Loading ...
Loading ...
Loading ...
5
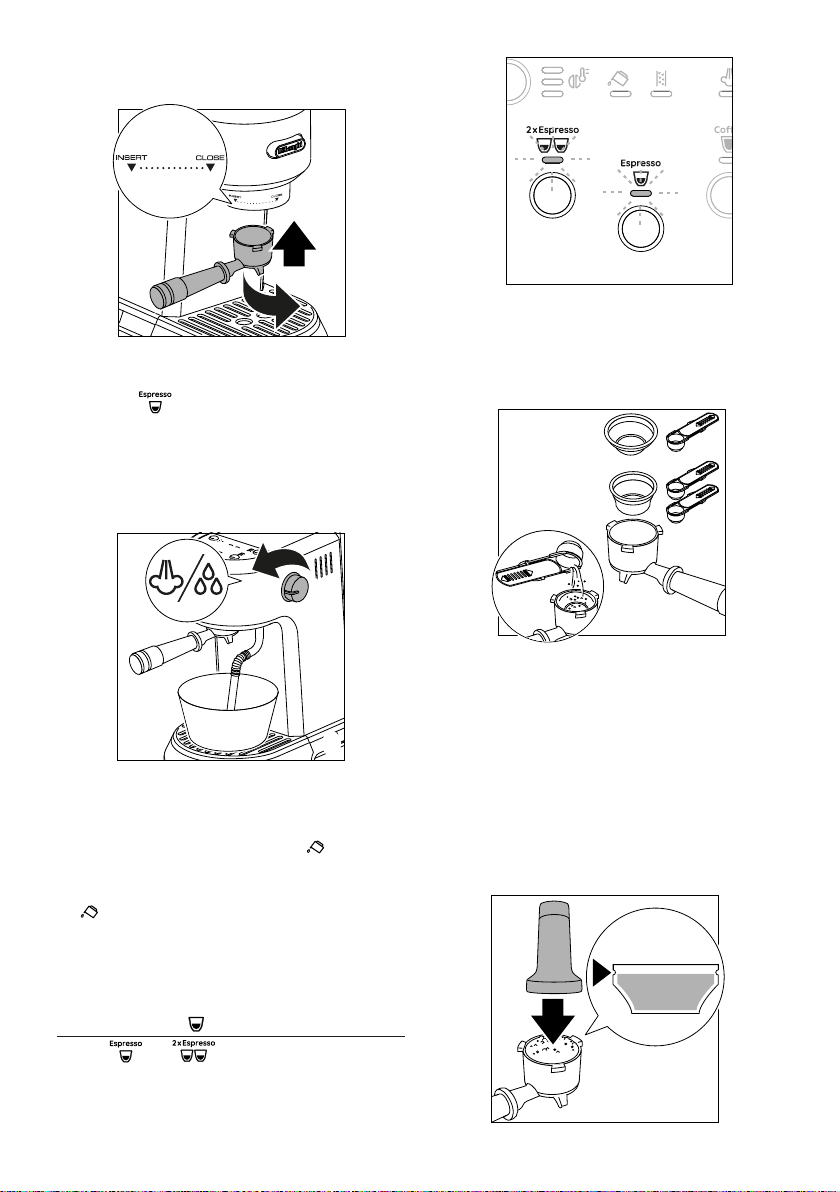
holder handle with “INSERT”, then turning the handle to the
right until it is aligned in the “CLOSE” position (g. 5).
5
• Place a container under the lter holder and steam wand
(A5).
• Press the
(B6) button. The appliance delivers water
from the lter holder. Repeat this operation 5 times.
• Turn the steam dial (A4) (g. 6) and deliver from the steam
wand to empty the water tank, then turn the dial back.
This is to purge the steam circuit before frothing or steam-
ing your milk.
6
Please note: Never operate the machine without water in the
water tank or without the tank.
The appliance has a water levels sensor.
If while brewing the selected beverage, the (B2) indicator
light blinks, the water in the water tank is running out. It is pos-
sible to complete the delivery of the selected beverage.
The (B2) indicator turns on when the water tank is empty.
Fill the water tank with fresh water.
It is normal for there to be water in the space under the tank.
This should therefore be dried regularly with a clean sponge.
3. MAKING COFFEE
• The and indicator lights blinks to indicate
the machine is heating up (g. 7).
7
When the lights stop blinking and all the indicator lights
on the control panel remain on steadily, the machine is
ready for use.
• Place the cup lter (A15) or (A16) in the lter holder (A14)
(g .8).
Espresso
2 x Espresso
8
• Fill the cup lter with ground coee using the measuring
scoop (A18). Make sure that you are using a ne grind, spe-
cic for espresso.
Before lling the coee lter with ground coee, make
sure there are no coee residues left in the lter from the
last time you made coee.
• Tap the lter holder several times to distribute the coee
evenly in the cup lter.
• Distribute the ground coee evenly and press down rmly
with the tamper (A11). Make sure the coee is at the rec-
ommended dose level after tamping (g. 9).
9
Loading ...
Loading ...
Loading ...