
FLANGE 3
Installation Instructions
Use and Care Information
Instructions d'installation
Utilisez et d'entretien
Instrucciones de instalación
Información de uso y cuidado
FLANGE 3
2
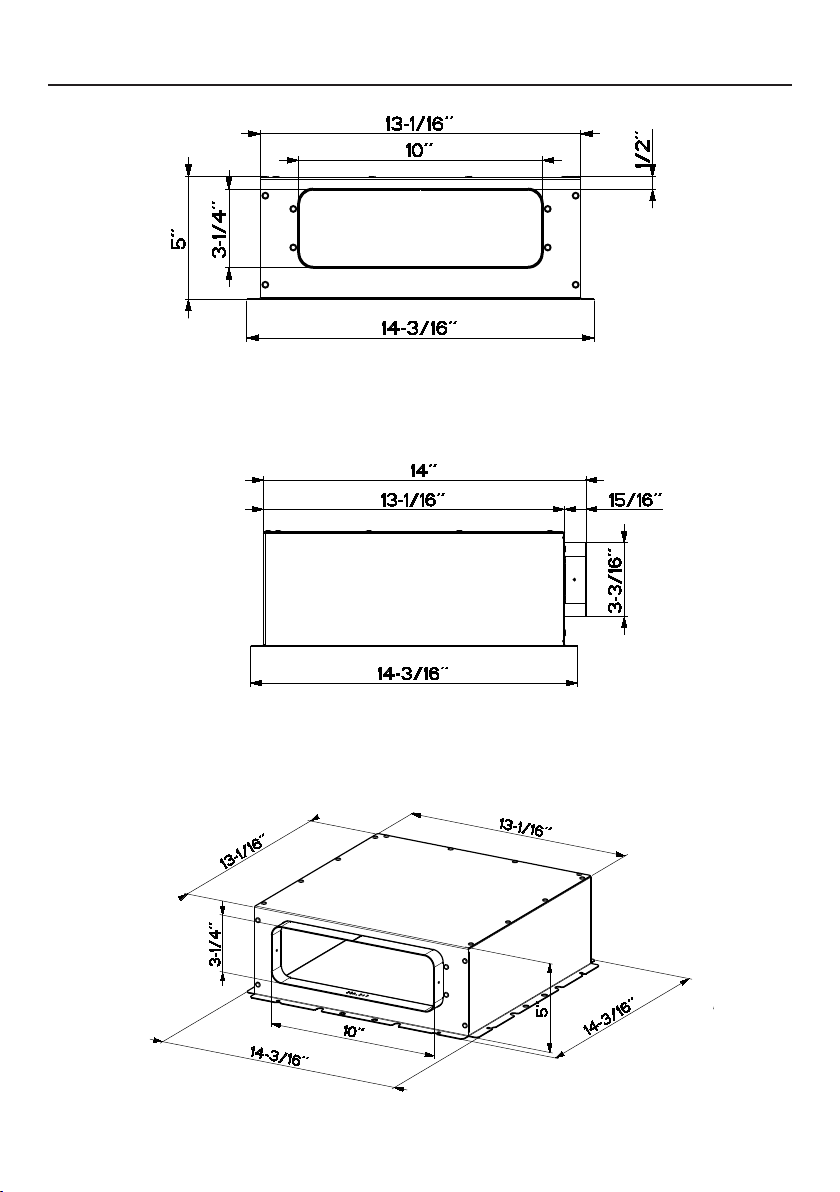
LINER DIMENSIONS
Bellucci, Daniele
23-Oct-2020
Released
Bellucci, Daniele
23-Oct-2020
Released
Front View
Overall Dimensions
Side View
Bellucci, Daniele
23-Oct-2020
Released
3
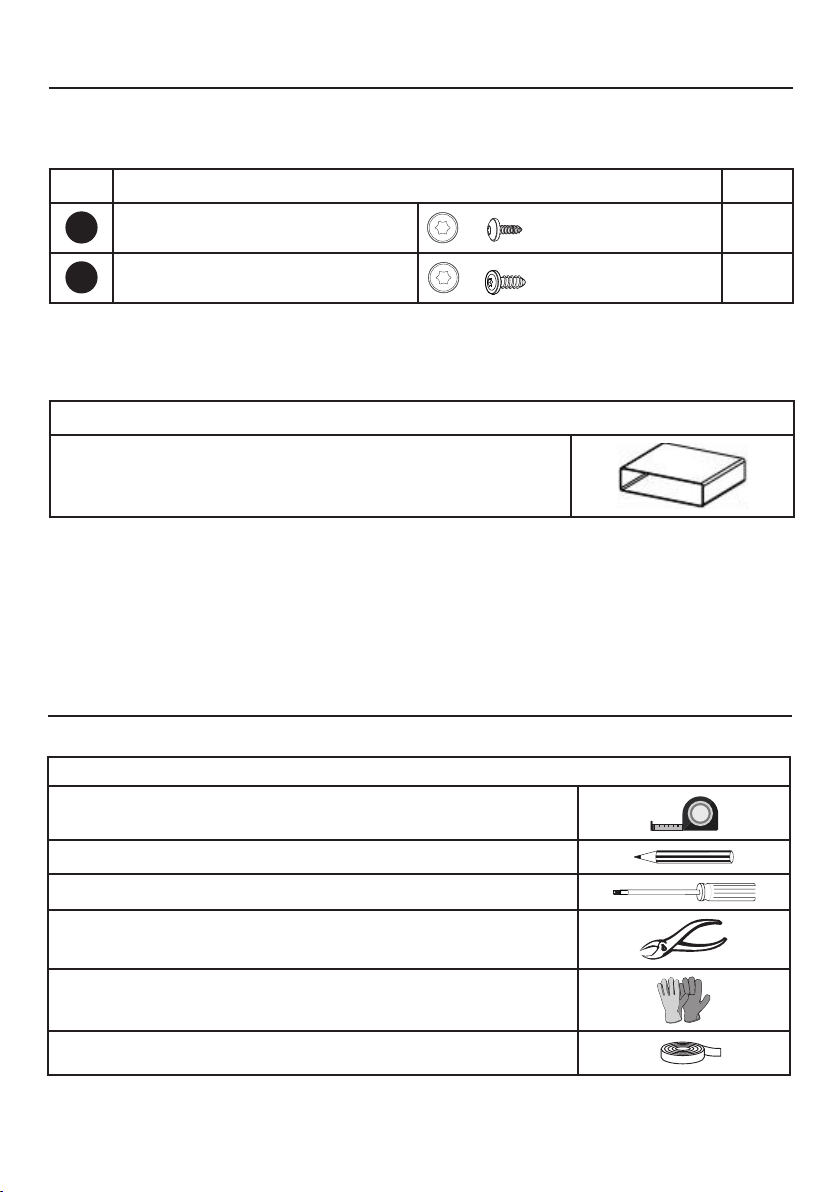
TOOLS NEEDED
TOOL
Tape Measure
Pencil
Torx Screwdriver
Metal sheers
Work gloves
Foil Tape
REF
PART
A
Torx Screws (1/8" x 5/16")
4
B
Torx Screws (3/16" x 5/16")
4
PARTS INCLUDED
PARTS
PART
3 1/4" x 10" Rectangular Ductwork
PARTS NEEDED
4
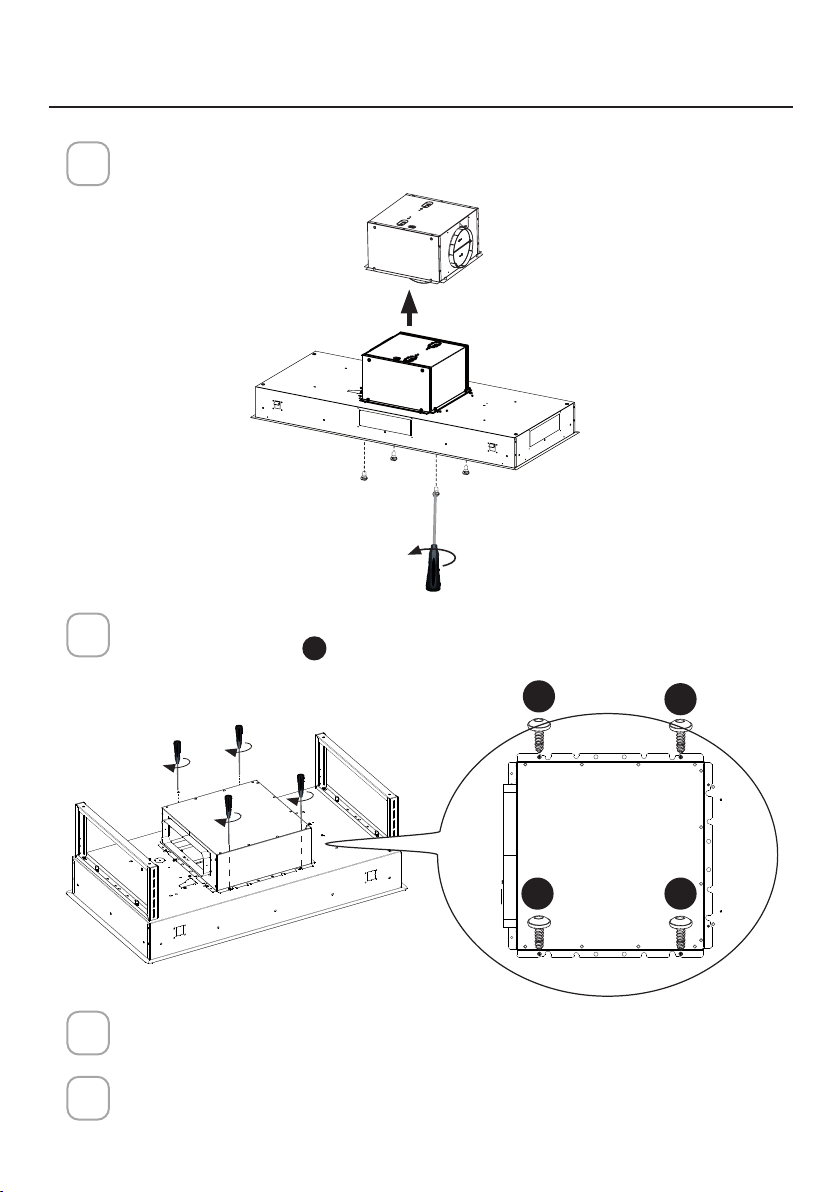
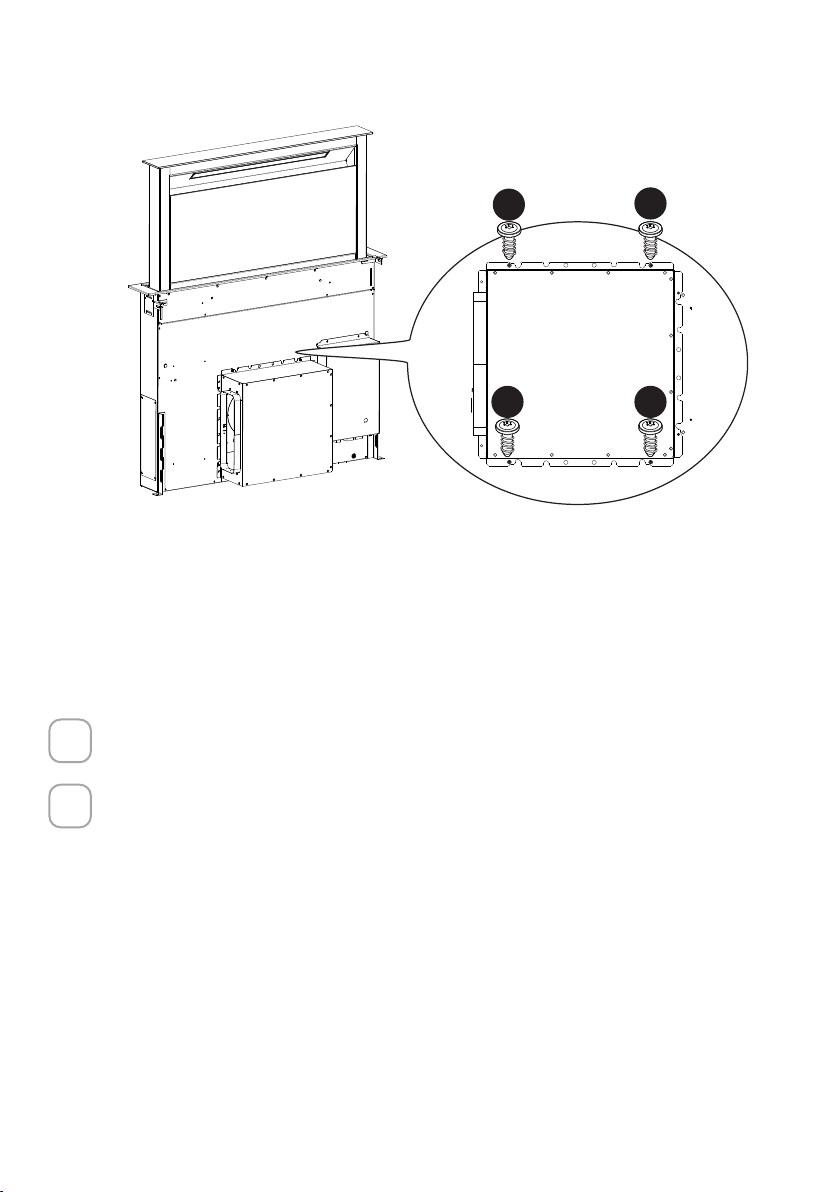
INSTALL THE FLANGE 3 TO THE CEILING RANGE
HOOD
1
Unscrew the 4 original screws from the motor box and detach from the
hood.
2
3
4
Attach the Flange 3 to the hood in the same location as the original motor
box with the screws
A
provided in the hardware bag as shown
Seal with foil tape
Consult your Hoods Installation Manual and the Remote Blower or In-Line
Blower Manual to continue with installation.
A
A
A A

5
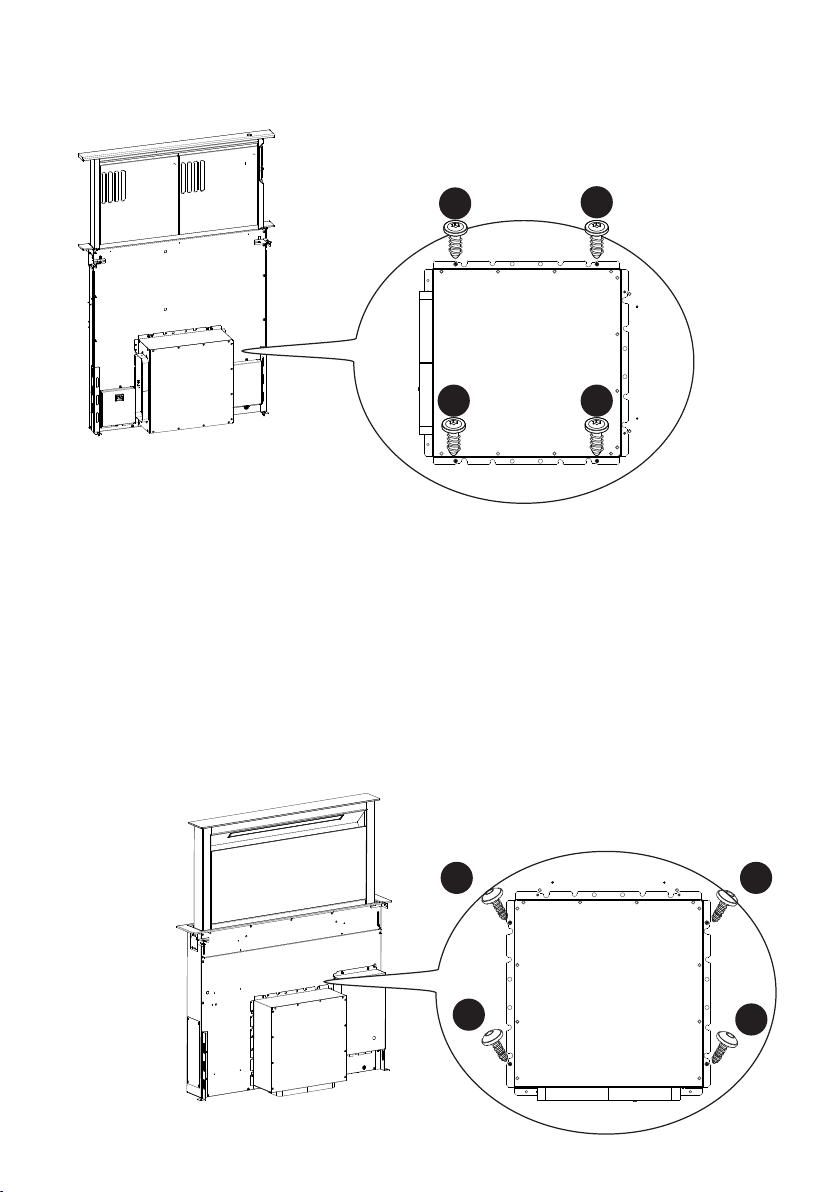
INSTALL THE FLANGE 3 TO THE DOWNDRAFT
RANGE HOOD
1
Remove the blocker plate from the hood.
2
Attach the Flange 3 to the hood in the same location as the blocker plate
using the screws
A
and
B
provided in the hardware bag.
Version 3/15 - Page 11
PRODUCT INSTALLATION
PLEASE READ SAFETY AND PRODUCT DIMENSIONS PAGES
BEFORE PROCEEDING WITH INSTALLATION
7KHGRZQGUDIWV\VWHPLVLQVWDOOHGGLUHFWO\EHKLQGWKHFRRNWRS)RU
HDVLHVWLQVWDOODWLRQLQVWDOOWKHYHQWLODWLRQV\VWHPÀUVWWKHQWKH
FRRNWRS7KHYHQWLODWLRQV\VWHPmust not be installedLQDQDUHDZKHUH
WKHUHDUHVWURQJGUDIWVIRULQVWDQFHQHDUZLQGRZVGRRUVHWF
5HPRYHWKHURXQGFRQQHFWLRQSODWHIURPWKHIURQWRIWKH
GRZQGUDIW),*85(
3XWWKHWRSPRXQWLQJEUDFNHWVLQSODFHZLWKVFUHZV
),*85(
6FUHZWKHERWWRPPRXQWLQJEUDFNHWV$LQ),*85(WRWKHVLGHRI
WKHKRXVLQJXVLQJVFUHZVHDFKDo not tighten the screws.7KH
EUDFNHWVDUHGLIIHUHQWIRUWKHULJKWDQGWKHOHIWVLGH$WWDFKWKHPZLWK
PRXQWLQJFOLS$SRLQWLQJXS
),*85(
),*85(
FOR SCIROCCO PLUS MODELS:
Venting down
B
B
A A
6
Venting to the side
B
B
B B
FOR SCIROCCO LUX MODELS:
Venting down
A A
A
A
7
Venting to the side
B
B
B B
3
4
Seal with foil tape
Consult your Hoods Installation Manual and the Remote Blower or In-Line
Blower Manual to continue with installation.

991.0xxx.xxx_01 - 210128
D0000xxxx_00
