Loading ...
Loading ...
Loading ...
installation
PROCEDURE B
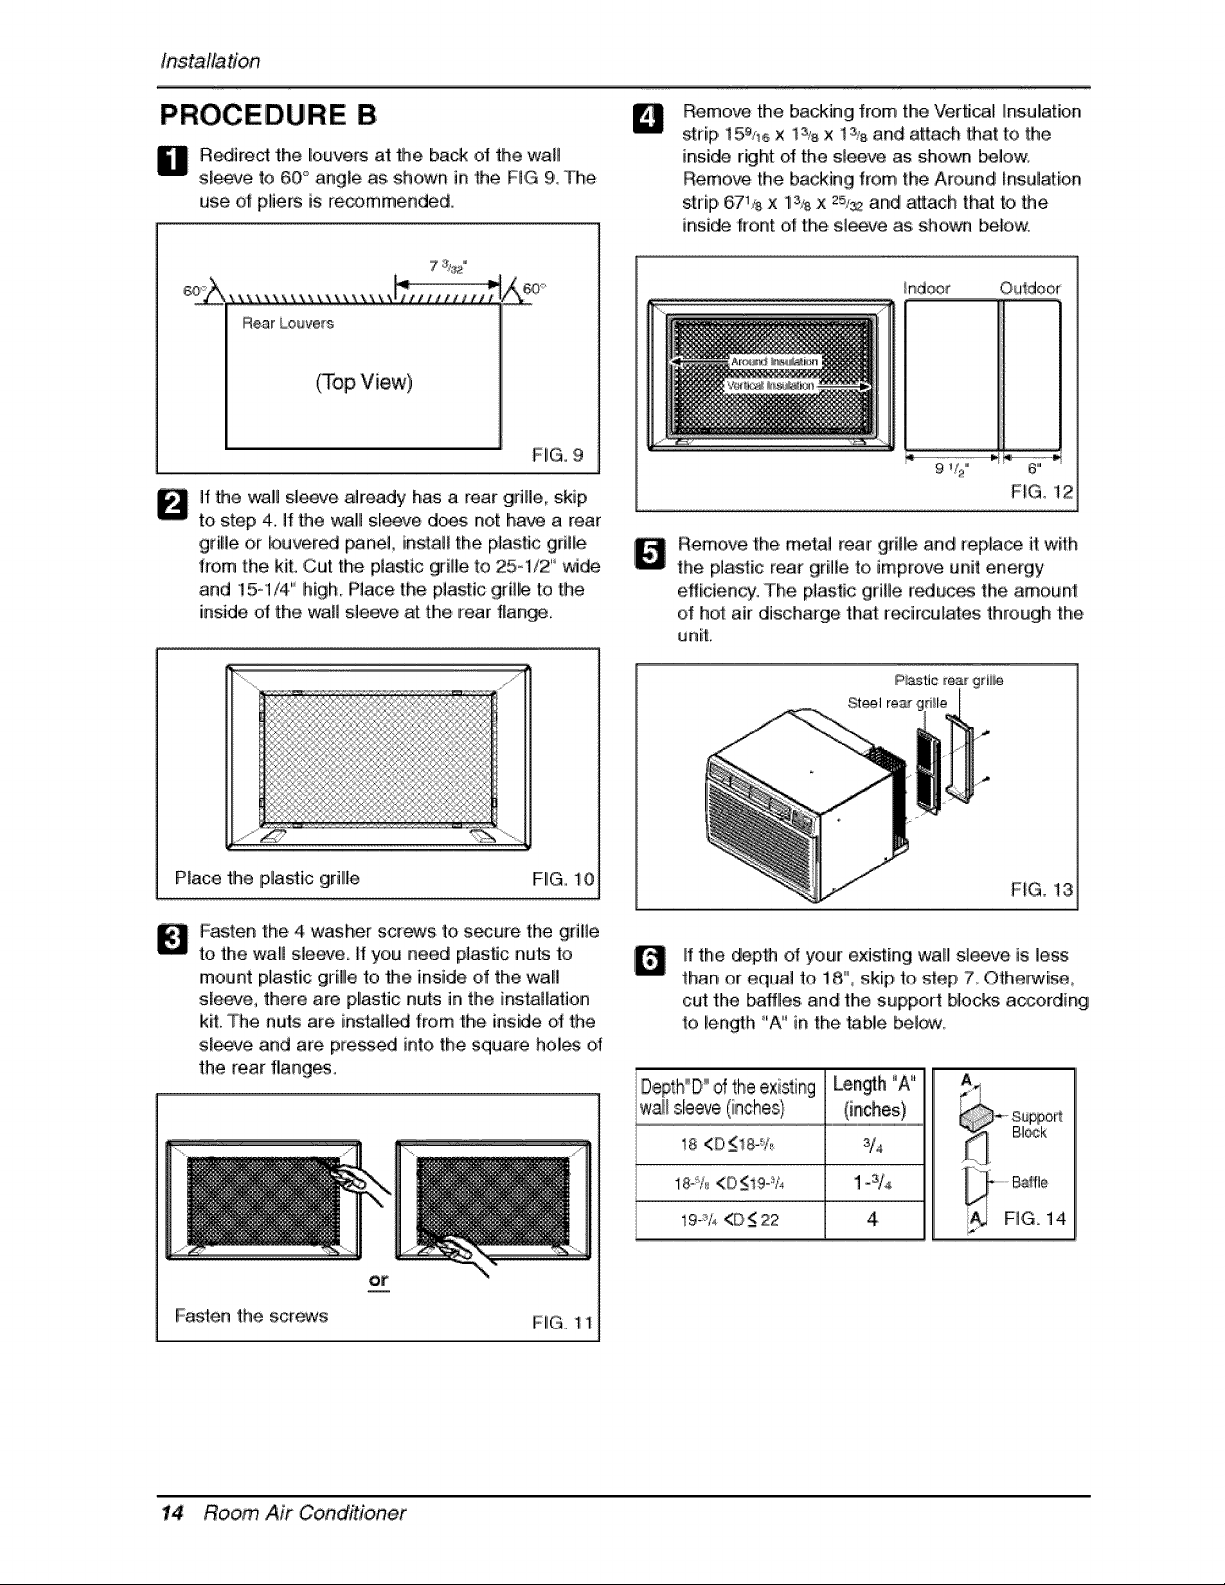
_ edirect the Iieuvers at Me back of the wa_l
sl_ve to 60," angle as, shown in 'the FiG 9, The
use o! ptiers is recommended,
D
Remove the b_cking from tlhe Verticall insulation
strip, t 59_,ex 13,,8x t % and attach #_at te lhe
inside r_ht of the sleeve as shown _lew.
Remove the b_cking from the Around Insulation
strip 67% x 1% x =5_ and al_lach that to the
inside front ,o_the sleeve as; shev_ be!o,w;
RearLo_ve_s
(Top View)
HG.9
it Me walll sleeve already has a rear gdBe, skip
to step 4, It the wal!ll slieeve does not have a rear
gHBe or buvered panel, ins_al_the p_astic grBle
f[o,m the kiL ,Cut the plastic _ille to 25ol/2 '' wi_
and t 5-1/4 '° high, Place the plastic grille to the
inside of the waB sleeve at the rear flank,
/nd_t Outdoor
F_G, 12
_ emeve the, met:a! rear grite and r,epla_ it with
the plastic rear grille to improve unit energy
efficiency. The plastic gri_te irr_uce's the amount:
of hot air discharge tlhat: reciirculates through the,
unit,
P_ace the plastic grillle
FiG,i0
HG, !3
_ asten the 4 washer scr_s to s_ure the griBe
to the waB sJemte, If you need pJas_c nuts to
meunt plastic gri_lle to Me inside of the walil
sleeve, there are p_astic nuts in the installation
kit. The nuts are inst:a[l_ from the inside ot the
sleeve and are p_e_ed into the square h,ol_ o_
the rear flange.
Fasten the scr_s
FIiG. 11
[f the _p_ of you_r existing wa[ll sleeve is _ess
llhan or eq_al to 18,'° skip to _ep, 7_ Otherwise
cut tlhe I_fflles and the support blocks according
to length "A' inthe table be]_,
wail sleeve (inches}
18 i(D _! i8-%
19-Y_<D_<22
Length "A "
(in®es)
3/4
1-_/_
4
14 Room Ah Conditioner
Loading ...
Loading ...
Loading ...