Loading ...
Loading ...
Loading ...
installation
CAUTION
We _ron,giy re,commend the removal of _e
oid wall sleeve and the instalia_on of a new
LGE Waft Sleeve,
ilf you d_i_ to keep Me exiting wall slieeve,
you have to, redired the Iouve_ at Me back of
the waft sleeve illustrati,on,,The u_ of pliers is
re,commendled, ff you DO NOT redirect, you
run Me risk of p,_r performan_ or produ_
failure. This is not covered un_r the terms ot
the LGE ,warranty.
• Pick a io,c,3tion which wiil allow the _nditioned air
to b_ow into the area you wanL G_d installation
with special attention to, the proper position of the
unit will II_n the chance that _r,Ji_ will be
needed.
_EMS IN INSTALLA_ON HARDWARE
You may not need all parts in the k_, Discard unused
)arts
_TEM (inches) ....................................................Ot
Plastic _riffe
Vertical insulation stri_
Around insulation Stri_
Horizontal Insulation Strip
_poM Bbck
Baifl!e
Shim
Trim Frame
Washer Screw
Nlu_(P_astic),
Griffe Rear
23_32 x 1s_,_x i _
11 _3,h6x 1 x _s4
1
2
1
2
2
4
4
1
HOW TO INSTALL
_ _ntJt=y the existing wall sleeve before ins,_lting
the unit item the listed below.
Brand Wali Siee_e Dimensions _h_s_
Wi_h Height
25ol/2 15,,,,1/4
Frigidaire
General Electric
26 ! 5o5/8
/Hot_int
Whirlp_l 25-7/8 164
Fed_r_Erner_fl 27 16o3/4
LGE 25-7/8 15-17/32
Emersen/Fe_ders 26-3/4 15-3/4
25o3/4 16....7/8
27 16-3/4Fr[edri,ch
Depth
i6_ 17-1/2
or 22
16o7/8
17-1/8
or 23
! 6.,,_4
or 19-3/4
16-23/32
t5
185/8
16-3/4
A{IIwall _eeve_s used to, mount the new Air
Conditioner must be in _3und structural condition
and have a rear grille that _curely atta_ to
slee_, o,r rear ffangie tha_ _r',_s as a stop lot the
Air Conditioner.
_ emo'_ o,_dair conditioner f_o,m existing wai!
sie_e.
_ lean the interior el an existing sie_.
(Do not d_urb _als.)
Q al! sl_, must be s_urely fastened in wall
_fo, re n,sLatl ng the air conditioner. U_ the
nails or _re_, through sl_ve into waft if
neie_d. Repaint _eeve if' needed.
_ Prepare the wail sl_ve for installation of the
unit. If you plan to use your ,existing wall sleeve,
and it is not LGE0 use procedure B or C below,
Procedure
A 16,.2_32
1i6,,1i7-1/9
or 22
B t 6.....7/8
C ¸
Brand
LGE
Whlite-Westin ghou_
Frigidaire Carrier
_52F _ries_
Generali Electric
iHetpoint
Carder _51S _ries)
Fed®r_Emer_n
Emer,_'a[dFe_ers
Friedrich,
17.,1/8 or 23
18-5/8
16-_4
or !9,,,,,3/4
15
16,,,,,_4
_ installnew unitintowall sleeve
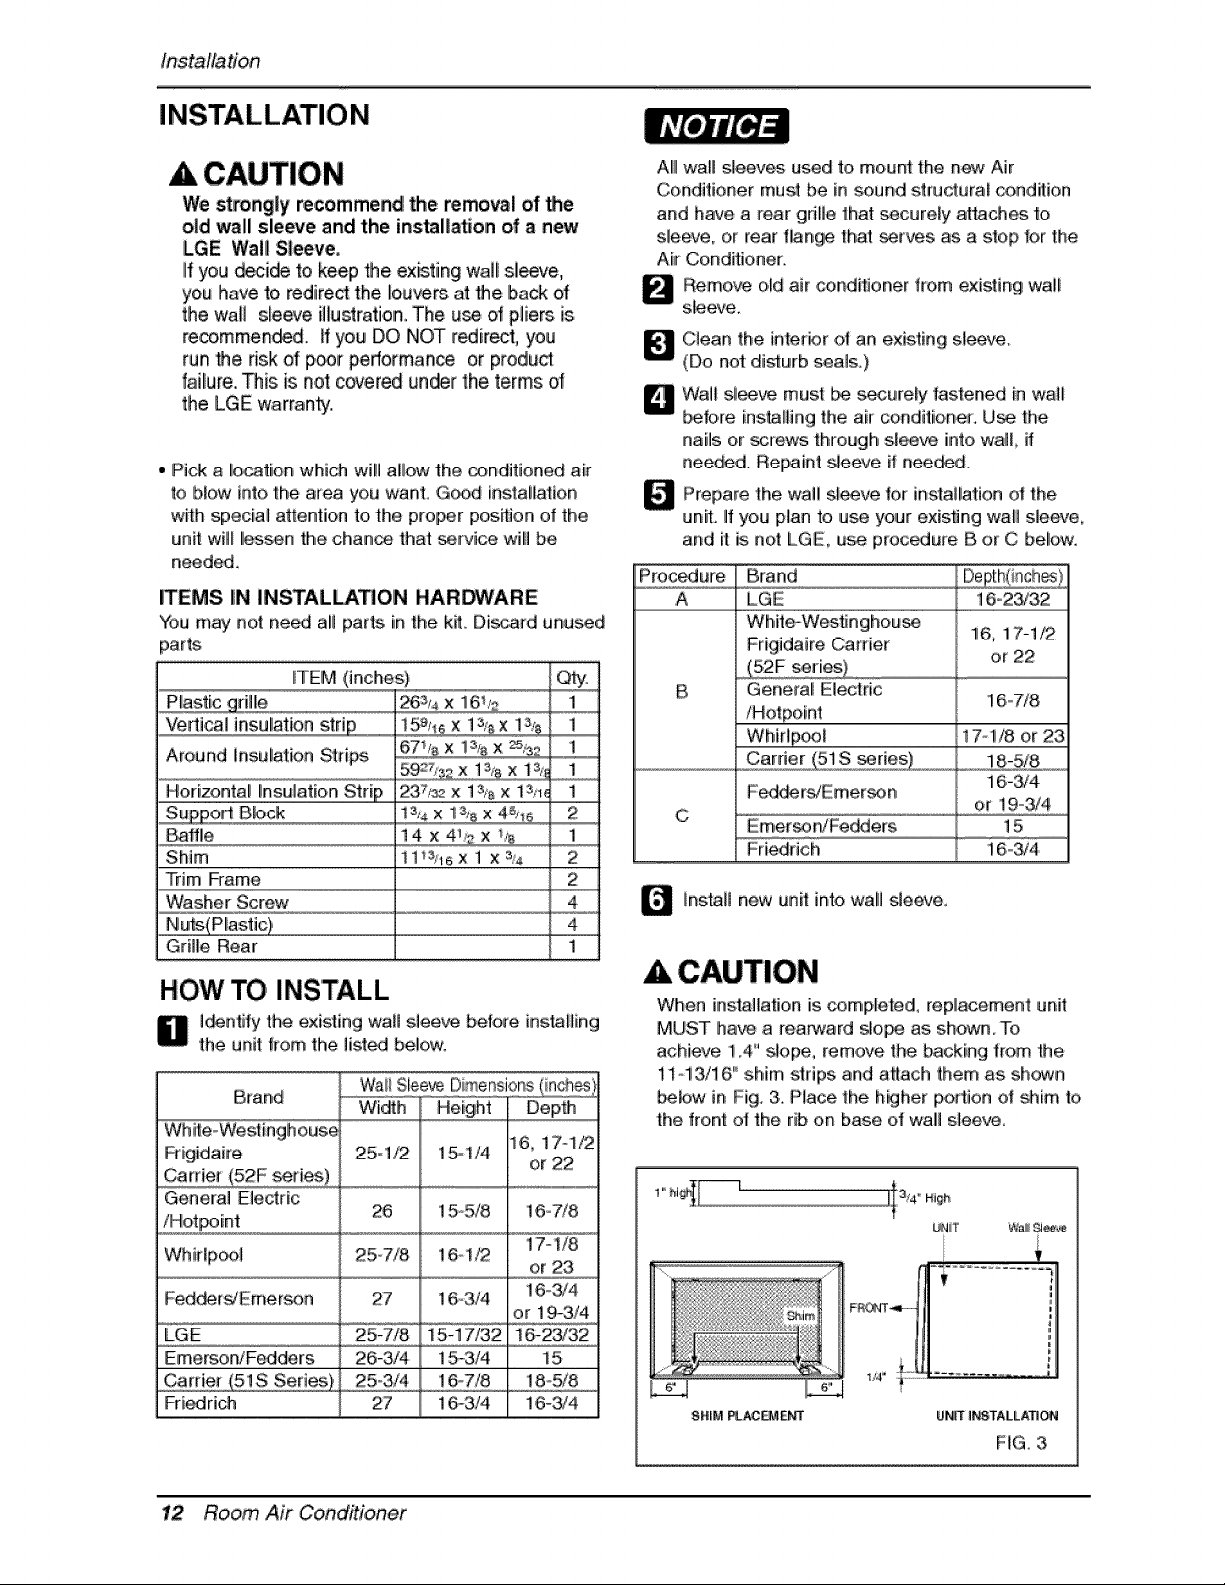
CAUTION
When installation is cempleted_ replacement unit
MUST ha_ a rea_ard slo_ as shown,To
achieve 1.4" _lope, rernove the _cking from the
1i i3716" shim s|fips and a_ach them as sh_m
_bw in Fig. 3. Place the higher portion el shim to
the front ot the rib on base oi wall sleeve
SH_M _AC_ Ui_T I_TALLAT_,ON
FIG. 3
12 Room Air Conditioner
Loading ...
Loading ...
Loading ...