DESICCANT TYPE DEHUMIDIFIER
DESHUMIDIFICATEUR D’AIR À
ADSORPTION
ADSORPTIONSTROCKNER
ADSORPTIE
LUCHTONTVOCHTIGER
DEUMIDIFICATORE CON
COMPRESSORE
AFFUGTER AF
TØRREMIDDELTYPE
OPERATING MANUAL ENGLISH P. 1
MANUAL D’UTILISATION FRANÇAIS P. 5
BEDIENUNGSANLEITUNG DEUTSCH P. 9
GEBRUIKSAANWIJZING NEDERLANDS P.13
MANUALE DI ISTRUZIONI ITALIANO P.17
BETJENINGSVEJLEDNING DANSK P.21
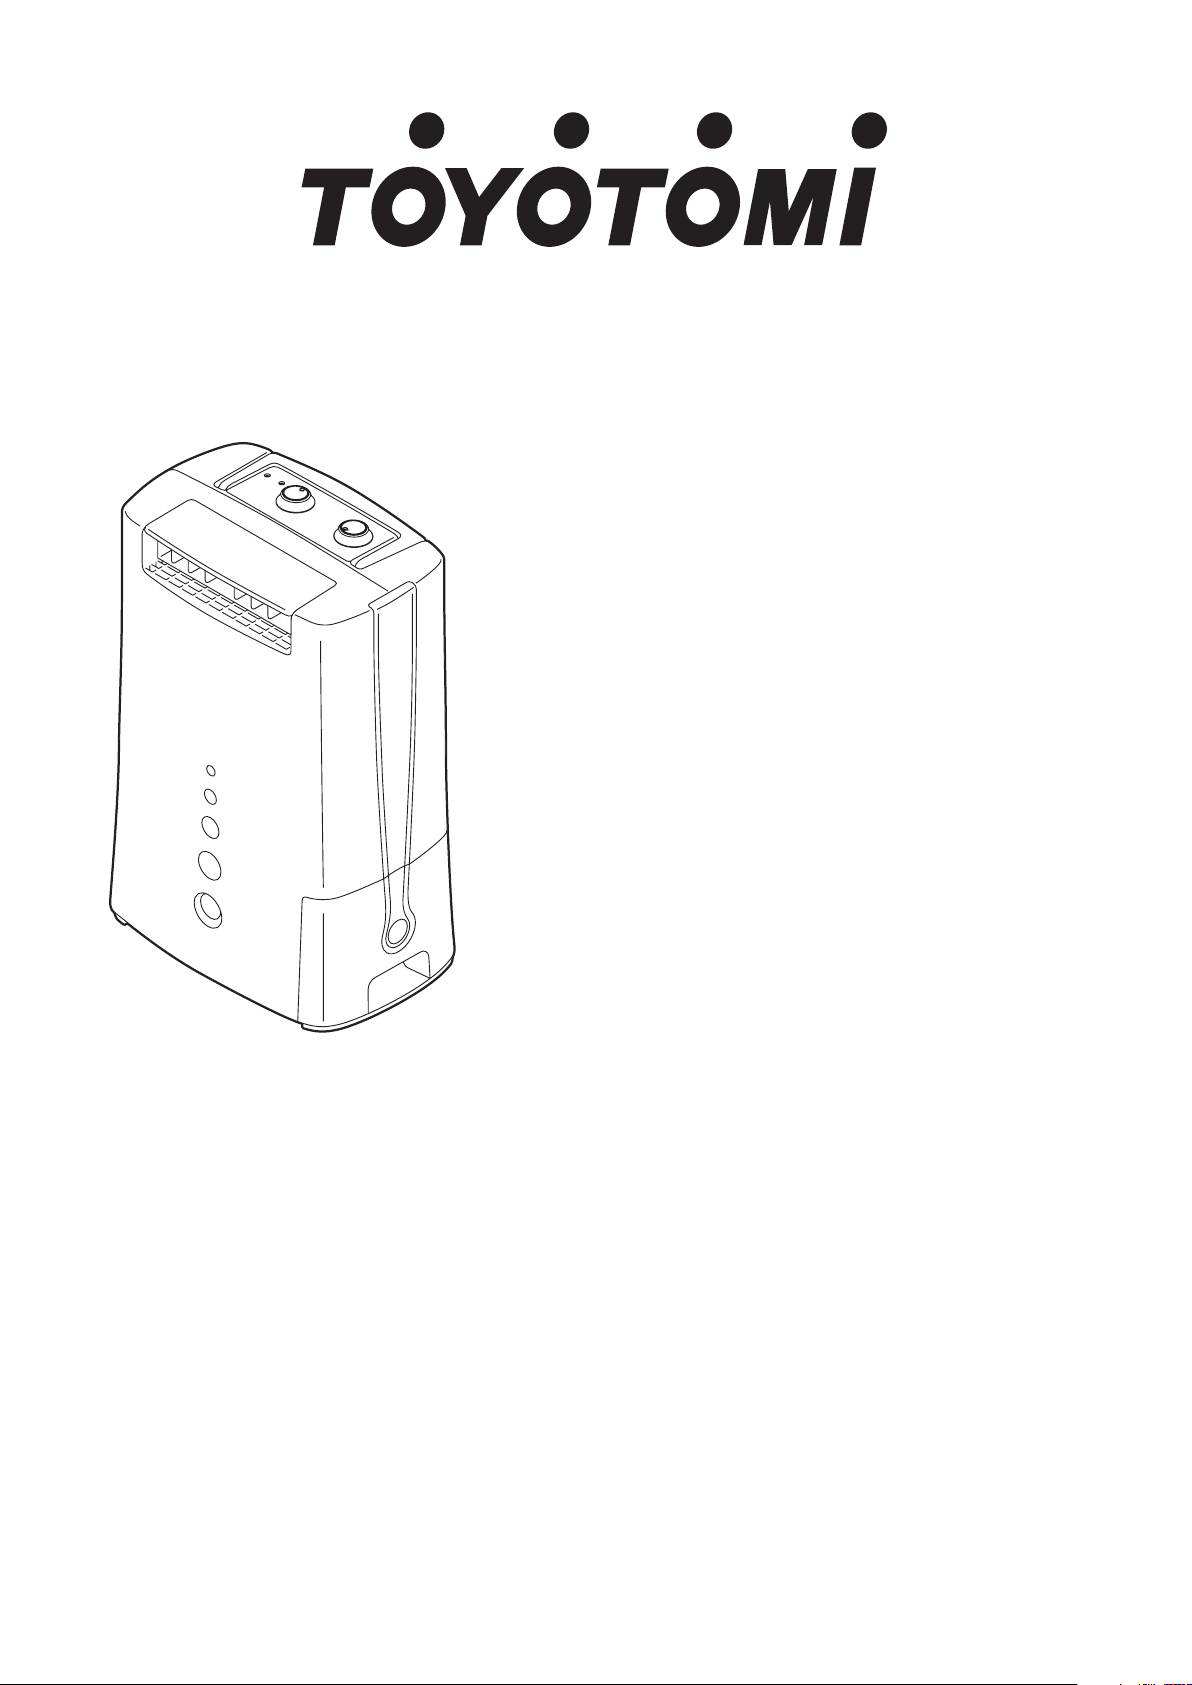
TD-ZM80
A
B
E
D
C3C4
C1C2
D1 D2 D3
D4 D5
B1
B2
B3
B4
A1
A2
A3
A4
A5
A6 A9
A7
A8
E2 E3
E4
E5
E1
E6 E7 E8
C
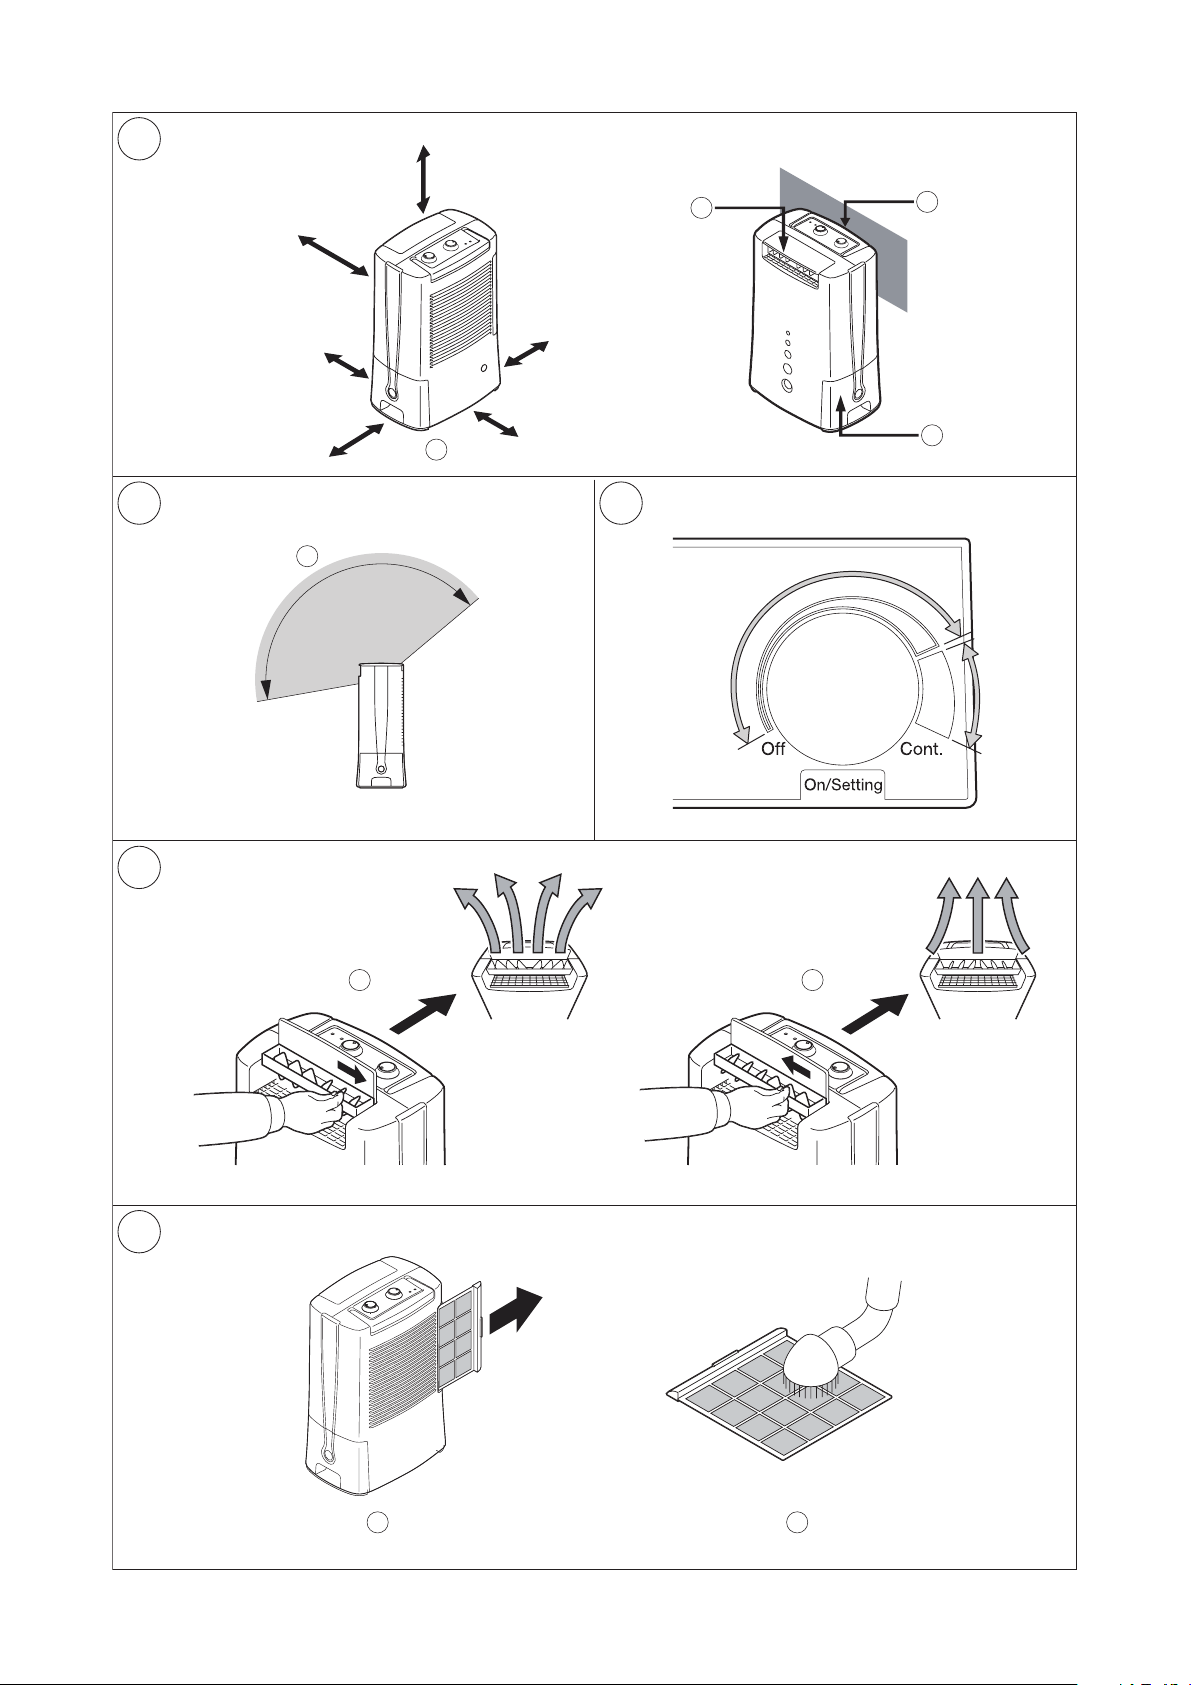
more than 50cm
more than 40cm
(When louver closed)
more than 20cm
(When louver up)
Top more than 60cm
more than 20cm
more than 20cm
G J
I
F
F3
F2
F4
H1
H2
I1
I2
F1
H
G1
B
A

1
ENGLISH
SUMMARY
The idea behind the unit is to dehumidify all season even if it is
winter. This model features desiccant instead of compressor.
Accordingly this model is not affected by room temperature. Also,
desiccant type dehumidifier does not use harmful gasses, so it can
be said as environmentally friendly.
It dries the air so that you can stay comfortable even when it’s hu-
mid or rainy outside. Also your furnishings, fabrics and clothes are
kept in good condition, and it is easy to dry your laundry and dry it
quickly. Desiccant type is quieter than the compressor type, there-
fore you can dry the laundry at night and it will be dried in the
morning.
OPERATIONAL FEATURES
FEATURES
1. COMPRESSOR LESS DEHUMIDIFIER
This model uses desiccant rotor technology and is environ-
mentally friendly with no harmful gasses & quiet in operation.
2. POWER SELECTION
Turn the knob to select HIGH MODE (high heating power and
high fan speed) or LOW MODE (low heating power and low fan
speed).
3. IONISER
When the unit is on, ioniser release negative ions from the air
outlet.
4. ANTI BACTERIAL FILTER
Nano-silver embedded in the filter kills bacteria on contact,
improving the quality of air in your home or office.
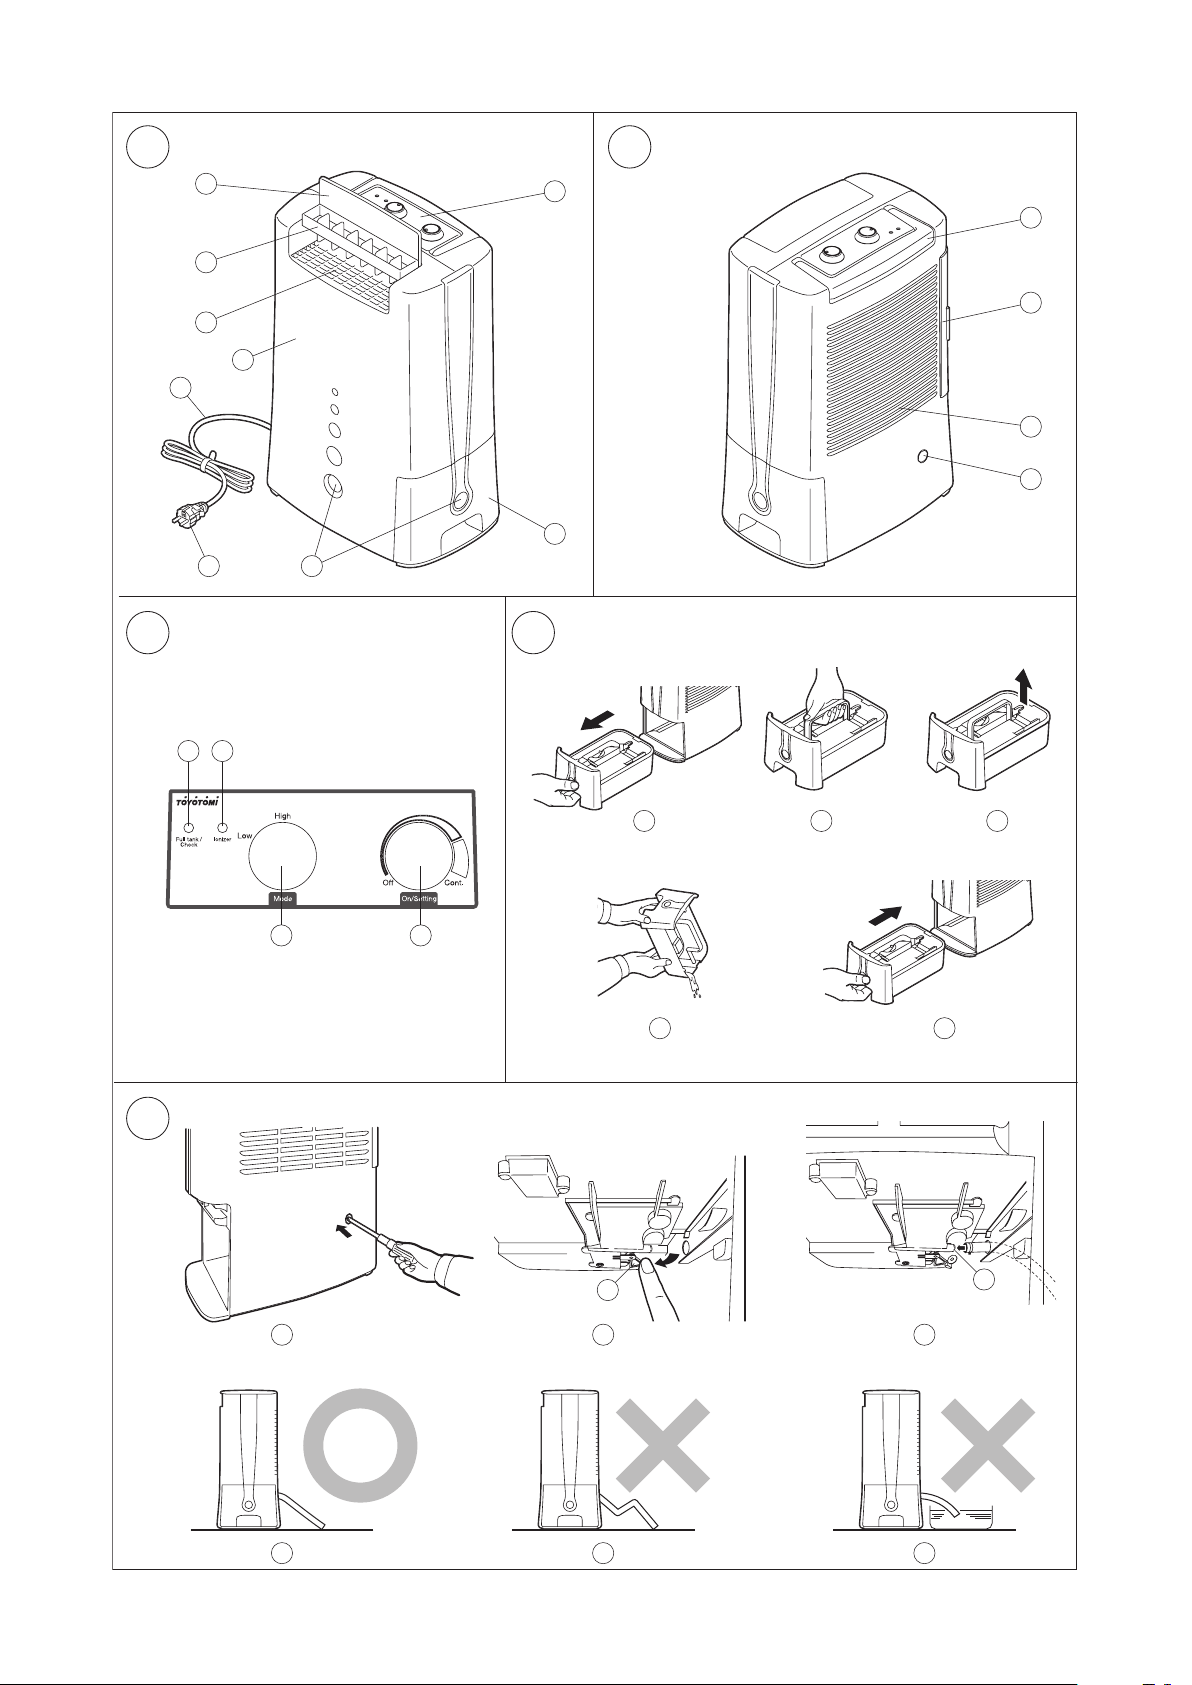
1. DESCRIPTION
Fig. A FRONT
A1 Louver
A2 Wide / Spot adjustable louver
A3 Air outlet
A4 Front panel
A5 Power supply cord
A6 Power plug
A7 Operation panel
A8 Water tank
A9 Water gauge
Fig. B REAR
B1 Carrying handle
B2 Air intake grille (Pre-filter)
B3 Air intake
B4 Water outlet drain for continuous drain operation
Fig. C OPERATION PANEL
C1 Humidistat knob
C2 Hi / Low Power knob
C3 Ion / Running lamp
C4 Full / Check lamp
(Lights up when the bucket is full, incorrectly in-
stalled; the unit inclines, falls down or internal ther-
mal protection activates when being misused or
overheated (see “TROUBESHOOTING”)
2. SAFETY TIPS
IMPORTANT
• Read instruction carefully before operation.
• The unit should be operated when the room temperature is
between 1°C to 40°C.
• If the supply cord is damaged, it must be replaced by the
manufacturer, its service agent or similarly qualified persons in
order to avoid a hazard.
• The appliance shall be installed in accordance with national
wiring regulations.
• While drying the clothes, please keep clothing at a safe dis-
tance from the unit to prevent water from dropping onto the
unit.
WARNING
This appliance is intended for use in a domestic environment only.
Any other use is not recommended by the manufacturer and may
cause fire, electrical shocks or other injury to person or property.
When using electrical appliances, basic safety precautions should
always be followed:
• DO NOT operate the unit with a damaged cord or plug,
after it malfunctions or has been dropped or damaged in
any way. Return to an authorized service facility for ex-
amination and repair.
• This unit should always be kept in an upright position to
avoid any damage. Locate the unit on a flat stable sur-
face.
• Check the household voltage to ensure it matches the
units rated specification before operating.
• Ensure that the air inlets and outlets are not blocked or
covered.
• DO NOT place the unit too close to curtains or other ob-
jects -minimum distance 40cm.
• When using the unit to speed up the drying of wet
clothes in the room, please keep the clothing at a safe
distance from the unit to prevent water from dropping
onto the unit.
• NEVER place anything on top of the unit and do not cov-
er with any kind of material while in use.
• This product is intended for domestic and light office
use ONLY and not for commercial, industrial or outdoor
use.
• To protect against electrical shocks, DO NOT immerse
unit, plug or cord in water, or spray with liquids.
• ALWAYS unplug the unit when not in use or moving lo-
cation. To disconnect from the power supply, grip the
plug and pull from the power socket. NEVER pull by the
cord.
• ALWAYS empty the water tank before storing the unit
away.
• Using the dehumidifier in front of a warm radiator can
result in the dehumidifier not collecting any water be-
cause of the heat from the radiator.
• DO NOT run power cord under carpets, rugs, or floor
mats of any kind. Arrange the cord away from areas
where it may be tripped over
• NEVER operate or store the unit in direct sunlight.
• To repair the unit, take it to a qualified service engineer.
Repairs carried out by unqualified people may cause
damage to the unit or injury to persons or property and
void the warranty.
• Where possible, avoid the use of an extension cable as
they may overheat and cause a risk of fire. Only use an
extension cord after ensuring it is in perfect condition.
• DO NOT use the unit without the air filter and make sure
that the filter is kept clean to avoid malfunction and in-
validating the warranty.
• This appliance can be used by children aged from 8
years and above and persons with reduced physical,
sensory or mental capabilities or lack of experience and
knowledge if they have been given supervision or in-
struction concerning use of the appliance in a safe way
and understand the hazards involved.
• Children shall not play with the appliance.
• Cleaning and user maintenance shall not be made by
children without supervision.

ENGLISH
2
3. OPERATION
UNIT SET UP (Fig. F)
• Place the unit in an upright position on a stable, flat surface.
• Ensure that the unit is a safe distance away from a wall or fur-
niture (Fig. F1).
• Keep clothes at a safe distance of 40 cm from air outlet of the
unit to prevent water dripping into the unit.
CAUTION
• Keep suitable space as above. (F2)
• DO NOT insert small objects into the unit or this will damage it
and cause a hazard. (F3)
• DO NOT remove water tank when running or water may leak.
(F4)
•
Ensure that the water tank is fitted correctly, if the tank is full or
is not in place, the “Full tank / Check” lights and the machine
stops. (F4)
HUMIDISTAT
OPERATING STEPS:
1. By turning the knob (C1) clockwise, unit starts the operation
and the dehumidification is started.
2. As the knob turned closer to the indication of 'Cont.', the set-
ting room humidity become lower.
3. When the knob is turned to the rightmost position, the opera-
tion mode become continuous operation.
4. The knob (C1) is recommended to be set in the range of 'A'
(Fig. J).
CAUTION
In case that the knob is set in the range of 'B' (Fig. J), after the
automatic operation is stopped, it may take time to start the
operation again depends on the room environment.
5. STOP OPERATION
Turn the knob (C1) counterclockwise to switch off and the run-
ning lamp (C3) will be off.
POWER SELECTION SWITCH
OPERATING STEPS:
1. Turn the knob (C2) clockwise to select HIGH MODE (high
heating power and high fan speed). Select this mode for short-
turm rapid dehumidification
2. Turn the knob (C2) counterclockwise to select LOW MODE
(low heating power and low fan speed). Use this mode for nor-
mal daily use, energy saving and quiet operation.
IONISER OPERATION:
1. When the unit is on, the IONISER and the Ionizer lamp (C3) will
be on.
2. When the unit is off, the IONISER and the Ionizer lamp (C3) will
be off.
HORIZONTAL ADJUSTABLE LOUVER (Fig. G)
The air outlet can be adjusted forward or upward.
WIDE / SPOT ADJUSTABLE LOUVER (Fig. H)
Wide blowing (H1) ➞ Adjust the blades outwards for an expanded
airflow.
Spot blowing (H2) ➞ Adjust the blades inwards for a spot airflow.
CONTINUOUS DRAINAGE MODE (Fig. E)
For continuous drainage, use a hose with an inner diameter of
12mm and outer diameter of 14mm~16mm.
1. Remove the water tank.
2. Use a screwdriver to remove the knockout at the back. (E1)
Pushing down and hold the stopper (E4) for drainage pipe by
finger (Fig. E2). Attach the hose to the drainage pipe (E5)
through the hole (Fig. E3).
3. Remove the tank cover and restore the water tank into the
unit.
If the tank is not restored in the unit, full tank lamp will light
and cannot start operation.
4. The tubing should be lead to the drain with no sharp bends.
(E6, E7, E8)
NOTE:
1. The water tank must be in the correct position before tubing.
2. Remove the tubing before pulling out the water tank.
3. Remove the hose from the continuous drainage hole. Be sure
to put the tank cover on the water tank and restart operation.
4. EMPTY THE WATER TANK (Fig. D)
1. When the water tank is full, the Water full indicator lamp (C4)
will light and unit stops in a few minutes.
NOTE: DO NOT move the unit or remove the water tank, if the
unit is still operating, as water may leak, damage the
unit or cause an electric shock.
2. By gripping the bottom of the bucket, remove the water tank
(D1) and lift carefully with handle (D2)
3. Remove the cover of water tank first (D3), then pour the water
away (D4). Clean the water tank and restore the cover and the
water tank (D5) to the correct position.
NOTE:
• Clean the water tank with clean water if needed. DO NOT
use solvent, abrasive or hot water.
• DO NOT remove or damage the float in the tank, or the
unit cannot work correctly.
• The water tank cover must be well fitted in position.
• The water full indicator lamp lights if the water tank is not
well in the position.
CLEANING
CLEANING AIR INTAKE GRILLE (Fig. I)
If the filter is covered with dust, the airflow and the performance of
the unit will be affected. It is recommended to check and clean the
air filter every 2 weeks.
1. Turn off the unit and remove the filter from the unit. (I1)
2. Clean the nano-silver filter with a vacuum cleaner or wash with
water (under 40°C). (I2) If you wash with water, dry it com-
pletely at shaded area.
3. Replace the filter in position.
CLEANING SURFACE
1. Turn off the unit, wait for the fan to stop and unplug from the
power socket.
2. Clean the surface with a soft damp cloth.
3. Dry thoroughly with a towel after cleaning.
4. In order to avoid damage, do not wash the unit with water, or
let water drip into the air inlet or outlet.
CAUTION
• NEVER use gasoline, solvents, chemical products or polish as
they could damage the surface.
5. LONG-TERM STORAGE
At the end of each season, or when you do not plan to use your
unit for an extended period of time, the following procedures are
recommended.
1. Turn off the unit, wait for it to stop and unplug from the power
socket.
2. Clean and dry the water tank. Leave the unit to drain for ap-
proximately one day.
3. Clean the filter and the unit. Cover the unit to prevent it from
gathering dust. Store upright in a cool dry place. DO NOT ex-
pose to direct sunlight.
CAUTION
• ALWAYS store the unit in the vertical position.
• DO NOT put heavy objects on top of the unit.
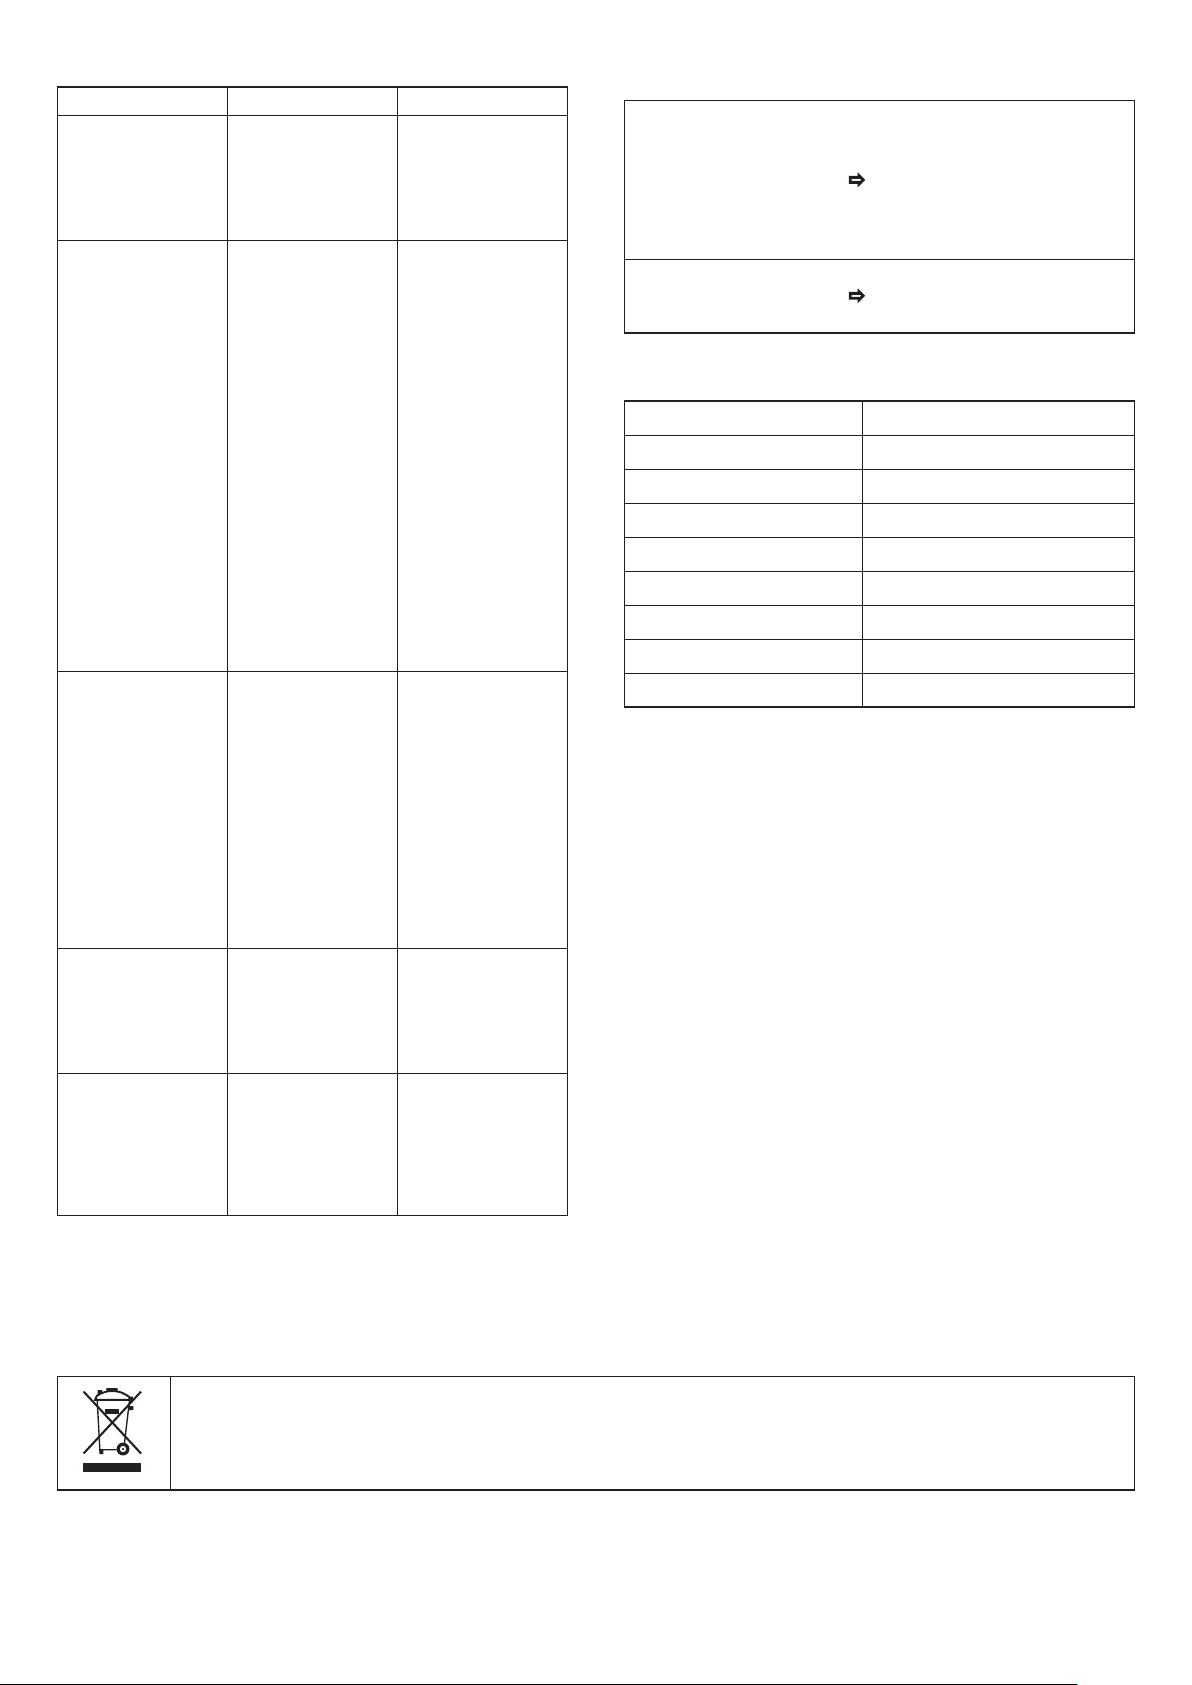
6. TROUBLESHOOTING
SYMPTOM CAUSE SOLUTION
Unit does not work. - Power cut.
- The plug has been
plugged improperly.
- The full-tank indica-
tor is ON. Tank is
full.
- Wait for power to
be supplied again.
- Plug in again.
- Remove the drain
water from the wa-
ter tank.
The device does not
dehumidify. (Full/
Check lamp on)
- The water tank is
full.
- The water tank has
not been replaced
correctly
- The air filter is
clogged.
- The room tempera-
ture or humidity is
too low for the cur-
rent settings.
- The ambient tem-
perature is too high,
such as over 40°C.
- Remove the water
from the water tank.
- Place the water
tank in the correct
position.
- Clean the air filter.
- It is highly unlikely
at that temperature
and humidity that
there is less mois-
ture to remove any-
way. Choose Low
mode and turn the
humidistat counter-
clockwisely to a
suitable setting.
- Do not use it in a
small and closed
place where heat
accumulates.
- Move to a cooler
places, wait at least
30 minutes to re-
start.
The dehumidifier
works, but reduces
the relative humidity
insufficiently/there is
little water in the wa-
ter tank.
- The house is too
large.
- There are too many
source of moisture.
Bathing, washing,
drying clothes and
cooking all puts
moisture into the
air. Calor gas heat-
ing can add too
much moisture into
the air for a dehu-
midifier.
- Set humidity is
reached.
- Recommend to use
a dehumidifier with
a greater capacity.
- Recommend to use
a dehumidifier with
a greater capacity.
Consider using a
different heat
source to a calor
gas heater.
- Readjist the humidi-
ty settings.
Dehumidifier is
blowing out warm
air.
- The dried air is past
over a heating ele-
ment before it is
blown into the room
as part of the dehu-
midification pro-
cess.
- This is normal, a
dehumidifier is not
an air cooler.
The dehumidifier is
noisy.
- The air filter is
blocked or the unit
is on an uneven
surface.
- Clean the filter and
/ or put the dehu-
midifier on a flat
surface. A dehu-
midifier will also be
noisier on wooden-
floors than on car-
pet.
Should there still be a problem, please unplug the unit and contact
us.
BEFORE CALLING FOR SERVICE
The followings are not defects.
Smell coming from the
dehumidifier when the
first use.
➡
The smell occurs because the
Zeolite absorbs odors from
items like cigarettes, cosmet-
ics, and building materials, and
discharged when the desiccant
is heated. It is normal, will not
last long and is not a sign of
fault.
Need emptying frequently
when the first use.
➡
As the room becomes dryer,
the dehumidifier collects less
water.
7. SPECIFICATIONS
MODEL TD-ZM80
DEHUMIDIFYING CAPACITY 8 L/D (20°C/60%rh)
POWER SOURCE Single Phase 220V~240V, 50Hz
POWER CONSUMPTION 580 W (230V)
OPERATING CURRENT 2.5 A
WATER TANK CAPACITY 2.2 L
OPERATING TEMP. RANGE 1°C ~ 40°C
DIMENSIONS (W × H × D) 212 × 496 × 320 mm
WEIGHT 6.1 kg
3
ENGLISH
This marking indicates that this product should not be disposed with other household wastes throughout the EU. To
prevent possible harm to the environment or human health from uncontrolled waste disposal, recycle it responsibly to
promote the sustainable reuse of material resources. To return your used device, please use the return and collection
systems or contact the retailer where the product was purchased. They can take this product for environmental safe
recycling.

4
ENGLISH
LIMITED WARRANTY
TOYOTOMI CO., LTD. (“TOYOTOMI”) warrants each product
and any parts thereof sold by it to be free from defects in mate-
rials or workmanship under normal use and service for
TWENTY FOUR (24) MONTHS from the date of delivery to the
original purchaser at retail subject to the following terms and
conditions:
WHAT IS COVERED : Product or any parts thereof which are
defective in materials or workmanship.
WHAT IS NOT COVERED:
This warranty does not extend to any defect due to the negli-
gence of others; failure to install, operate or maintain unit in ac-
cordance with instructions (operating and maintenance instruc-
tions are furnished with each new unit); unreasonable use, ac-
cidents, alteration, use of unauthorized or non-standardized
TOYOTOMI parts and accessories; electrical malfunction, i.e.,
as resulting from large power surges, short circuit, etc.; incor-
rect installation; or repair by anyone other than a service facility
specified by TOYOTOMI.
WHO IS COVERED: The original purchaser at retail.
WHAT WE WILL DO: TOYOTOMI will either repair or replace, at
its opinion, all defective parts free of charge that are covered
by this limited warranty on a carry-in basis, to your nearest au-
thorized dealer or distributor of TOYOTOMI.
WHAT YOU MUST DO FOR WARRANTY SERVICE: You must
return the defective Product or part to any authorized dealer or
distributor of TOYOTOMI with this LIMITED WARRANTY. If ser-
vice is not available locally, please contact our CUSTOMER
RELATIONS DEPARTMENT at:
TOYOTOMI EUROPE SALES B.V.
E-MAIL: [email protected]
INTERNET: www.toyotomi.eu
THE FOREGOING EXPRESS ALL OF TOYOTOMI’S
OBLIGATIONS AND LIABILITIES WITH RESPECT TO THE
QUALITY OF PRODUCT FURNISHED BY IT. ALL OTHER
WARRANTIES, EXPRESSED OR IMPLIED, INCLUDING THE
WARRANTIES OF MERCHANTABILITY OR FIFTNESS FOR A
PARTICULAR PURPOSE ARE DISCLAIED. TOYOTOMI SHALL
NOT BE LIABLE FOR THE LOSS OF USE OF THE PRODUCT,
INCONVENIENCE, LOSS OR ANY OTHER DAMAGES, DIRECT
OR CONSEQUENTIAL ARISING OUT OF, THE USE OF, OR
INABILITY TO USE, THE PRODUCT OR DAMAGES
RESULTING FROM OR ATTRIBUTABLE TO DEFFECTS IN THE
PRODUCT.
No other than TOYOTOMI has authority to extend or modify
the terms of this Limited Warranty in any manner whatsoever.
Some states do not allow the exclusion or limitation of inciden-
tal or consequential damages or limitations on how long an im-
plied warranty lasts, so these limitations or exclusions may not
apply to you. This Limited Warranty gives you specific legal
rights and you may also have other rights which vary from state
to state.

DESICCANT TYPE DEHUMIDIFIER
DESHUMIDIFICATEUR D’AIR À
ADSORPTION
ADSORPTIONSTROCKNER
ADSORPTIE
LUCHTONTVOCHTIGER
DEUMIDIFICATORE CON
COMPRESSORE
AFFUGTER AF
TØRREMIDDELTYPE
OPERATING MANUAL ENGLISH P. 1
MANUAL D’UTILISATION FRANÇAIS P. 5
BEDIENUNGSANLEITUNG DEUTSCH P. 9
GEBRUIKSAANWIJZING NEDERLANDS P.13
MANUALE DI ISTRUZIONI ITALIANO P.17
BETJENINGSVEJLEDNING DANSK P.21
TD-ZM80
NEW 10/15
TOYOTOMI CO., LTD.
5-17, Momozono-cho, Mizuho-ku,
Nagoya, 467-0855 Japan
www.toyotomi.jp
Printed in China