Loading ...
Loading ...
Loading ...
7
7. Connect your Sirius ducting (see www.
siriusbrand.com for approved ducting) to the
outlet collar on the rangehood and secure in
place with a ring clamp if you are using semi rigid
ducting. If you are using solid/rigid ducting and
external duct connector is required. (Note: do not
fix the ducting in place with screws as they will
prevent the movement of the non-return valves).
(See Fig. 2 for ducting options). Complete all of
the duct work to the atmosphere before fixing the
flue covers in place to ensure the ducting has not
come free.
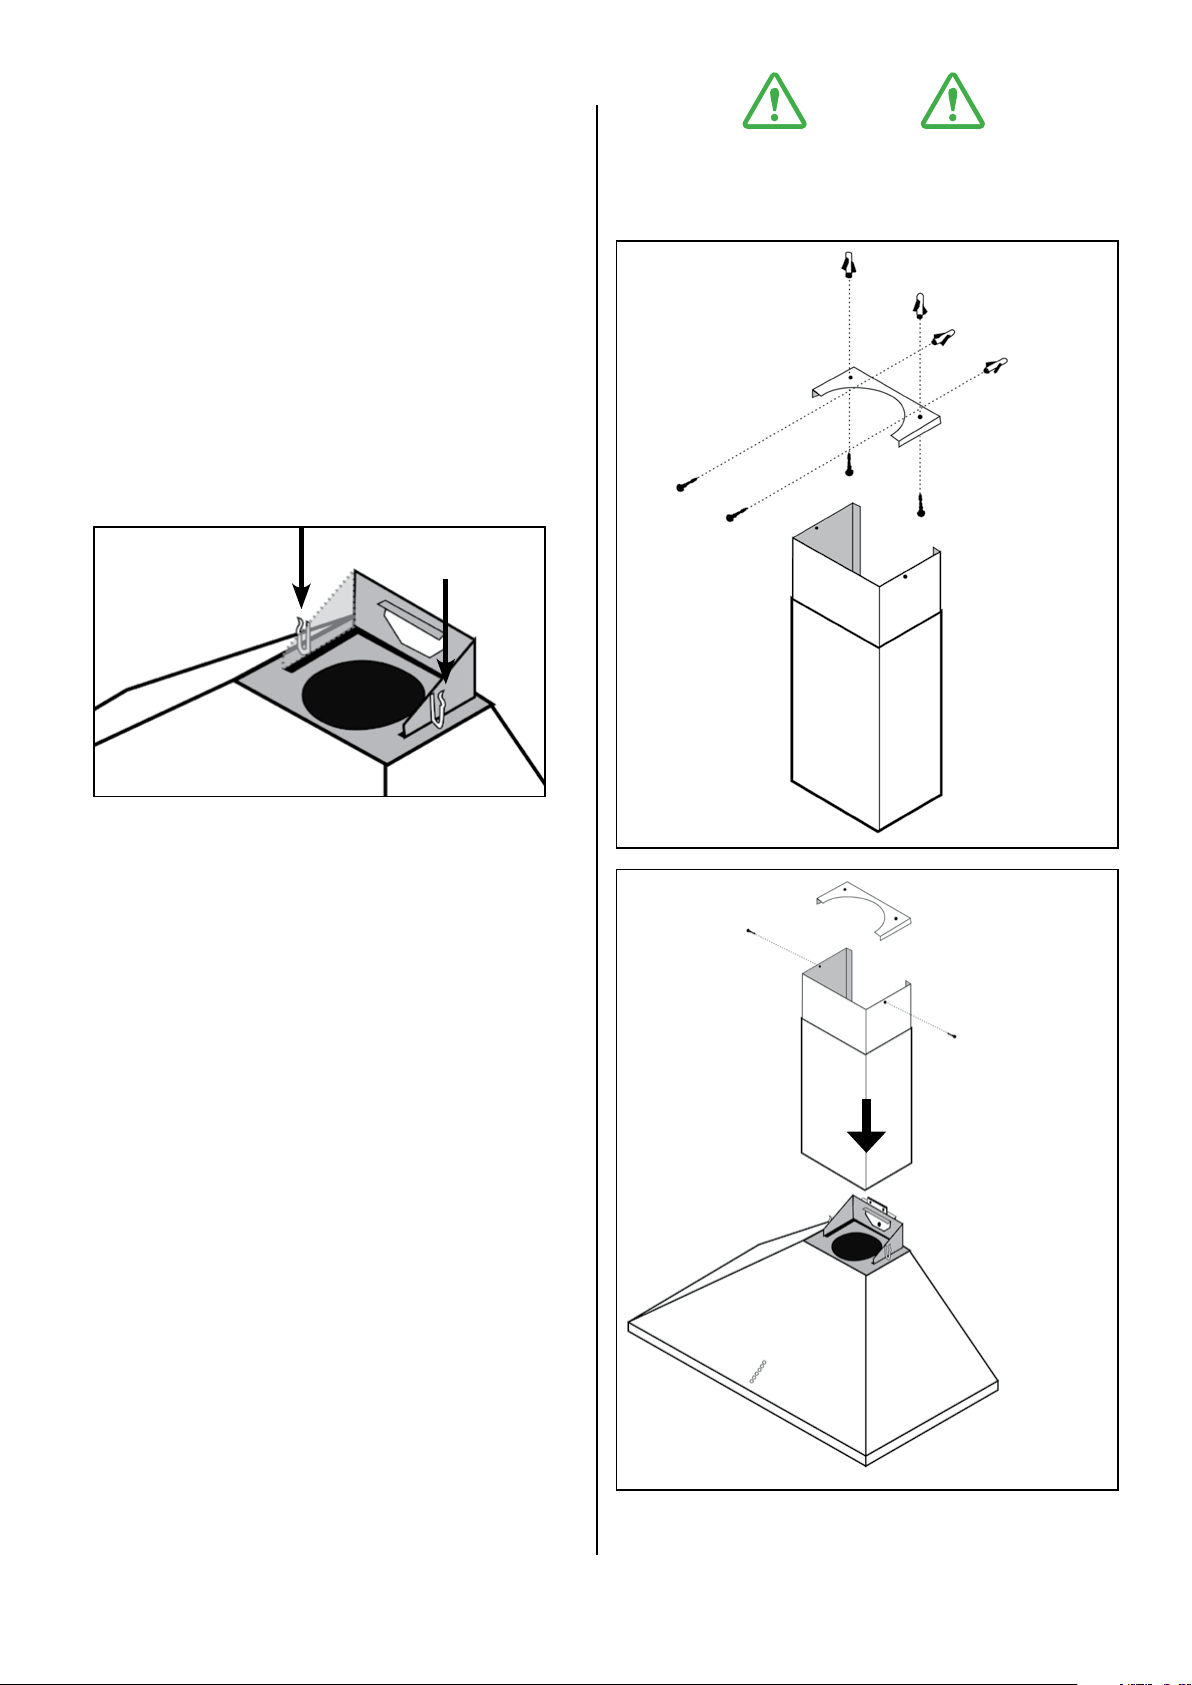
8. Insert the upper flue cover into the cover into the
lower flue cover and mount into the channel on
the top of the rangehood. There are two spring
loaded clips that need to be on the inside of the
lower flue cover to secure in place. (Fig 6.)
9. Telescope the upper flue cover to the ceiling and
mark with a pencil the outer line of the cover, this
will give you the exact location of where the top
fixing bracket needs to be fitter to the ceiling.
10. Fix the top fixing bracket into place using the
supplied 30mm screws (Fig.7) and telescope
the upper flue cover over the bracket and secure
in place with the very small 10mm supplied
screws. (Fig 8.)
(Fig. 6)
(Fig. 7)
(Fig. 8)
NOTE
Please do not fix shroud permanently.
Must be removable for servicing purposes.
30mm
10mm
Loading ...
Loading ...
Loading ...