Loading ...
Loading ...
Loading ...
6
1. The rangehood is quite heavy, so two people
will be needed for installation.
2. Before connecting any ducting to the motor,
make sure the non-return valves - which are on
the air outlet of the motor - can swing open.
3. Using the supplied bracket template (pg. 7), mark
the location of the holes that need to be drilled
in the wall, being careful to make sure that the
wall behind is clear of electrical wiring, plumbing,
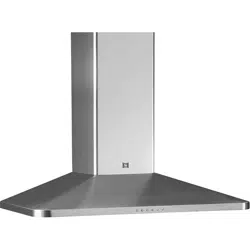
pipes etc. Note: Be sure to set the height of the
rangehood between the minimum and maximum
height requirements as per diagram Fig. 1( Pg. 3).
This can be done by measuring from the lowest
point of the rangehood to the horizontal support
bar. (Fig. 4)
NOTE: Model measurements will vary.
Please check specific model specs.
4. Using an 8mm drill bit, pre-drill the holes that
will hold the bracket to the wall. (Using bracket
template)
5. Insert the supplied plastic dowels to the pre-
drilled holes and fix bracket to the wall with the
supplied screws. (Note: Please use a spirit level to
make sure the bracket is perfectly level.)
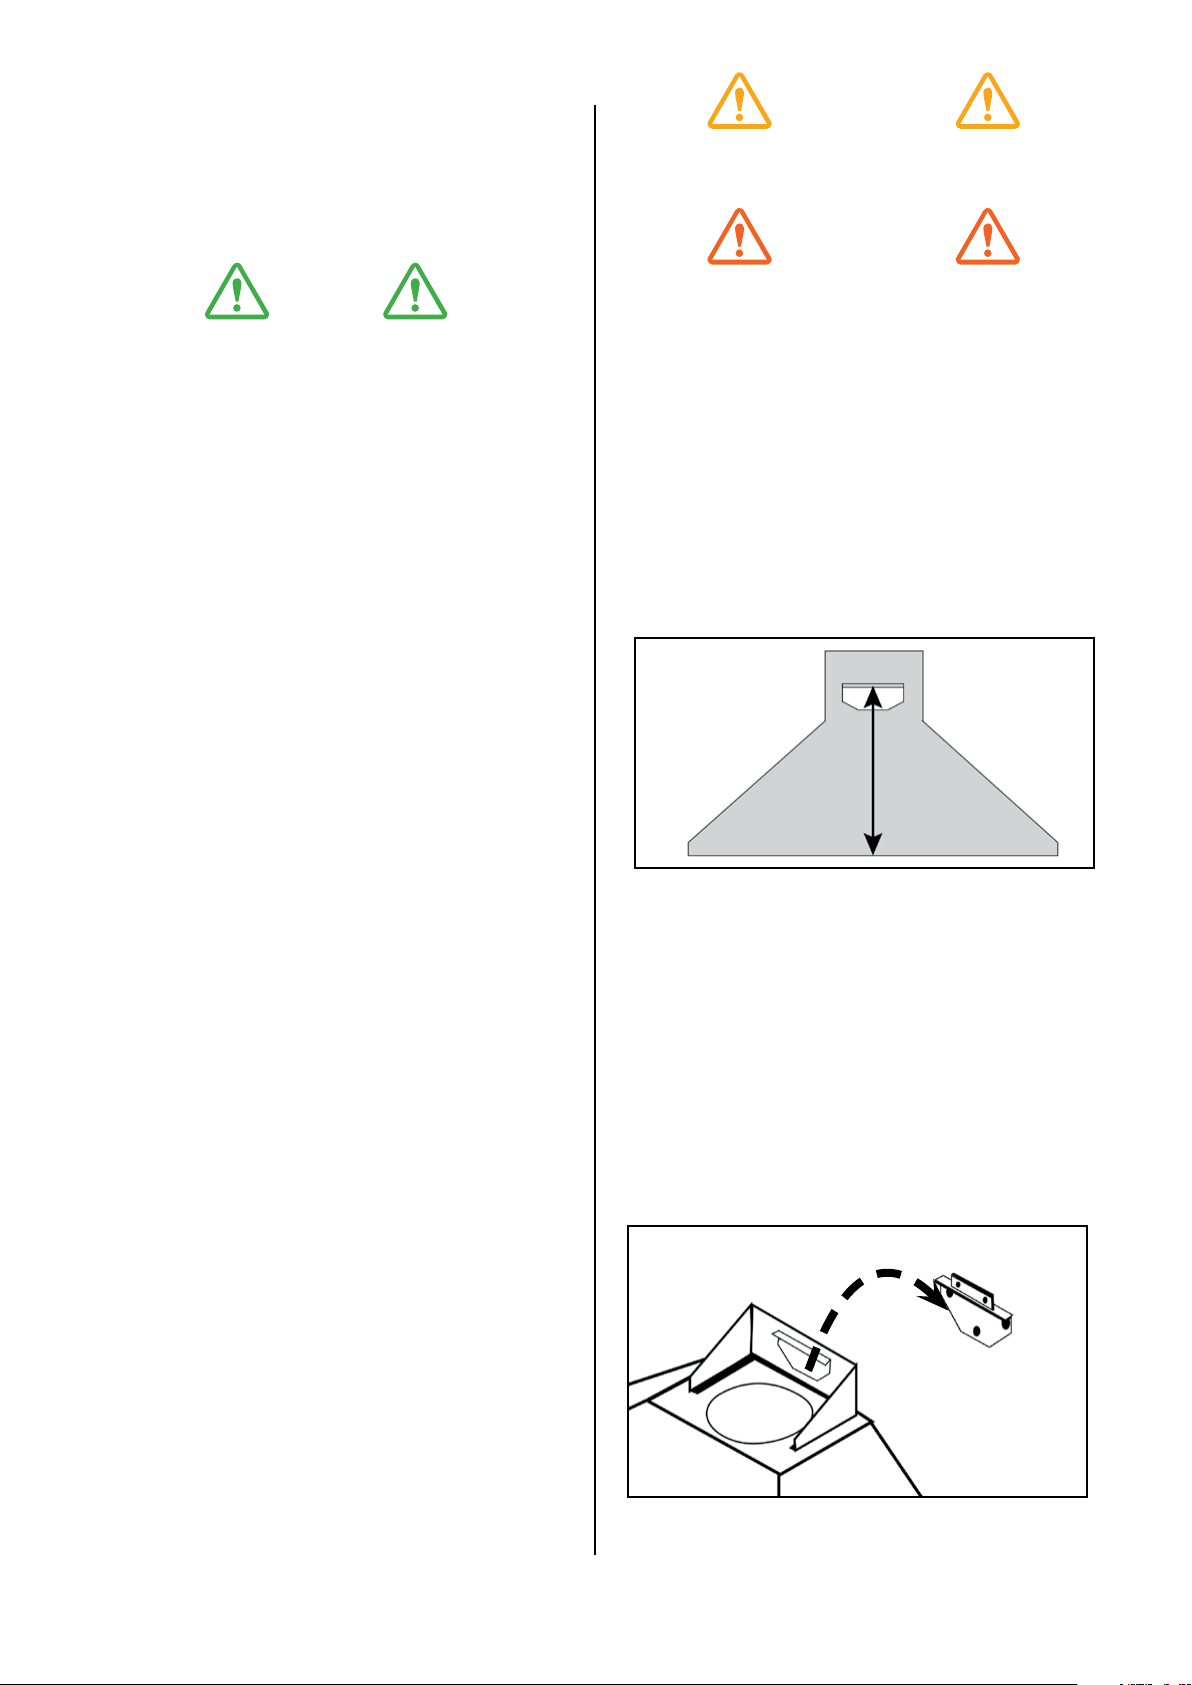
6. Once the bracket is secure, using two people,
lift the hood and drop the horizontal support bar
onto the fixed bracket (Fig. 5).
(Note: There are additional holes on the inside of
the hood to secure the rangehood flush to the wall
and completely stable. (Hole locations will vary per
model.)
CANOPY RANGEHOOD
INSTALLATION - ONBOARD MOTOR
Before installing the appliance, make sure that
none of the parts are damaged in any way. In
case of damaged parts, contact your retailer
and do not proceed with installation. Read all
of the following instructions with care before
installing the appliance.
• Use ducting within the min/max specifications
• Limit the number of ducting bends.
• Do not make any changes in ducting diameter
(recommended constant diameter: Ø 150 mm /
Ø 200 mm or equal surface area).
Before installing the appliance - in order not to
damage the appliance itself - the metal grease filter
should be removed. These filters could be removed
by pushing the handles towards the back side of the
rangehood and pulling it downwards to unfasten it
from its slot. (Fig.3).
To install the appliance please follow these
instructions:
• The appliance must be installed by qualified
technicians, or where possible use a Sirius
recommended installer. See siriusbrand.com. In
order to avoid damage to the electronic parts
of the appliance, please do not use additional
screws.
1. Prepare the power supply - 240 volts.
2. Prepare a hole for the exhaust - 160mm diameter
for single motor & 210mm for for twin motor
versions.
• Maximum length of ducting should not exceed 7
metres.
• Do not use screws to fix the ducting to the
rangehoods as they will prevent the movement of
non-return valves.
• Limit the number of elbows in the ducting, since
each elbow reduces the duct efficiency by 1
metre. (i.e. if you use two 90° elbows, the length
of ducting must not exceed 5 metres.)
• Avoid abrupt direction changes.
• Use 150mm constant diameter ducting for the
whole length for the single motor, 200mm ducting
for the twin motor model.
• The use of Sirius ducting will increase the
warranty of the unit to 6 years.
NOTE
CAUTION
WARNING
(Fig. 5)
(Fig. 4)
WARNING: Failure to install the screws or fixing
device in accordance with these instructions
may result in electrical hazards.
Loading ...
Loading ...
Loading ...