Loading ...
Loading ...
Loading ...
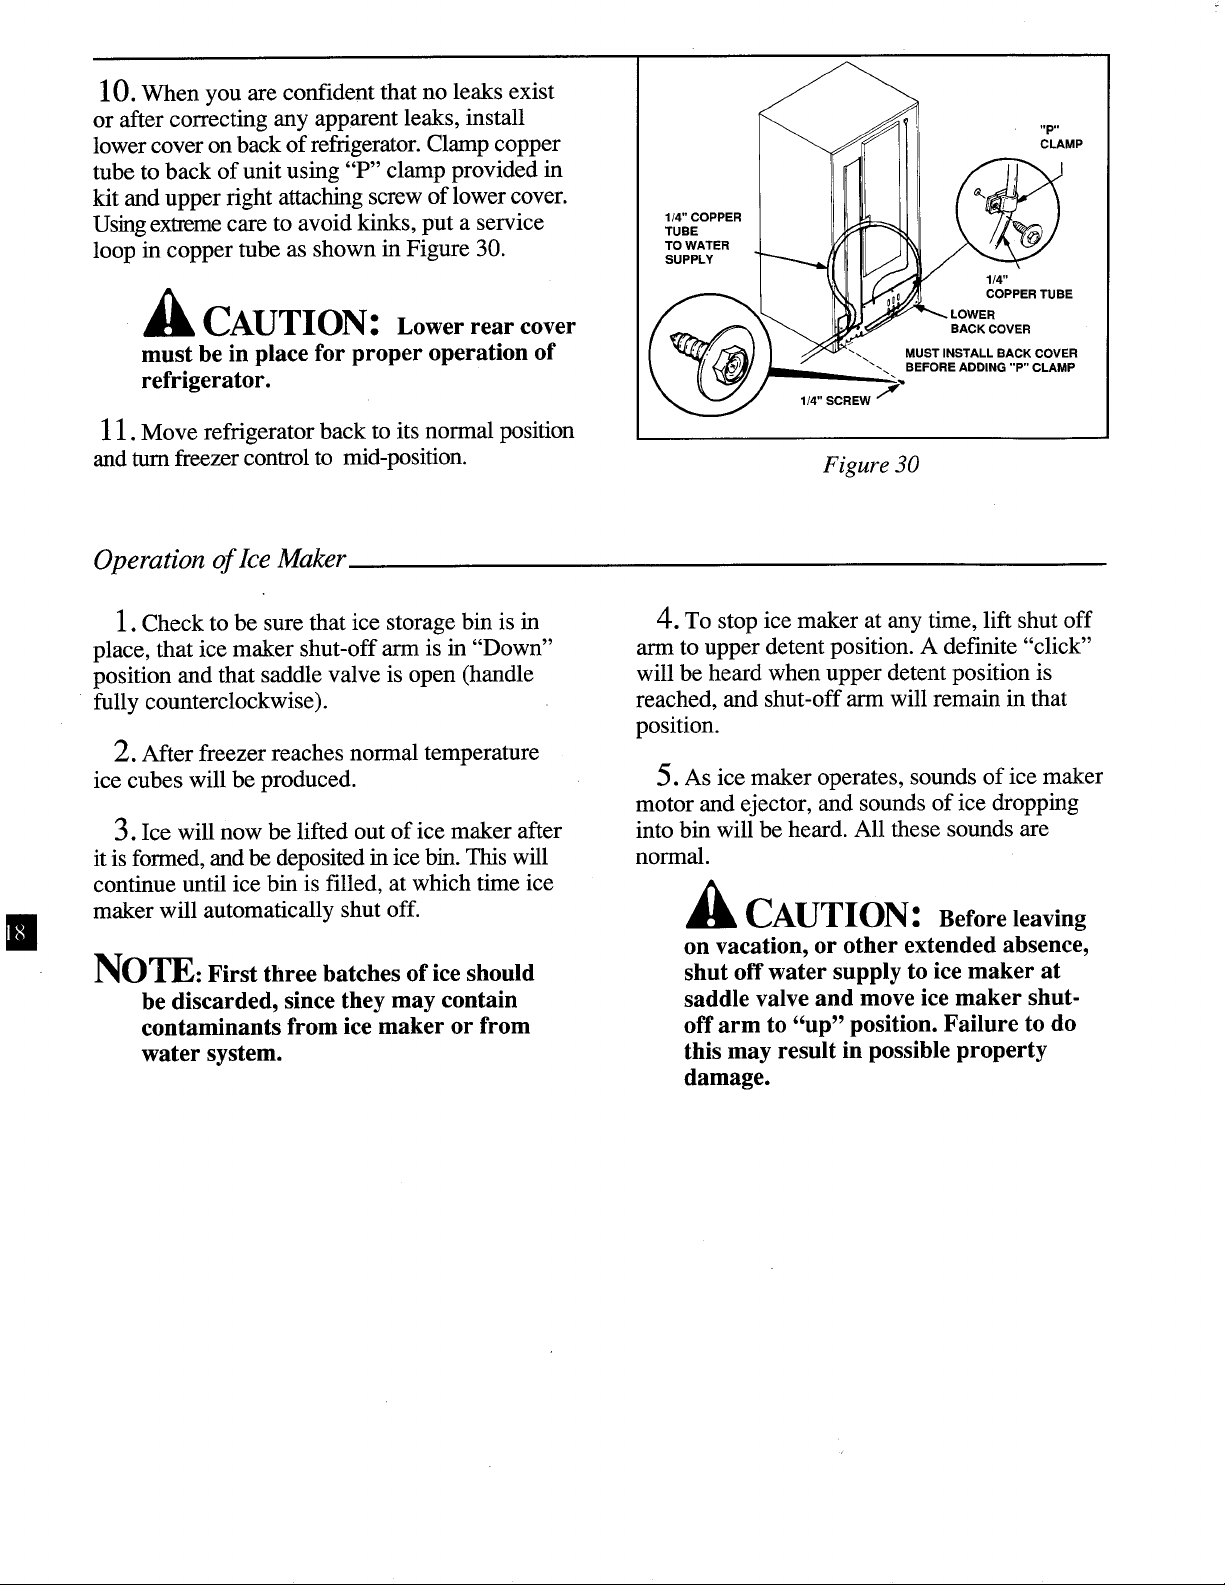
10. When you are confident that no leaks exist
or after correcting any apparent leaks, install
lower cover on back of refrigerator. Clamp copper
tube to back of unit using "P" clamp provided in
kit and upper right attaching screw of lower cover.
Using extreme care to avoid kinks, put a service
loop in copper tube as shown in Figure 30.
15, CAUTION: Lowerrear cover
must be in place for proper operation of
refrigerator.
11. Move refrigerator back to its normal position
and turn freezer control to mid-position.
1/4"COPPER
TUBE
TO WATER
SUPPLY
"P" MP
f_'_l_ 1/4"
_y/_ COPFERTUBE
_LOWER
BACK COVER
_MUST INSTALL BACK COVER
_BEFORE ADDING "P" CLAMP
1/4" SCREW _''
Figure 30
Operation of Ice Maker,
1.Check to be sure that ice storage bin is in
place, that ice maker shut-off arm is in "Down"
position and that saddle valve is open (handle
fully counterclockwise).
2.After freezer reaches normal temperature
ice cubes will be produced.
3. Ice will now be lifted out of ice maker after
it is formed, and be deposited in ice bin. This will
continue until ice bin is filled, at which time ice
maker will automatically shut off.
NOTEFirst three batches of ice should
be discarded, since they may contain
contaminants from ice maker or from
water system.
4. To stop ice maker at any time, lift shut off
arm to upper detent position. A definite "click"
will be heard when upper detent position is
reached, and shut-off arm will remain in that
position.
5. As ice maker operates, sounds of ice maker
motor and ejector, and sounds of ice dropping
into bin will be heard. All these sounds are
normal.
ACAUTION: Beforeleaving
on vacation, or other extended absence,
shut off water supply to ice maker at
saddle valve and move ice maker shut-
off arm to "up" position. Failure to do
this may result in possible property
damage.
Loading ...
Loading ...
Loading ...