Loading ...
Loading ...
Loading ...
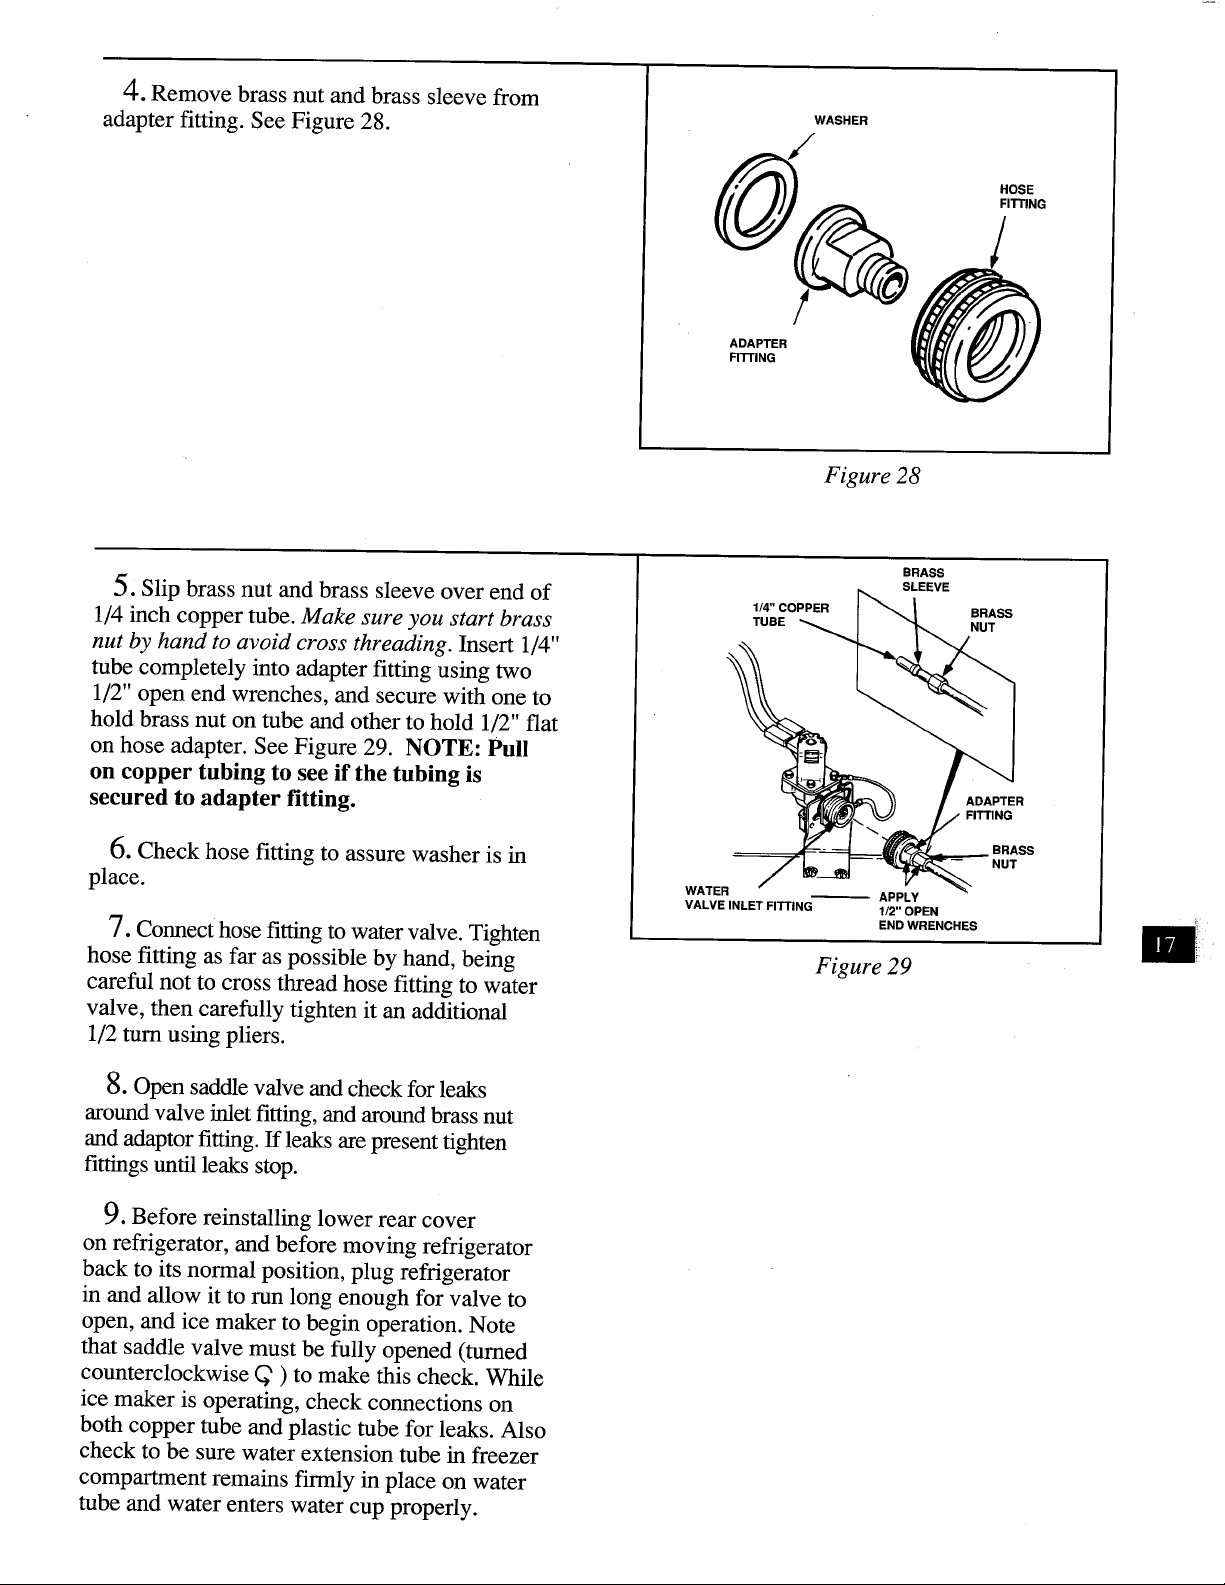
4.Remove brass nut and brass sleeve from
adapter fitting. See Figure 28. WASHER
HOSE
FITTING
1
ADAPTER
FITTING
Figure 28
5. Slip brass nut and brass sleeve over end of
1/4 inch copper tube. Make sure you start brass
nut by hand to avoid cross threading. Insert 1/4"
tube completely into adapter fitting using two
1/2" open end wrenches, and secure with one to
hold brass nut on tube and other to hold 1/2" flat
on hose adapter. See Figure 29. NOTE: Pull
on copper tubing to see if the tubing is
secured to adapter fitting.
6. Check hose fitting to assure washer is in
place.
7. Connect hose fitting to water valve. Tighten
hose fitting as far as possible by hand, being
careful not to cross thread hose fitting to water
valve, then carefully tighten it an additional
1/2 turn using pliers.
8. Open saddle valve and check for leaks
around valve inlet fitting, and around brass nut
and adaptor fitting. If leaks are present tighten
fittings until leaks stop.
9.Before reinstalling lower rear cover
on refrigerator, and before moving refrigerator
back to its normal position, plug refrigerator
in and allow it to run long enough for valve to
open, and ice maker to begin operation. Note
that saddle valve must be fully opened (turned
counterclockwise _' ) to make this check. While
ice maker is operating, check connections on
both copper tube and plastic tube for leaks. Also
check to be sure water extension tube in freezer
compartment remains firmly in place on water
tube and water enters water cup properly.
1/4"COPPER
TUBE
BRASS
SLEEVE
BRASS
NUT
WATER
VALVEINLETFITTING
ADAPTER
FITTING
BRASS
NUT
APPLY
1/2"OPEN
END WRENCHES
Figure 29
Loading ...
Loading ...
Loading ...