Loading ...
Loading ...
Loading ...
4 5
ninjakitchen.com
ninjakitchen.com
ACCESSORY ASSEMBLY INSTRUCTIONS
CRISPER TRAY
USING THE SMARTSWITCH
The SmartSwitch allows you to change between
the two cook modes, which are labeled on the
switch for your reference.
•Rapid Cooker
•Air Fry/Stovetop
The SmartSwitch's position will determine which
cooking functions are available for selection.
HOW TO OPEN & CLOSE THE LID
To open or close the lid handle at any time, use the
handle that is located in the center-front of the unit,
just above the control panel.
You can open and close the lid when the
SmartSwitch is in either the RAPID COOKER or
AIR FRY/STOVETOP position.
Elevated Position
Use elevated
position for proteins
and vegetables
when following
recipe instructions
for Speedi Meals or
when using Air Broil
Bottom Position
Use bottom position
for traditional
steam and air frying
capabilities.
Be sure to
reference charts
and recipes for
crisper tray position
recommendations.
NOTE: Before placing the Crisper Tray in
the elevated position, make sure to add any
ingredients needed at the bottom of the pot.
NOTE: Recipes using the Speedi Meals
function require that the Crisper Tray be set up
in the elevated position.
ACCESSORY ASSEMBLY & USING THE SMARTLID
TM
To set up the Crisper Tray in the elevated position,
first rotate the tray's legs outward, so that they
extend past the four corners of the tray. The legs
should sit on the ledges at the base of each groove,
allowing the tray to remain elevated in the pot.
To set up the Crisper Tray in the bottom position,
rotate the tray's legs inward so that they are turned
against the underside of the tray. This will allow the
Crisper Tray to rest at the bottom of the pot.
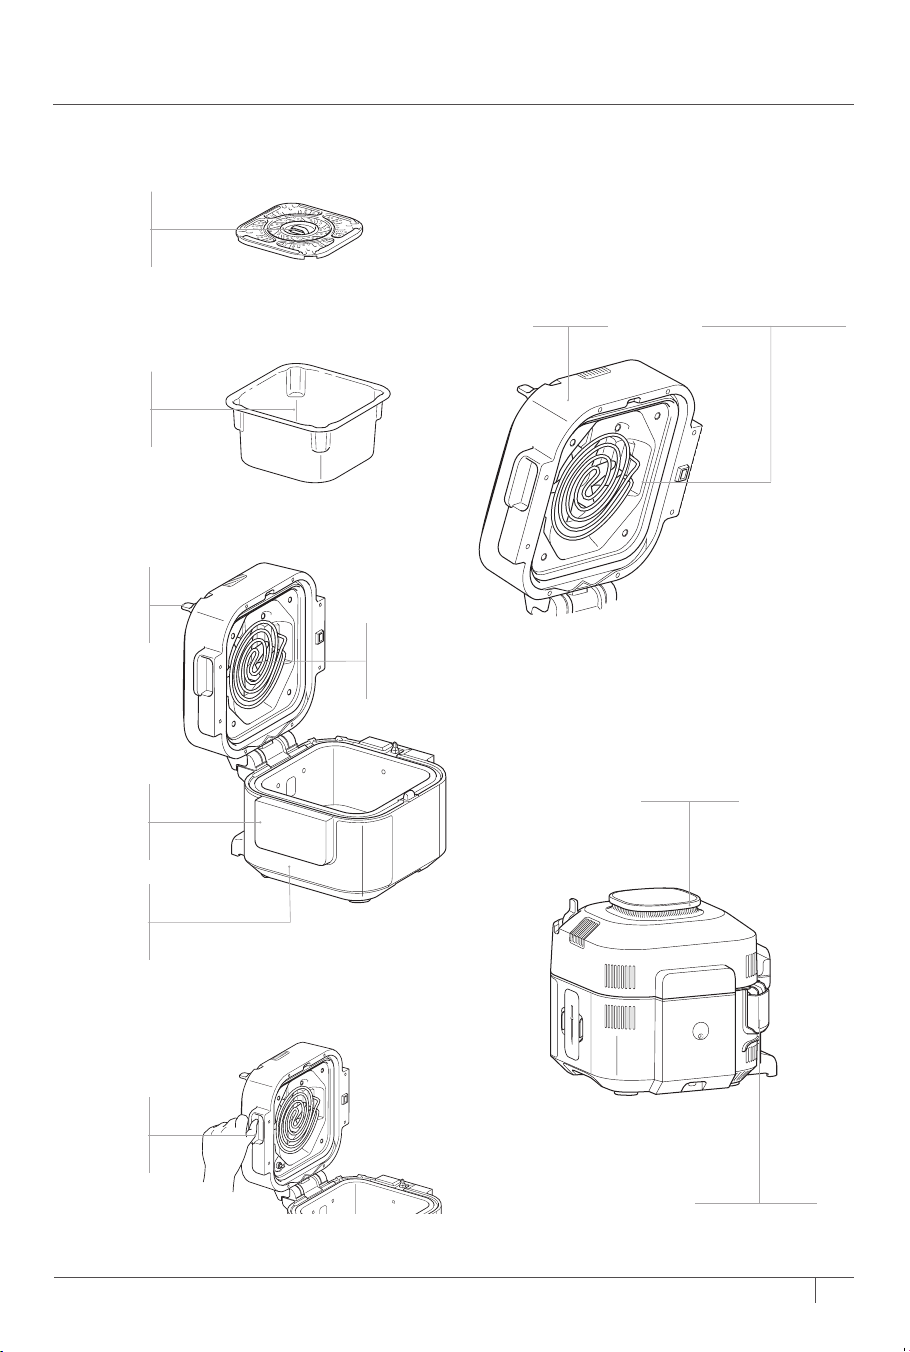
PARTS & ACCESSORIES
Crisper Tray
Accessories Included
6-Quart
Removable
Cooking Pot
Cooker Lid
SmartSwitch
Control Panel
Cooker Base
Lid Handle
Air
Outlet Vent
Condensation
Collector
Unit Lid Heating Element
R
A
P
I
D
C
O
O
K
E
R
Loading ...
Loading ...
Loading ...