Loading ...
Loading ...
Loading ...
10 11
ninjakitchen.com
ninjakitchen.com
Bake/Roast
1 Be sure to position the Crisper Tray in the
bottom of the pot.
2 Move SmartSwitch to AIR FRY/STOVETOP,
then use the center front arrows to select
BAKE/ROAST. The default temperature
setting will display. Use the up and down
arrows to the left of the display to choose a
temperature from 300°F to 400°F, in either
10 or 15 degree increments.
NOTE: For best results, it is recommended to
periodically shake ingredients during air frying.
You can open the lid and lift out the pot to
shake or toss ingredients for even browning.
When done, lower the pot back into the unit
and close the lid. Cooking will automatically
resume after the lid is closed.
USING THE AIR FRY/STOVETOP FUNCTIONS
Air Fry
1 Be sure to place the Crisper Tray in the bottom
position.
2 Add ingredients to the pot and close the lid.
Sear/Sauté
1 Before getting started, be sure to remove the
Crisper Tray from the pot. Add ingredients to
the pot.
2 Move SmartSwitch to AIR FRY/STOVETOP
then use the center front arrows to select SEAR/
SAUTÉ. Use the up and down arrows to the
left of the display to select "Lo1," "2," "3," "4,"
or "Hi5."
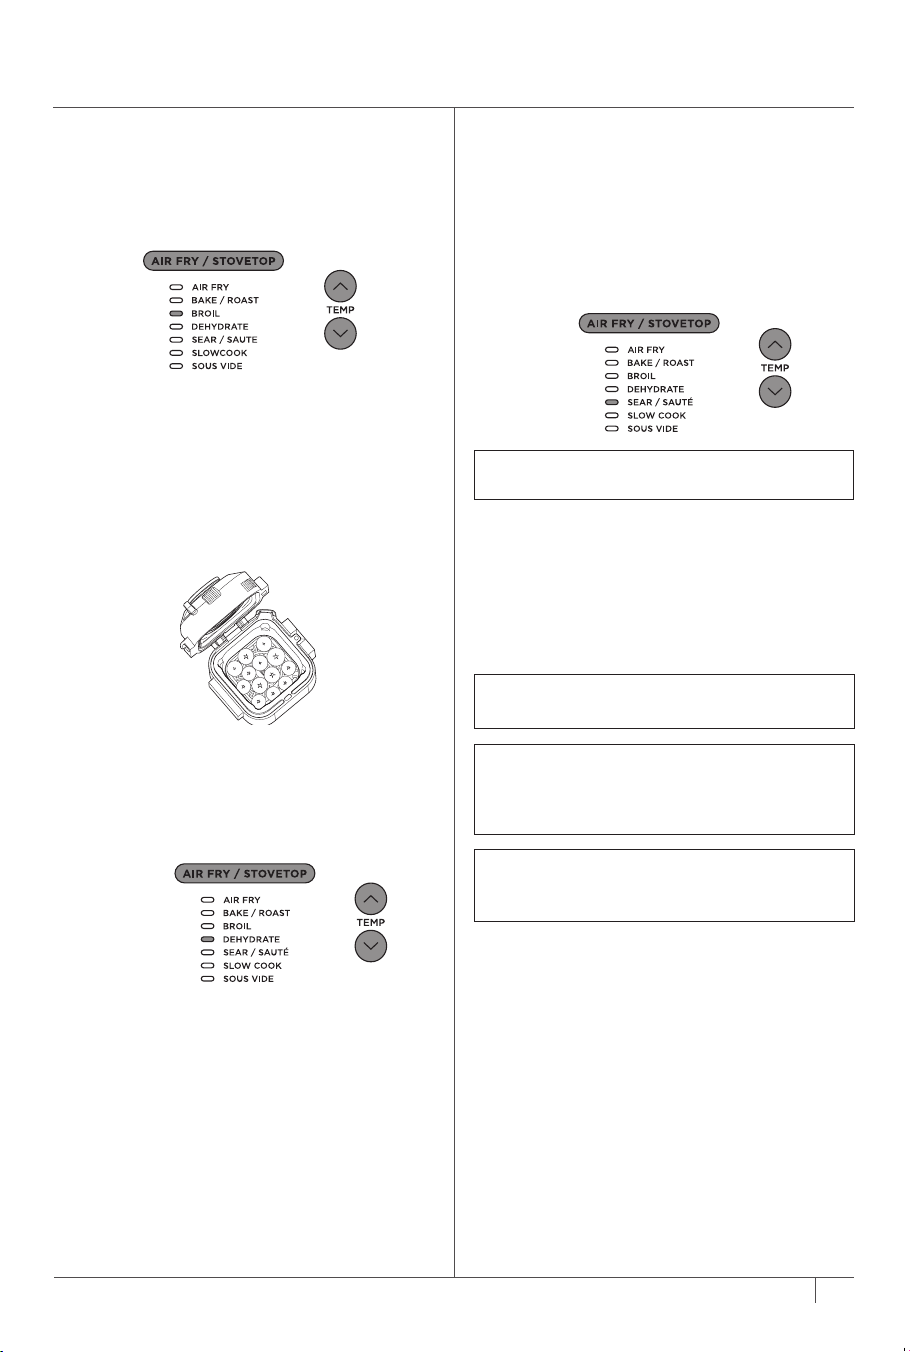
3 Move SmartSwitch to AIR FRY/STOVETOP, then
use the center front arrows to select BROIL.
The default temperature setting will display.
Use the up and down arrows to the left of the
display to chose a temperature from 400°F to
450°F in 25 degree increments.
NOTE: You can use this function with the lid
open or with the lid closed.
NOTE: A LWAYS use nonstick utensils in
the complete meal pot. DO NOT use metal
utensils, as they will scratch the nonstick
coating on the pot.
NOTE: SEAR/SAUTÉ will automatically turn
o after 1 hour for "4" and "Hi5" and 4 hours
for "LO1," "2," and "3."
NOTE: There is no time adjustment available
when using the Sear/Sauté function.
USING YOUR NINJA SPEEDI
™
AIR FRYER - CONT.
3 Move SmartSwitch to AIR FRY/STOVETOP,
the unit will default to AIR FRY. The default
temperature setting will display. Use the up
and down arrows to the left of the display to
choose a temperature from 250°F to 400°F,
in either 10 or 15 degree increments.
4 Use the up and down arrows to the right of
the display to adjust the cook time in minute
increments up to 1 hour.
5 Press START/STOP to begin cooking.
6 When cook time reaches zero, the unit
will beep and display "End".
3 Use the up and down arrows to the right of the
display to adjust the cook time up to 1 hour in
1 minute increments and from 1 hour to
4 hours in 5 minute increments.
4 Press START/STOP to begin cooking.
5 When cook time reaches zero, the unit
will beep and "End".
Broil
1 Be sure to place the Crisper Tray in the
elevated position.
2 Place ingredients on the tray then close the lid.
4 Use the up and down arrows to the right of the
display to adjust the cook time up to
30 minutes in 1 minute increments.
5 Press START/STOP to begin cooking.
6 When cook time reaches zero, the unit will beep
and display "End".
Dehydrate
1 Be sure to place the Crisper Tray in the bottom
position.
2 Move SmartSwitch to AIR FRY/STOVETOP,
then use the center front arrows to select
DEHYDRATE. The default temperature setting
will display. Use the up and down arrows to the
left of the display to adjust the temperature
between 105°F and 195°F.
3 Use the up and down arrows to the right of the
display
to adjust the cook time between 1 and
12 hours, in 15 minute increments.
4 Press START/STOP to begin cooking.
5 When cook time reaches zero, the
unit will beep and display "End".
3 Press START/STOP to begin cooking. The
timer will begin counting up.
4 Press START/STOP to turn o the SEAR/
SAUTÉ function. To switch to a dierent
cooking function, press START/STOP to
end the cooking function then use the
SmartSwitch and center front arrows to select
your desired function.
+
+
+
+
+
Loading ...
Loading ...
Loading ...