Loading ...
Loading ...
Loading ...
26
After making all appropriate adjustments, replace the base grille
by aligning the ends of the grille with the leveling assemblies on
each side and snapping the grille into place. Use a 1/4" hex driver
to reinstall screws if applicable.
Final Steps
WARNING
Electrical Shock Hazard
Plug into a grounded 3 prong outlet.
Do not remove ground prong.
Do not use an adapter.
Do not use an extension cord.
Failure to follow these instructions can result in death,
fire, or electrical shock.
1. Plug into a grounded 3 prong outlet
2. Reset the controls. See “Control Panel Descriptions” in the
Quick Start Guide for details.
3. Return all removable door parts to doors and the food to
refrigerator.
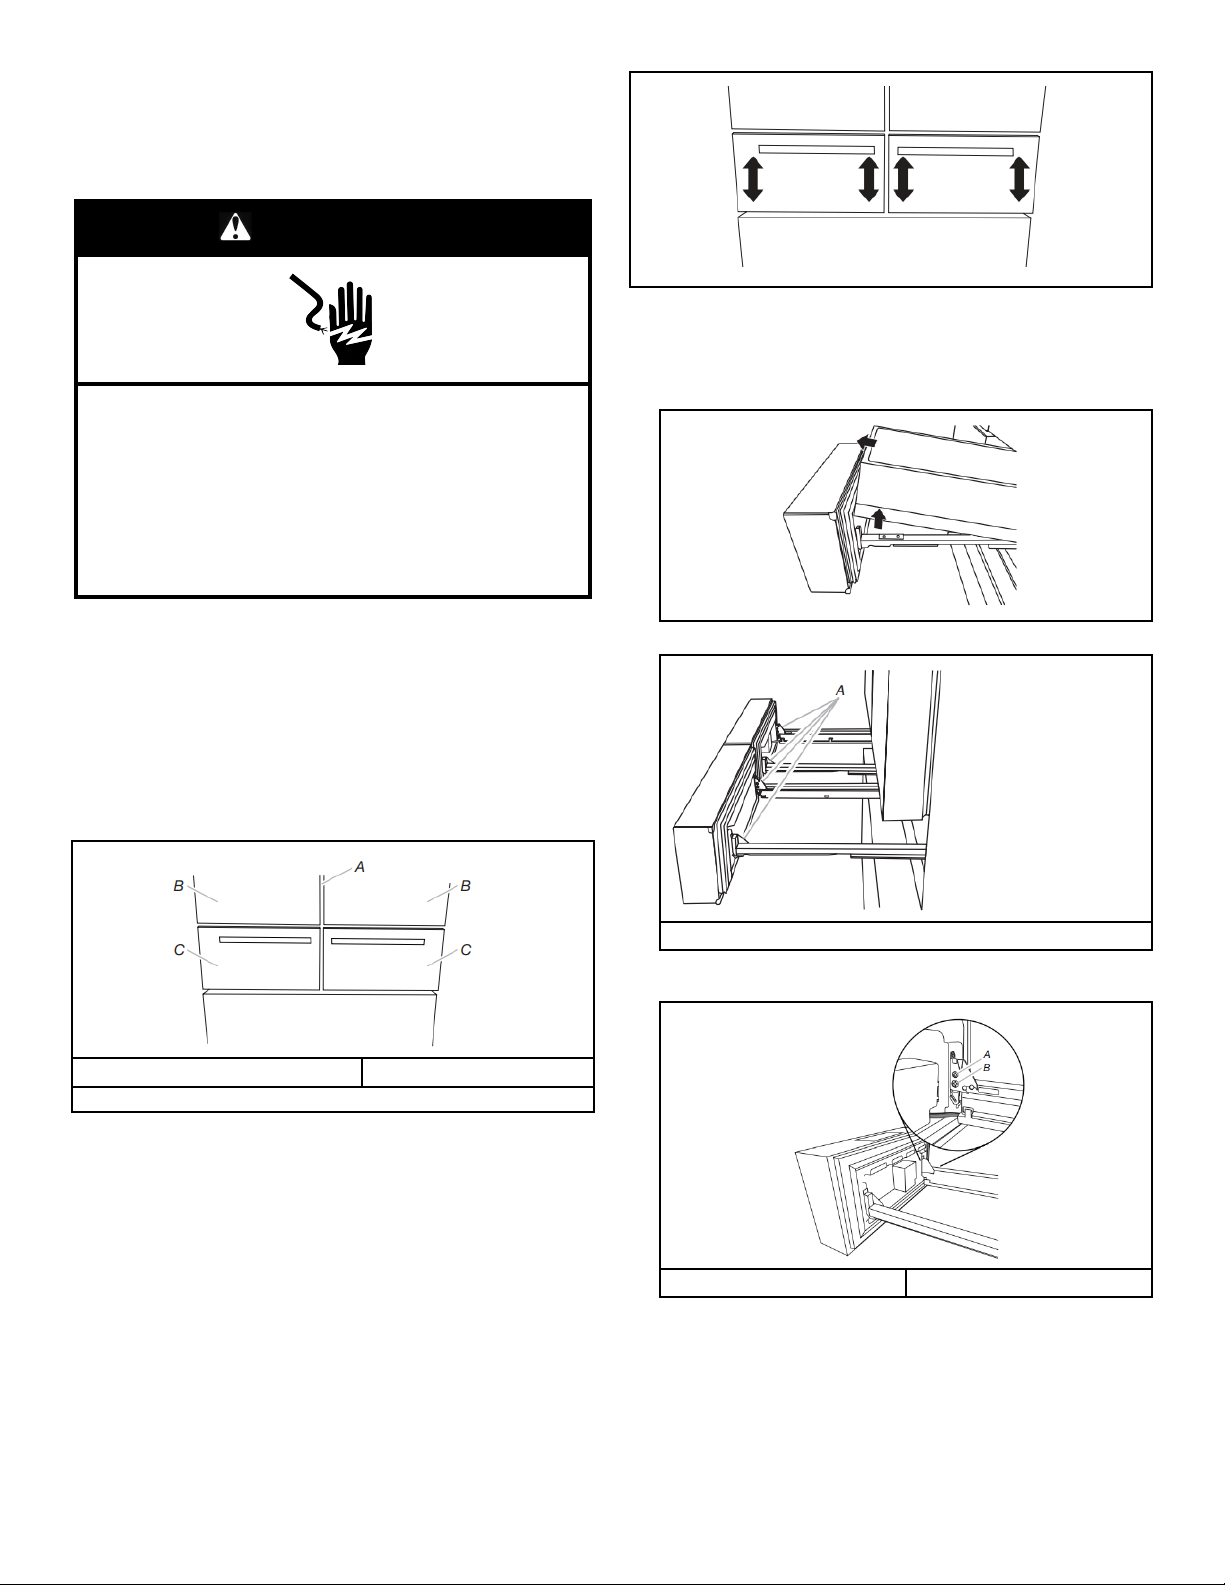
Align Refrigerated Drawer Fronts (on some
models)
When the drawer fronts are aligned, the width of the vertical space
(A) between the refrigerator doors (B) and the drawer fronts (C) is
the same thickness, and the drawers appear level.
A. Vertical space between doors C. Drawer fronts
B. Drawer fronts
Aligning the drawer fronts is a two-step process. The first step is
to adjust the drawer fronts up and down. The second step shifts
the drawer fronts from side to side. Visually inspect the
refrigerator for alignment and adjust the drawer fronts as needed.
Step 1 - Adjust the Drawer Fronts Up/Down
IMPORTANT: Each refrigerated drawer can be adjusted up and
down on both the left and the right sides.
Tools Needed: Phillips screwdriver
1. With the drawers closed, identify the drawer front that needs
to be raised or lowered.
2. Open the drawer to its full extension, and remove the interior
bin.
3. Locate the drawer glide brackets.
A. Drawer glide brackets
4. Insert the Phillips screwdriver into tightening screw and turn
counterclockwise to loosen the drawer front.
A. Tightening screw B. Adjusting screw
Loading ...
Loading ...
Loading ...