Loading ...
Loading ...
Loading ...
17
5. Install the water filter cap onto the new filter. Be sure to align
the arrows so the grooves in the filter align with ribs in the filter
cap.
6. Insert the filter into the housing.
7. Twist the water filter and turn 90° clockwise until it locks into
place and the arrows are aligned.
8. Push the water filter door closed.
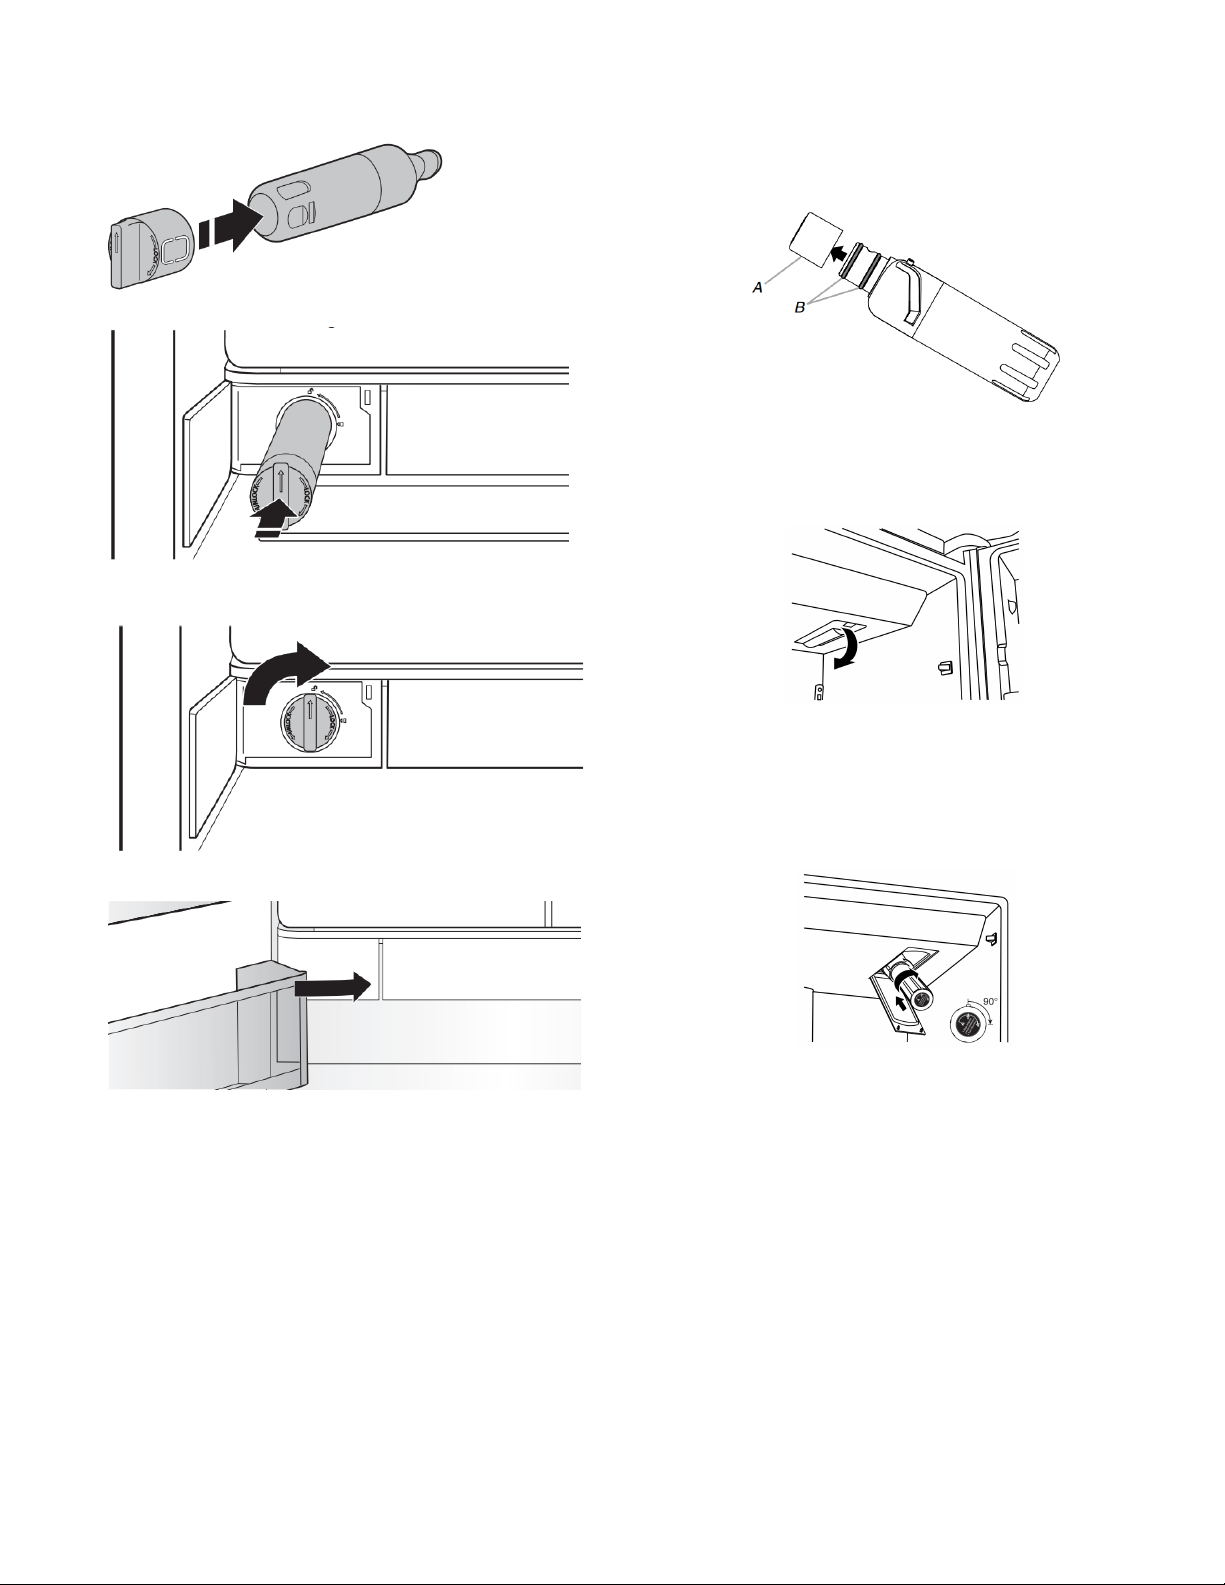
Style 2— Right-Hand Side of Refrigerator Ceiling
1. Locate the accessory packet in the refrigerator and remove
the water filter.
2. Take the water filter out of its packaging and remove the cover
from the O-rings. Be sure the O-rings are still in place after the
cover is removed.
A. O-ring cover
B. O-rings
3. The water filter compartment is located in the right-hand side
of the refrigerator ceiling. Push up on the compartment door to
release the catch, then lower the door.
4. Align the arrow on the water filter label with the cutout notch in
the filter housing and insert the filter into the housing.
5. Turn the filter clockwise 90 degrees (1/4 turn), until it locks into
the housing.
NOTE: If the filter is not correctly locked into the housing, the
water dispenser will not operate. Water will not flow from the
dispenser.
6. While the compartment door is still open, lift the filter up into
the compartment. Then, close the filter compartment door
completely.
7. Flush the water system. See “Water and Ice Dispensers” for
details.
IMPORTANT: If you do not flush the water system, you may
experience dripping and/or decreased flow from the water
dispenser.
Replacing the Water Filter
To purchase a replacement water filter, use model number
P9WBL2 (EDR2RXD1), contact your dealer, or call 1-800-422-
9991 in the U.S.A. or 1-800-807-6777 in Canada.
IMPORTANT: Air trapped in the water system may cause water
and filter to eject. Always dispense water for at least 2 minutes
before removing the filter or blue bypass cap.
Loading ...
Loading ...
Loading ...