Loading ...
Loading ...
Loading ...
Installation instructions en
21
3.
Screw the cover plate in tightly, depending on the
installation situation.
Installing the appliance
WARNING‒Risk of injury!
Components inside the appliance may have sharp
edges.
▶ Wear protective gloves.
The appliance is heavy.
▶ To move the appliance, twopeople are required.
▶ Use only suitable tools and equipment.
Note:To protect the cables, do not remove the transit
bolt yet.
1.
Lift the appliance by the short sides and align the
front of the appliance with the hob.
2.
Pull the cable connection into the strain relief
and
remove the transit bolt .
3.
Note:To ensure that the appliance is not yet fully in-
serted into the cut-out, place a slat below the short
side of the appliance in each case.
Insert the appliance into the cut-out in the worktop
from above.
Insert the appliance evenly so that it is not tilted.
4.
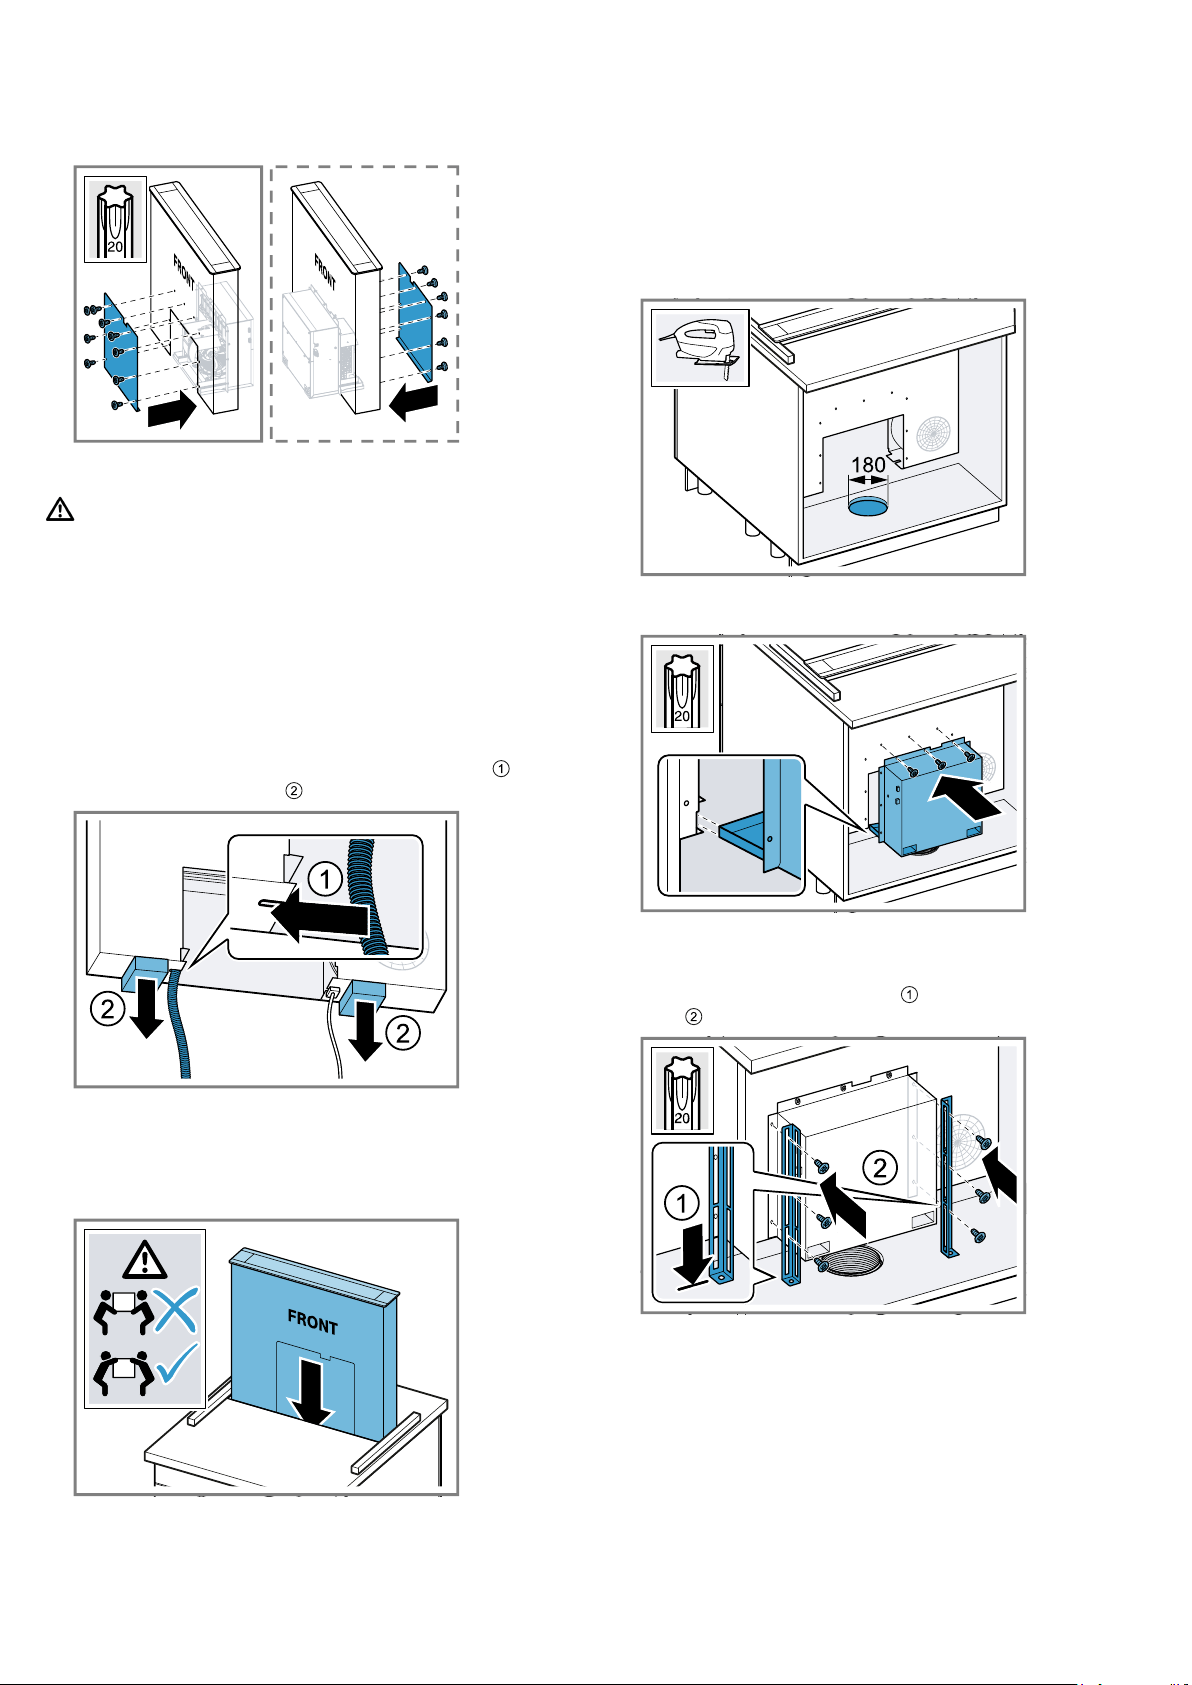
Mark the cut-out for the pipework:
‒ Attach the exhaust air hose for the fan box to the
connector.
‒ Slide the fan box into the guide and tighten this
with a screw.
‒ Mark the position of the pipework on the bottom
of the unit.
‒ Undo the screw and remove the fan box again.
5.
Saw out the cut-out for the pipework.
6.
Slide the fan box into the guide, connect the pipe-
work and screw the fan box tightly back in place.
7.
Support the appliance from below and remove the
slats.
8.
Insert the appliance fully in the cut-out.
9.
Align the rails to the bottom and attach to the
side .
Loading ...
Loading ...
Loading ...