
Loading ...
Loading ...
Loading ...
en Installation instructions
20
17.6 Instructions for the exhaust air pipe
The appliance manufacturer does not provide any war-
ranty for faults attributable to the pipeline.
¡ Use a short, straight exhaust air pipe with as large a
pipe diameter as possible.
¡ Long, rough exhaust air pipes, many pipe bends or
small pipe diameters reduce the suction power and
increase the fan noise.
¡ Use an exhaust pipe that is made of non-combust-
ible material.
¡ To prevent condensate from returning, fit the ex-
haust pipe with a 1° gradient from the appliance.
Note:Suitable air extraction ducts are available from
our after-sales service, your dealer or on our website.
Flat ducts
Use flat ducts with an inner cross-section that corres-
ponds to the diameter of the round pipes:
¡ Diameter of 150mm corresponds to ap-
prox.177cm².
¡ Diameter of 120mm corresponds to ap-
prox.113cm².
¡ Use sealing strips for different pipe diameters.
¡ Do not use any flat ducts with sharp bends.
Round pipes
Use round pipes with an inner diameter of 150mm (re-
commended) or at least 120mm.
17.7 Installation
Checking the units
▶
Check whether the fitted unit is level and has suffi-
cient load-bearing capacity.
The maximum weight of the appliance is 40kg.
Preparing the units
Note:To install the hob and the appliance seamlessly,
you require special accessories, which are not included
in the scope of delivery. Observe the enclosed installa-
tion instructions for special accessories.
Requirement:The unit is suitable for the installation.
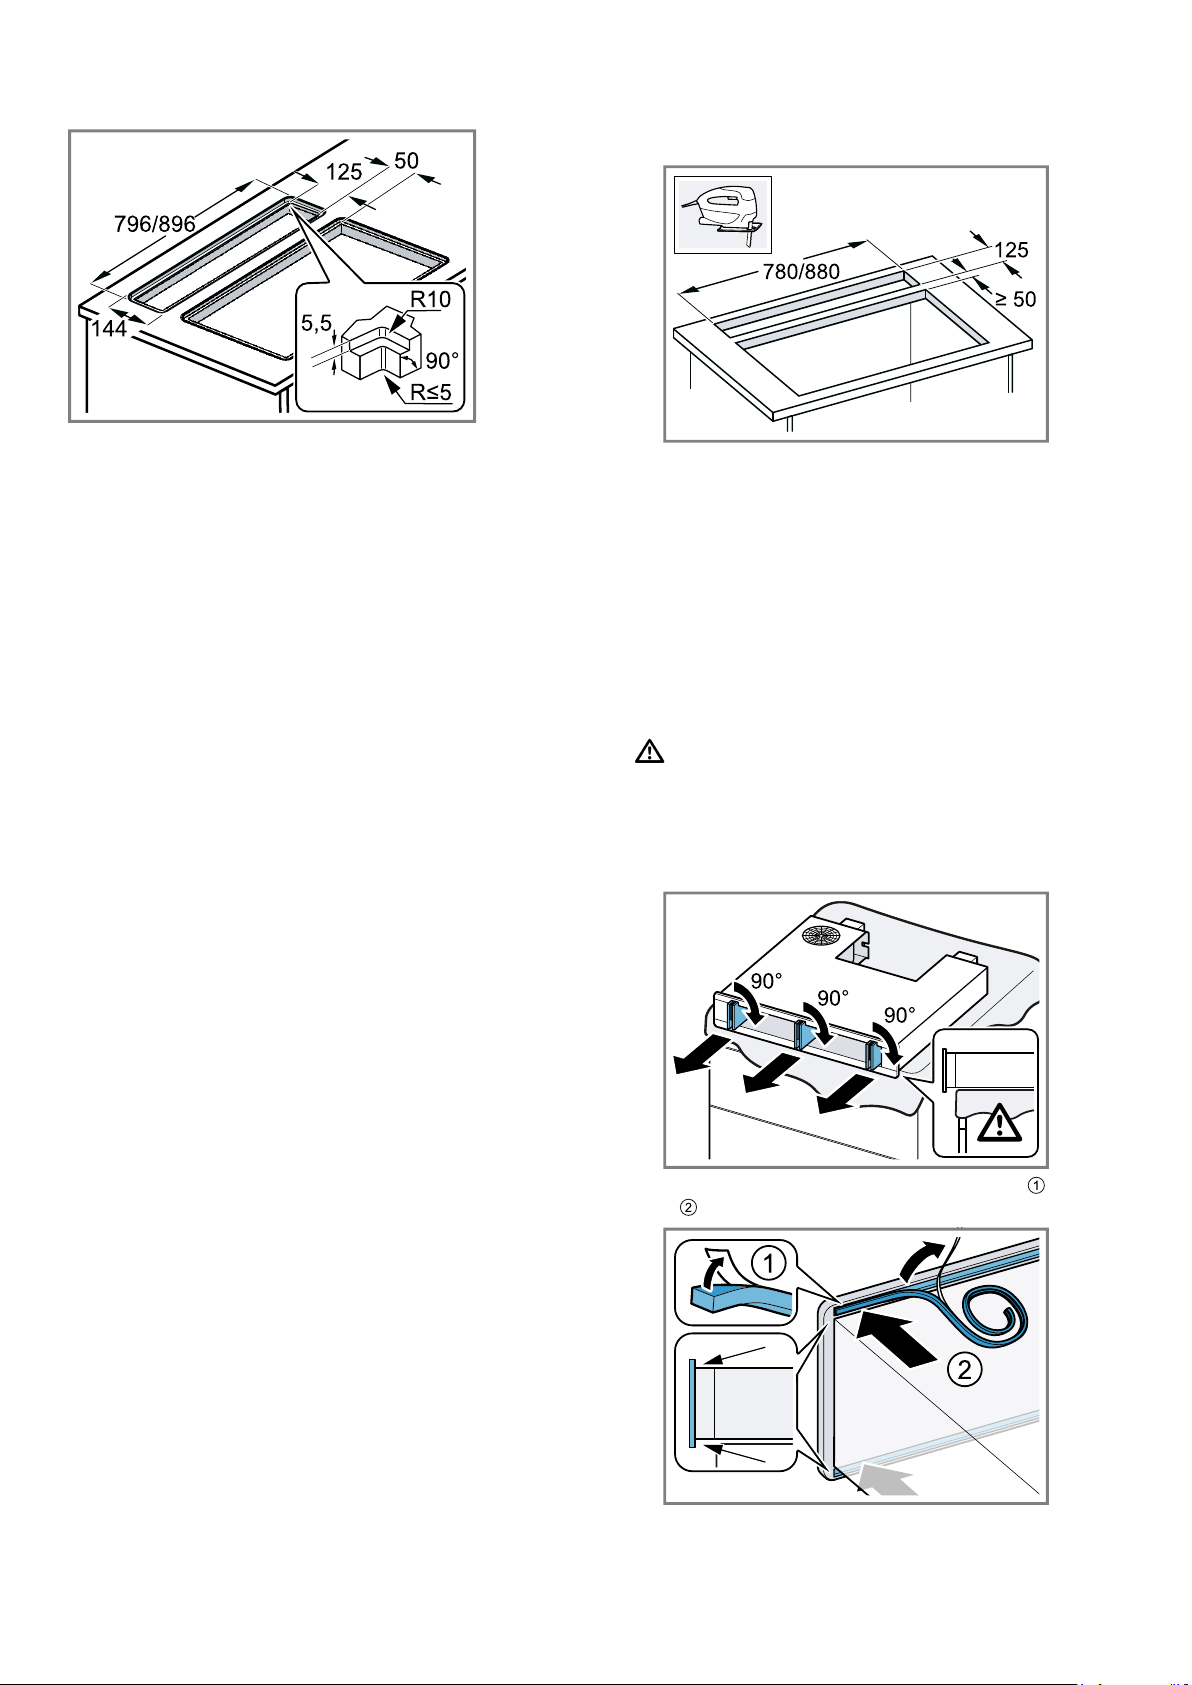
1.
Make a cut-out in the worktop, depending on the in-
stallation position.
The angle between the cut surface and the worktop
must be 90°.
2.
Ensure that the worktop has sufficient load-bearing
capacity and stability.
Use a heat- and humidity-resistant reinforcing mater-
ial for any substructure.
3.
Ensure that the fitted unit is still stable after the cut-
outs have been made.
4.
Remove any shavings.
5.
Depending on the installation position, remove the
back panel of the fitted unit.
Preparing the appliance
WARNING‒Risk of injury!
The appliance is heavy.
▶ To move the appliance, twopeople are required.
▶ Use only suitable tools and equipment.
1.
Place the appliance on a soft surface and remove
the transit bolt.
2.
Stick the seal in the designated groove and trim
it .
Loading ...
Loading ...
Loading ...