English
Congratulations on your Celestron Labs
microscope purchase. Your new Celestron
Labs microscope is a precision optical
instrument, made of the highest quality
materials to ensure durability and long
life. It is designed to give you a lifetime of
enjoyment with minimal maintenance.
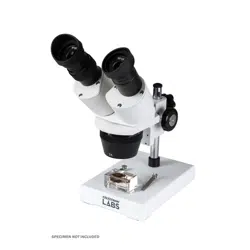
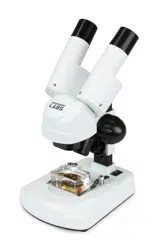
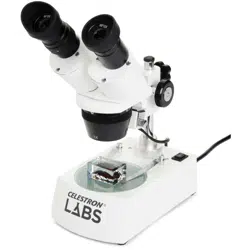
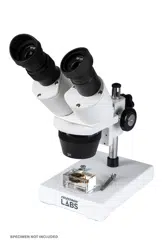
The S10-30 microscope provides a low power
range of 10x to 30x. The S10-30 is a stereo,
low-magnification microscope ideal for
examining specimens such as coins, stamps,
rocks, electronics, jewelry, watches, insects,
and other 3D objects.
Before attempting to use your Celestron Labs
microscope, please read these instructions
to familiarize yourself with the parts and
functions of the microscope. Refer to the
microscope diagrams to locate the parts
discussed in the manual. The final section
of the manual provides simple care and
maintenance tips.
IN THE BOX
- Microscope S10-30
- 1 set of wide field eyepieces— (2) 10x
- 1 reversible stage plate
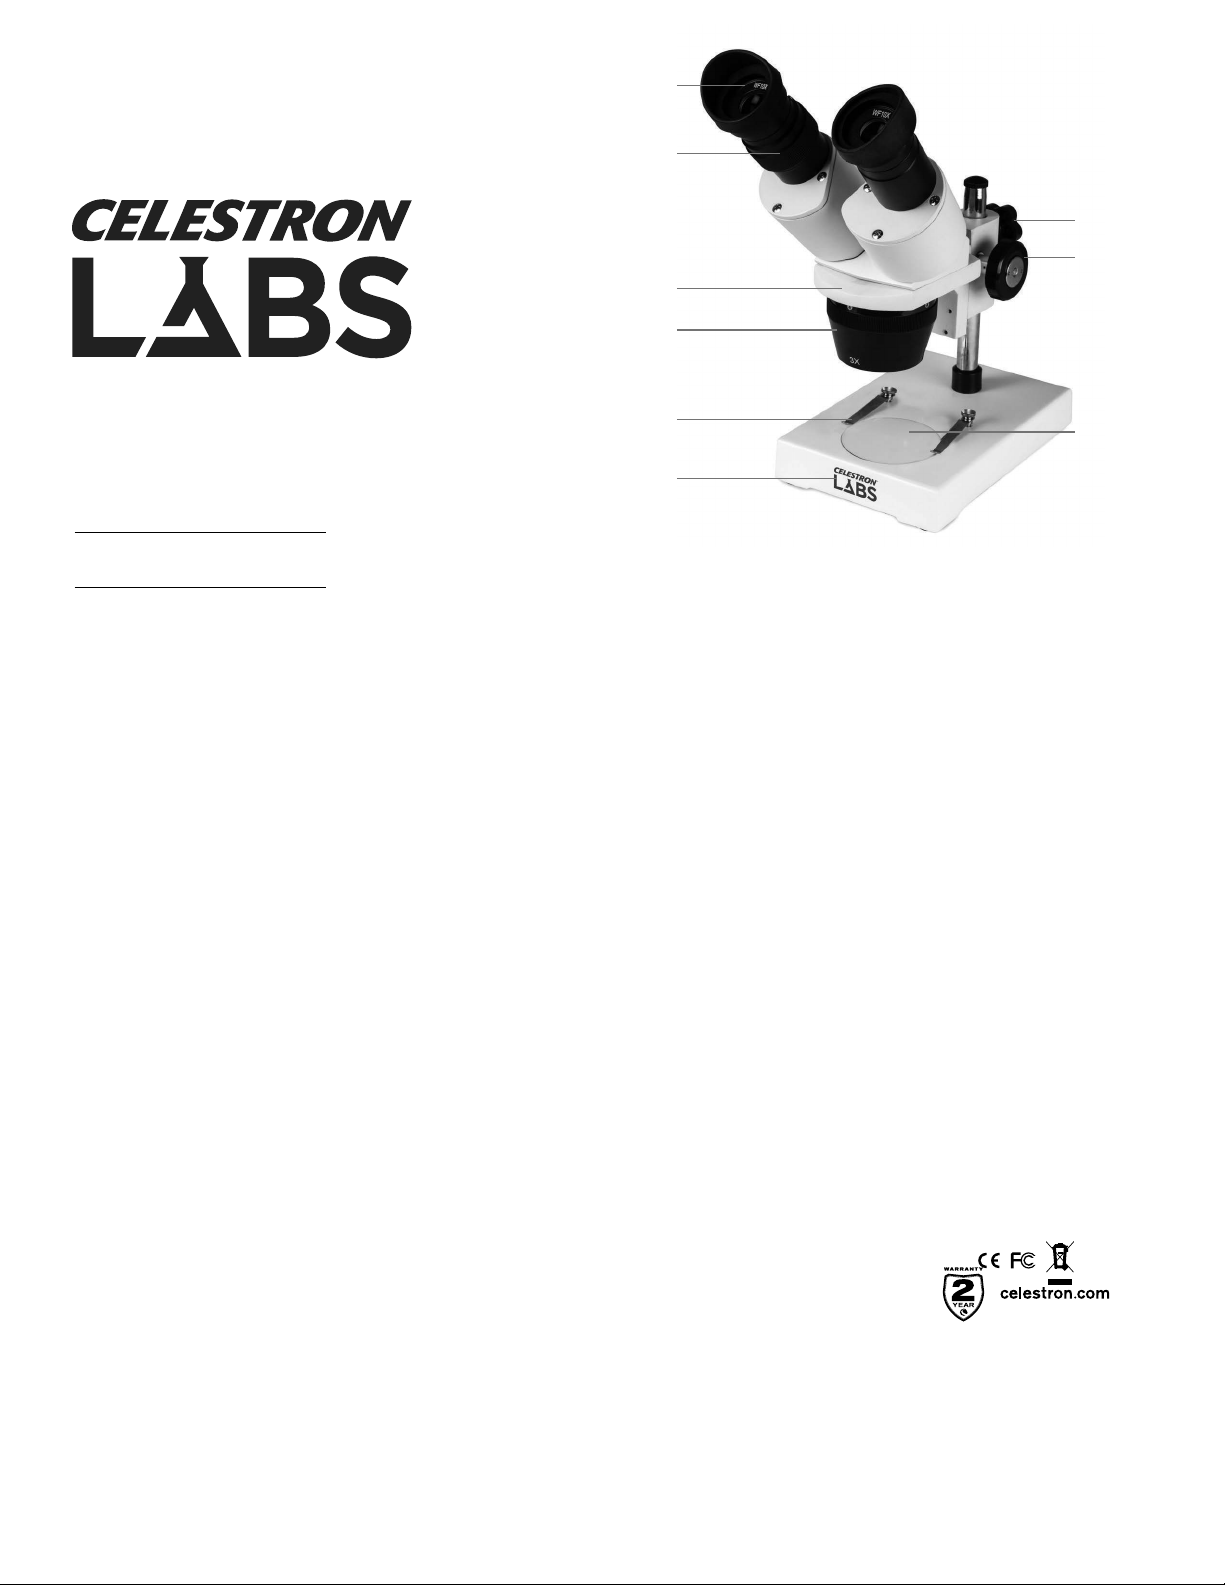
PARTS
1. Eyepieces
2. Diopter Control
3. Head
4. Objective Lens Housing
5. Stage Clips
6. Base
7. Pillar Locking Knob
8. Focus Knob
9. Stage
SPECIFICATIONS
STAGE: Stage Plate with clips
HEAD: Binocular with 45° incline
MAGNIFICATION: 10x, 30x,
FOCUSER: Coarse focus
OBJECTIVES: 1x, 3x
EYEPIECES: WF 10x
INTERPUPILLARY DISTANCE:
2.17 in - 2.95 in (55 mm - 75 mm)
WORKING DISTANCE: 2.17 in (55 mm)
DIMENSIONS: 4.75 in x 7.62 in x 11.50 in
(121 mm x 134 mm x 292 mm)
WEIGHT: 2.7 lbs (1.108 kg)
MAGNIFICATION TABLE
OBJECTIVE LENS: 1x 3x
WF 10X EYEPIECE: 10x 30x
SETTING UP YOUR
MICROSCOPE
1. Remove the Styrofoam container from the
carton.
2. Carefully remove the microscope and
accessories from container and set them
on a table, desk, or other flat surface.
3. Remove bag coverings from microscope.
4. Make sure the head (3) is parallel to the
base (6). If it is not, then hold the head
(3) with one hand and loosen the pillar
stand locking knob with the other, turning
it counterclockwise. Then rotate the head
until it is perpendicular to the base.
5. Remove eyepieces (1) from plastic bags.
6. Insert the two WF 10x eyepieces into the
eyepiece tubes on the binocular head (3).
7. If you do not wear eyeglasses, you can
install the rubber eyecups with the lips up
and facing outward. The rubber eyecups
will help stop extraneous light.
MICROSCOPE OPERATION
Before viewing specimens, please read these
sections thoroughly regarding focusing and
using the stage.
VIEWING A SPECIMEN
Stereo microscopes produce a true 3D image
of the specimen.
1. Carefully place a specimen in the center of
the stage plate.
2. Rotate the knurled ring on the objective
lens housing (4) to the 1x position. It is
best to begin viewing a specimen at low
power, then switch to higher power as
needed.
3. Look through the eyepieces and gradually
turn the focus knob (8) until the specimen
comes into focus. If there is not enough
travel in the focuser mechanism to reach
focus, it may be necessary to loosen the
pillar stand locking knob (7) and raise or
lower the entire binocular head assembly
until the image becomes sharp.
4. If higher power is desired, rotate the
objective lens housing (4) to the 3x
position and refocus until the specimen
becomes sharp.
NOTE: You may need to adjust the
interpupillary distance of the eyepieces
for better viewing. Rotate the eyepieces
up and down to adjust the eyepiece
distance. Close your right eye and
turn the left eyepiece diopter (2) until
the image is in sharp focus through
the eyepiece. Now the interpupillary
distance is set and you will only focus
with the focus knob (8).
ILLUMINATION
NOTE: You can further illuminate a specimen
by using an additional source of lighting
such as a flashlight, desk lamp, table
lamp, or bright overhead light.
CARE, MAINTENANCE AND
WARRANTY
Your Celestron Labs microscope is a precision
optical instrument and should be treated
with care at all times. Follow these care
and maintenance suggestions and your
microscope will need very little maintenance
throughout its lifetime.
• When you are done using your microscope,
remove any specimens left on the stage.
• Always place the plastic bag or dust cover
over the microscope when not in use to
help keep it clean.
• Store the microscope in a dry, clean place.
• Be very careful if using your microscope
in direct sunlight to prevent damage to the
microscope or your eyes.
• To carry your microscope, place one hand
on the “arm” of the microscope and the
other hand under the base for support. Do
not grasp your microscope by the focuser
knob or head.
• Clean the outside surfaces (metal and
plastic) with a moist cloth.
• Never clean optical surfaces with cloth or
paper towels as they can scratch optical
surfaces easily. Instead, use an air blower
or camel hair brush.
• To clean fingerprints off of optical surfaces,
use a lens cleaning agent and lens tissue
available at most photo supply stores. When
cleaning, do not rub in circles as this may
cause streaks or scratches.
• Never disassemble your microscope
or clean internal optical surfaces. Only
qualified technicians at the factory or an
authorized repair facility should attempt
these repairs.
• When handling glass specimen slides, use
care, as the edges can be sharp.
© 2021 Celestron • All rights reserved
celestron.com/support/warranties
(Products or instructions may change without
notice or obligation.)Designed and intended
for those 14 years of age and older.
Made in China
S1030
Model # 44138
1
3
2
4
6
5
7
8
9

Français
Félicitation pour l’achat de votre microscope
Celestron Labs. Votre nouveau microscope
Celestron Labs est un instrument optique de
précision, fabriqué à partir des matériaux de la
plus haute qualité lui garantissant une grande
fiabilité et une longue durée de vie. Il est conçu
pour vous offrir une vie entière de plaisir avec
une maintenance minimale.
Le microscope S10-30 permet une observation
de 10x à 30x à basse puissance. Le S10-30 est
un microscope stéréo à faible grossissement
idéal pour l’observation de spécimens tels que
des pièces, des timbres, des minéraux, des
composants électroniques, des montres, des
insectes et d’autres objets en 3D.
Avant de tenter d’utiliser votre microscope
Celestron Labs, veuillez lire ces instructions
pour vous familiariser avec les composants
et les fonctions du microscope. Consultez les
schémas du microscope pour identifier les
pièces décrites dans le mode d’emploi. La
section finale du mode d’emploi donne des
conseils simples d’entretien et de maintenance.
DANS LA BOÎTE
- Microscope S10-30
- 1 ensemble d’oculaires à large champ— (2)
10x
- 1 platine réversible
PIÈCES
1. Oculaires
2. Contrôle de dioptre
3. Tête
4. Boîtier du porte-objectif
5. Valets de la platine
6. Base
7. Verrou de la potence
8. Molette de mise au point
9. Platine
SPÉCIFICATIONS
PLATINE: Platine avec valets
TÊTE: Binoculaire avec inclinaison à 45°
GROSSISSEMENT: 10x, 30x,
SYSTÈME DE MISE AU POINT: Mise au
point grossière
OBJECTIFS: 1x, 3x
OCULAIRES: WF 10x
DISTANCE INTERPUPILLAIRE:
2,17 in - 2,95 in (55 mm - 75 mm)
DISTANCE DE FONCTIONNEMENT:
2,17 in (55 mm)
DIMENSIONS: 4,75 in x 7,62 in x 11,50 in
(121 mm x 134 mm x 292 mm)
POIDS: 2,7 lbs (1,108 kg)
TABLEAU DES
GROSSISSEMENTS
LENTILLE D’OBJECTIF: 1x 3x
WF 10X OCULAIRE: 10x 30x
INSTALLER VOTRE
MICROSCOPE
1. Sortez le conteneur de polystyrène du
carton.
2. Sortez avec soin le microscope et les
accessoires du conteneur et posez-les sur
une table, un bureau ou une autre surface
plane.
3. Retirez les sachets protecteurs
du microscope.
4. Assurez-vous que la tête (3) est parallèle à
la base (6). Si ce n’est pas le cas, tenez la
tête (3) d’une main et desserrez la molette
de verrouillage de la potence de l’autre, en
la faisant tourner dans le sens anti-horaire.
Faites ensuite tourner la tête jusqu’à ce
qu’elle soit perpendiculaire à la base.
5. Sortez les oculaires (1) des
sachets de plastique.
6. Insérez deux oculaires WF 10x dans les
tubes de la tête binoculaire (3).
7. Si vous ne portez pas de lunettes, vous
pouvez installer les œilletons de caoutchouc
avec les œillères relevées et tournées vers
l’extérieur. Les œilletons de caoutchouc
aident à bloquer la lumière parasite.
UTILISATION DU MICROSCOPE
Avant d’observer des spécimens, veuillez
lire ces sections avec attention pour savoir
comment effectuer la mise au point et utiliser
la platine.
OBSERVER UN SPÉCIMEN
Les microscopes stéréo peuvent reproduire une
image en 3D vraie d’un spécimen.
1. Placez avec soin un spécimen au centre de
la platine.
2. Faites tourner la molette striée du boîtier du
porte-objectif (4) sur la position 1x. Il est
recommandé de commencer l’observation
d’un spécimen à basse puissance, puis
de basculer sur une plus haute puissance
quand nécessaire.
3. Regardez dans les oculaires et faites
graduellement tourner la molette de mise
au point (8) jusqu’à ce que le spécimen
soit net. Si la molette ne peut tourner
suffisamment pour atteindre la mise au
point, il peut être nécessaire de desserrer la
molette de verrouillage de la potence (7) et
de lever ou d’abaisser la tête entière jusqu’à
obtention de la mise au point.
4. Si une puissance supérieure est requise,
faites tourner le boîtier du porte-objectif (4)
sur la position 3x et refaites la mise au point
jusqu’à ce que le spécimen soit net.
NOTE: Il peut être nécessaire d’ajuster la
distance interpupillaire des oculaires
pour améliorer le confort d’observation.
Faites tourner les oculaires pour les lever
ou les baisser pour ajuster la distance
entre les oculaires. Fermez l’œil droit et
faites tourner le dioptre (2) de l’oculaire
de gauche jusqu’à ce que l’image
soit nette dans l’oculaire. La distance
interpupillaire est maintenant définie et
vous n’effectuerez la mise au point dans
le futur qu’avec la molette de mise au
point (8).
ÉCLAIRAGE
NOTE: Vous pouvez illuminer le spécimen
encore plus à l’aide d’une source
supplémentaire d’éclairage comme une
lampe torche, une lampe de table ou un
plafonnier brillant.
ENTRETIEN, MAINTENANCE ET
GARANTIE
Votre télescope Celestron Labs est un
instrument optique de précision et doit
toujours être traité avec soin. Suivez ces
suggestions d’entretien et de maintenance,
et votre microscope nécessitera très peu de
maintenance tout au long de sa durée de vie.
• Lorsque vous avez fini d’utiliser votre
microscope, retirez tout spécimen restant sur
la platine.
• Placez toujours le sac plastique ou un cache
anti-poussière sur le microscope lorsque vous
ne vous en servez pas pour qu’il reste propre.
• Rangez le microscope dans un lieu
sec et propre.
• Faites attention si vous utilisez le télescope
sous la lumière directe du soleil, pour éviter
d’endommager le microscope ou vos yeux.
• Pour transporter le microscope, placez une
main sur la « potence » du microscope et
l’autre main sous la base pour le support. Ne
tenez pas le microscope par la molette de
mise au point ou la tête.
• Nettoyez les surfaces extérieures de métal ou
de plastique avec un chiffon humide.
• Ne nettoyez jamais les surfaces optiques
avec un tissu ou du papier absorbant, car
cela pourrait aisément endommager les
surfaces optiques. Au lieu de cela, utilisez
une soufflette ou une brosse en poil de
chameau.
• Pour éliminer les empreintes de doigt des
surfaces optiques, utilisez un produit de
nettoyage pour lentilles et un tissu pour
lentilles que vous pouvez acheter dans
la majorité des magasins de produits
photographiques. Lorsque vous nettoyez
les lentilles, ne faites pas de mouvements
circulaires, qui pourraient laisser des traces
ou des rayures.
• Ne démontez jamais votre microscope et
ne nettoyez jamais les surfaces optiques
internes. Seuls des techniciens qualifiés en
usine ou un centre de réparation certifié sont
autorisés à effectuer ces réparations.
• Lorsque vous manipulez des lamelles de
spécimen de verre, faites attention, car leurs
bords peuvent être coupant.
© 2021 Celestron • Tous droits réservés.
celestron.com/support/warranties
(Les produits ou les instructions peuvent
changer sans préavis ni obligation). Ce pro-
duit est conçu et prévu pour être utilisé par
des personnes âgées de 14 ans et plus.
Fabriqué en Chine
Deutsch
Herzlichen Glückwunsch zum Kauf Ihres
Mikroskops von Celestron Labs. Bei Ihrem
Mikroskop von Celestron Labs handelt es sich
um ein präzises optisches Instrument, das
aus Materialien höchster Qualität gefertigt
wurde, um Haltbarkeit und Langlebigkeit zu
gewährleisten. Es wird Ihnen während seiner
Lebensdauer viel Freude bei minimalem
Wartungsaufwand bereiten.
Das Mikroskop S10-30 bietet einen niedrigen
Vergrößerungsbereich von 10x bis 30x.
Das S10-30 ist ein Stereo-Mikroskop mit
geringer Vergrößerungsleistung und ideal
zum Untersuchen von Proben, wie Münzen,
Briefmarken, Steinen, Elektronikteilen,
Schmuck, Uhren, Insekten und anderen
3D-Objekten.
Bitte lesen Sie diese Anleitung vor Gebrauch
Ihres Mikroskops von Celestron Labs durch
und machen Sie sich mit den Teilen und
Funktionen des Mikroskops vertraut. Sehen
Sie sich die Schaubilder zum Mikroskop
an, um die in der Anleitung beschriebenen
Bauteile zu identifizieren. Im abschließenden
Abschnitt der Anleitung werden Pflege- und
Instandhaltungshinweise aufgeführt.
PACKUNGSINHALT
- Mikroskop S10-30
- 1 Set Weitfeldokulare – (2) 10x
- 1 reversibel
Objekttischplatte
TEILE
1. Okulare
2. Dioptrien
3. Kopf
4. Objektivlinsengehäuse
5. Tischklammern
6. Instrumentenbasis
7. Säulenarretierungsknopf
8. Fokusknopf
9. Objekttisch
TECHNISCHE DATEN
OBJEKTTISCH: Objekttischplatte mit
Klammern
KOPF: Binokular mit 45°-Neigung
VERGRÖSSERUNG: 10x, 30x
FOKUSSIERER: Grobfokus
OBJEKTIVE: 1x, 3x
OKULARE: WF 10x
AUGENABSTAND:
2,17 Zoll - 2,95 Zoll (55 mm - 75 mm)
ARBEITSABSTAND: 2,17 Zoll (55 mm)
ABMESSUNGEN: 4,75 Zoll x 7,62 Zoll x
11,50 Zoll (121 mm x 134 mm x 292 mm)
GEWICHT: 2,7 lbs (1,108 kg)
VERGRÖSSERUNGSTABELLE
OBJEKTIVE: 1x 3x
WF-10X-OKULAR: 10x 30x
MIKROSKOPAUFBAU
1. Nehmen Sie den Styroporbehälter aus dem
Karton.
2. Nehmen Sie vorsichtig Mikroskop und
Zubehör aus dem Karton und stellen Sie
alles auf einen Tisch, Schreibtisch oder
eine andere ebene Fläche.
3. Entfernen Sie alle Beutel über
dem Mikroskop.
4. Achten Sie darauf, dass Kopf (3) und
Instrumentenbasis (6) parallel ausgerichtet
sind. Ist dies nicht der Fall, müssen Sie
den Kopf (3) mit einer Hand festhalten
und den Säulenarretierungsknopf mit der
anderen Hand gegen den Uhrzeigersinn
lösen. Drehen Sie nun den Kopf parallel zur
Instrumentenbasis.
5. Nehmen Sie die Okulare (1) aus den
Plastikbeuteln.
6. Bringen Sie die zwei WF-10x-Okulare in
die Okulartuben am Binokularkopf (3) an.
7. Wenn Sie kein Brillenträger sind, können
Sie die Gummi-Augenmuscheln mit den
lippen nach oben und außen anbringen. Die
Gummi-Augenmuscheln schirmen Licht von
außen ab.
MIKROSKOP-BETRIEB
Bevor Sie Proben untersuchen, lesen Sie bitte
die Abschnitte bzgl. des Fokussierens und der
Verwendung der Objekttisches gründlich durch.
BETRACHTEN EINER PROBE
Stereomikroskope erzeugen ein
realitätsgetreues 3D-Bild der Proben.
1. Legen Sie eine Probe vorsichtig in die Mitte
der Objekttischplatte.
2. Drehen Sie den gerändelten Ring
des Objektivgehäuses (4) in die
1x-Position. Am besten starten Sie die
Betrachtung von Proben mit niedrigster
Vergrößerungsleistung und wechseln bei
Bedarf zu einer höheren.
3. Schauen Sie durch die Okulare und
drehen Sie schrittweise am Fokusknopf
(8), bis die Probe ins Sichtfeld rückt. Ist
zum Scharfstellen nicht genug Weg im
Fokusmechanismus möglich, kann es nötig
sein, den Säulenarretierungsknopf (7)
zu lösen und die gesamte Binokularkopf-
Baugruppe anzuheben, bis das Bild scharf ist.
4. Möchten Sie mit einer höheren
Vergrößerungsleistung arbeiten, wird
das Objektivlinsengehäuse (4) auf die
3x-Position gedreht und die Probe erneut
scharf gestellt.
HINWEIS: Möglicherweise muss der
Augenabstand der Okulare für ein optimales
Betrachten eingestellt werden. Drehen Sie
zum Einstellen des Augenabstandes die
Okulare nach oben und unten. Schließen Sie
Ihr rechtes Auge und drehen Sie die linke
Okulardioptrie (2), bis das Bild durch das
Okular scharf ist. Nun ist der Augenabstand
eingestellt und Sie fokussieren nun nur noch
mit dem Fokusknopf (8).
BELEUCHTUNG
HINWEIS: Eine Probe kann darüber hinaus
mittels einer zusätzlichen Lichtquelle,
wie z. B. einer Taschenlampe, einer
Schreibtischlampe, einer Tischlampe oder
einem hellen Oberlicht beleuchtet werden.
PFLEGE, WARTUNG UND
GEWÄHRLEISTUNG
Ihr Mikroskop von Celestron Labs ist
ein optisches Präzisionsinstrument und
muss zu jeder Zeit mit Vorsicht behandelt
werden. Befolgen Sie diese Pflege- und
Wartungsvorschläge und Ihr Mikroskop wird
während seiner Lebensdauer nur sehr wenig
Wartung benötigen.
• Entfernen Sie sämtliche auf dem Tisch
befindlichen Proben, wenn Sie mit der
Verwendung Ihres Mikroskops abschließen.
• Stülpen Sie grundsätzlich die
Plastikabdeckung oder den Staubschutz über
das Mikroskop, wenn es nicht verwendet
oder gelagert wird, um es sauber zu halten.
• Lagern Sie das Mikroskop an einem
trockenen und sauberen Ort.
• Seien Sie äußerst vorsichtig, wenn Sie
Ihr Mikroskop im direkten Sonnenlicht
verwenden, um Schäden am Mikroskop und
ihren Augen zu vermeiden.
• Wenn Sie Ihr Mikroskop bewegen, heben
Sie es mit einer Hand am “Arm“. Legen
Sie anschließend die andere Hand zur
Unterstützung unter die Instrumentenbasis.
Tragen Sie Ihr Mikroskop nicht am
Fokussierknopf oder Binokularkopf.
• Reinigen Sie äußere Oberflächen (Metall und
Kunststoff) mit einem feuchten Tuch.
• Reinigen Sie optische Oberflächen niemals
mit einem Stoff- oder Papiertuch, da
dies leicht zu Kratzern auf den optischen
Oberflächen führen kann. Verwenden
Sie stattdessen Druckluft oder eine
Kamelhaarbürste.
• Um Fingerabdrücke von optischen
Oberflächen zu entfernen, benutzen Sie bitte
Objektiv-Reinigungsmittel und Linsen-Tuch,
wie sie in Fotobedarfs-Verkaufsstellen
erhältlich sind, und reiben Sie nicht in
Kreisen, da dies zu Schrammen oder Kratzer
führen kann.
• Demontieren Sie niemals Ihr Mikroskop
oder reinigen Sie die internen optischen
Oberflächen. Dies darf nur von qualifizierten
Technikern im Werk oder anderen
autorisierten Reparatureinrichtungen
durchgeführt werden.
• Wenn Sie mit Objektträgern aus Glas
arbeiten, handhaben Sie sie mit Vorsicht, da
die Ränder scharfkantig sein können.
© 2021 Celestron • Alle Rechte vorbehalten
celestron.com/support/warranties
(Produkte oder Anleitung können ohne
Mitteilung oder Verpflichtung geändert
werden.)Für den Gebrauch durch Personen
von 14 Jahren oder älter konzipiert.
Hergestellt in China
Italiano
Congratulazioni per l’acquisto del microscopio
Celestron Labs. Il microscopio Celestron Labs
è uno strumento ottico di precisione, realizzato
con materiali di ottima qualità per garantire
resistenza e lunga durata. È ideato per fornire
un intrattenimento duraturo con una minima
manutenzione.
il microscopio S10-30 fornisce un basso indice
di ingrandimento da 10x a 30x. Il modello
S10-30 è un microscopio stereoscopico a basso
indice di ingrandimento, ideale per esaminare
campioni come monete, francobolli, rocce,
componenti elettronici, gioielli, orologi, insetti e
altri oggetti tridimensionali.
Prima di utilizzare il microscopio Celestron
Labs, leggere le presenti istruzioni per
familiarizzare con i componenti e le funzioni
del microscopio. Fare riferimento ai disegni per
identificare i componenti descritti nel manuale.
La sezione finale del manuale fornisce semplici
suggerimenti di cura e manutenzione.
NELLA CONFEZIONE
- Microscopio S10-30
- 1 set di oculari grandangolari— (2) 10x
- 1 tavolino reversibile
COMPONENTI
1. Oculari
2. Controllo diottrico
3. Testata
4. Vano obiettivo
5. Mollette fermavetrino
6. Base
7. Manopola di blocco colonna
8. Manopola di messa a fuoco
9. Piatto portaoggetti
SPECIFICHE
TAVOLINO: Tavolino con mollette
TESTATA: Binoculare con inclinazione di 45°
INGRANDIMENTO: 10x, 30x
MESSA A FUOCO: Macrometrica
OBIETTIVI: 1x, 3x
OCULARI: WF 10x
DISTANZA INTERPUPILLARE:
55 mm - 75 mm (2,17” - 2,95”)
DISTANZA DI LAVORO: 55 mm (2,17”)
DIMENSIONI: 121 mm x 134 mm x 292
mm (4,75” x 7,62” x 11,50”)
PESO: 1,108 kg (2,7 libbre)
TABELLA DEGLI
INGRANDIMENTI
OBIETTIVO: 1x 3x
OCULARE WF 10X: 10x 30x
PREPARAZIONE DEL
MICROSCOPIO
1. Rimuovere la confezione in styrofoam dal
cartone.
2. Rimuovere con cautela il microscopio e
gli accessori dalla confezione e sistemarli
su un tavolo, una scrivania o su un’altra
superficie piana.
3. Rimuovere la busta che ricopre
il microscopio.
4. Accertarsi che la testata (3) sia parallela
alla base (6). In caso contrario, tenere
con una mano la testata (3) e allentare
con l’altra la manopola di blocco del
supporto della colonna, ruotandola in
senso antiorario. Quindi ruotare la testata
fino a quando è perpendicolare alla base.
5. Rimuovere gli oculari (1) dalle
buste in plastica.
6. Inserire i due oculari WF 10x negli
appositi tubi sulla testata binoculare (3).
7. Se non si indossano occhiali, è possibile
sistemare le coppette in gomma con i
lembi rivolti verso l’alto e verso l’esterno.
Le coppette in gomma impediscono la
penetrazione della luce.
FUNZIONAMENTO DEL
MICROSCOPIO
Prima di procedere a osservare i campioni,
leggere attentamente le presenti sezioni che
riguardano la messa a fuoco e l’utilizzo del
tavolino.
VISUALIZZAZIONE DI UN
CAMPIONE
I microscopi stereoscopici producono
un’immagine reale 3D del campione.
1. Sistemare con cautela un campione al
centro del tavolino.
2. Ruotare l’anello zigrinato sul vano
obiettivo (4) in posizione 1x. È preferibile
iniziare a visualizzare un campione con
un basso indice di ingrandimento, quindi
passare a un ingrandimento maggiore se
necessario.
3. Guardare attraverso gli oculari e ruotare
gradualmente la manopola di messa
a fuoco (8) fino alla messa a fuoco
del campione. Se il movimento del
meccanismo di messa a fuoco non è
sufficiente per raggiungere la messa
a fuoco, potrebbe essere necessario
allentare la manopola di blocco del
supporto della colonna (7) e sollevare o
abbassare l’intera testata binoculare fino
a ottenere un’immagine nitida.
4. Se si desidera un ingrandimento
maggiore, ruotare il vano obiettivo (4)
alla posizione 3x e rimettere a fuoco fino
a quando il campione diventa nitido.

NOTA: Potrebbe essere necessario regolare
la distanza interpupillare degli oculari per
una visione migliore. Ruotare gli oculari
verso l’alto e verso il basso per regolare
la distanza degli stessi. Chiudere l’occhio
destro e ruotare l’oculare diottrico sinistro
(2) fino a quando l’immagine è messa
a fuoco nell’oculare. Ora la distanza
interpupillare è impostata e la messa a
fuoco avviene solo attraverso la manopola di
messa a fuoco (8).
ILLUMINAZIONE
NOTA: È possibile illuminare ulteriormente
un campione utilizzando una fonte di
illuminazione aggiuntiva come una torcia,
una lampada da tavolo o da scrivania o un
punto luce alto.
CURA, MANUTENZIONE E
GARANZIA
Il microscopio Celestron Labs è uno strumento
ottico di precisione e deve essere sempre
trattato con cura. Seguire questi suggerimenti
per la cura e la manutenzione per assicurare
che il microscopio richieda pochissima
manutenzione nel corso della sua durata utile.
• Una volta terminato l’uso del microscopio,
rimuovere eventuali campioni lasciati sul
tavolino.
• Posizionare sempre la busta di plastica o
il copri-polvere sul microscopio quando lo
stesso non è in uso per mantenerlo pulito.
• Conservare il microscopio in un
luogo fresco e asciutto.
• Prestare molta attenzione in caso di utilizzo
del microscopio alla luce diretta del sole per
evitare danni al microscopio o agli occhi.
• Per trasportare il microscopio, poggiare una
mano sul “braccio” del microscopio e l’altra
mano sotto la base per sostenerla. Non
afferrare il microscopio per la manopola di
messa a fuoco o per la testata.
• Pulire le superfici esterne (metallo e
plastica) con un panno umido.
• Non pulire mai le superfici ottiche con
panni o salviette di carta in quanto possono
facilmente graffiare la superficie. In
alternativa, usare un phon o un pennello in
setole di cammello.
• Per pulire le impronte dalle superfici ottiche,
utilizzare un agente pulente per lenti e un
panno per lenti disponibili nei principali
negozi fotografici. Durante la pulizia, non
strofinare in modo circolare, in quanto ciò
potrebbe causare striature e graffi.
• Mai smontare il microscopio o pulire le
superfici ottiche interne. Solo tecnici
qualificati in fabbrica o un centro di
riparazione autorizzato possono eseguire tali
riparazioni.
• In caso di manipolazione di vetrini in vetro,
prestare molta attenzione in quanto i bordi
possono essere taglienti.
© 2021 Celestron • Tutti i diritti riservati.
celestron.com/support/warranties
(I prodotti o le istruzioni possono essere
modificati senza previa notifica od obbligo.)
Questo dispositivo non è destinato all’uso da
parte di minori di 14 anni.
Prodotto in Cina
Español
Felicidades por su adquisición de un
microscopio Celestron Labs. Su microscopio
Celestron Labs es un instrumento óptico de
precisión, fabricado con materiales de la
mejor calidad para garantizar su resistencia
y larga vida útil. Está diseñado para
ofrecerle toda una vida de satisfacción con
un mantenimiento mínimo.
El microscopio S10-30 ofrece una gama de
potencia baja, de 10x a 30x. El S10-30 es
un microscopio de bajo aumento estéreo
perfecto para examinar especímenes como
monedas, sellos, minerales, electrónica,
joyería, relojes, insectos y otros objetos
tridimensionales.
Antes de intentar usar su microscopio
Celestron Labs, lea estas instrucciones para
familiarizarse con las piezas y funciones
del microscopio. Consulte el diagrama
del microscopio para encontrar las piezas
que se tratan en este manual. La última
sección del manual ofrece recomendaciones
sencillas de cuidados y mantenimiento.
CONTENIDO DEL EMBALAJE
- Microscopio S10-30
- 1 kit de oculares de gran angular -(2) 10x
- 1 placa de soporte reversible
PIEZAS
1. Oculares
2. Control de dioptría
3. Cabezal
4. Chasis de lente de objetivo
5. Clips del soporte
6. Base
7. Mando de bloqueo de altitud
8. Mando de enfoque
9. Soporte
ESPECIFICACIONES
SOPORTE: Placa de soporte con clips
CABEZAL: Binocular con inclinación de 45º
AUMENTO: 10x, 30x,
ENFOQUE: Enfoque aproximado
OBJETIVOS: 1x, 3x
OCULARES: WF 10x
DISTANCIA INTERPUPILAR:
2,17 in - 2,95 in (55 mm - 75 mm)
DISTANCIA OPERATIVA: 2,17 in (55 mm)
DIMENSIONES: 4,75 in x 7,62 in x 11,50
in (121 mm x 134 mm x 292 mm)
PESO: 2,7 lbs (1,108 kg)
TABLA DE AUMENTO
LENTE DE OBJETIVO: 1x 3x
OCULAR WF 10X: 10x 30x
PREPARACIÓN DEL
MICROSCOPIO
1. Saque el embalaje de espuma de la caja.
2. Saque cuidadosamente el microscopio y
los accesorios del embalaje y colóquelos
sobre una mesa, escritorio u otra
superficie plana.
3. Saque la bolsa que cubre el microscopio.
4. Asegúrese de que el cabezal (3) quede
paralelo a la base (6). Si no lo está,
aguante el cabezal (3) con una mano y
afloje el mando de bloqueo del pilar con
la otra, girándolo a la izquierda. Gire el
cabezal hasta que quede perpendicular
a la base.
5. Saque los oculares (1) de las bolsas de
plástico.
6. Introduzca los dos oculares WF 10x en los
tubos de ocular del cabezal binocular (3).
7. Si no lleva gafas, puede instalar las
almohadillas de goma con los labios
arriba y mirando hacia fuera. Las
almohadillas de goma ayudarán a detener
la luz exterior.
USO DEL MICROSCOPIO
Antes de observar especímenes, lea por
completo estas secciones sobre enfoque y
uso del soporte.
OBSERVAR UN ESPÉCIMEN
Los microscopios estéreo crean una imagen
3D real del espécimen.
1. Coloque cuidadosamente un espécimen
en el centro de la placa del soporte.
2. Gire la arandela rugosa sobre el chasis
de la lente de objetivo (4) a la posición
1x. Es preferible comenzar observando
un espécimen a baja potenica y cambiar
a una potencia superior según sea
necesario.
3. Mire por los oculares y gire lentamente
el mando de enfoque (8) hasta que
el espécimen quede enfocado. Si el
mecanismo de enfoque no tiene el
recorrido suficiente para enfocar, puede
ser necesario aflojar el mando de bloqueo
del pilar (7) y levante o baje el cabezal
binocular hasta que la imagen quede
definida.
4. Si se desea una potencia superior, gire
el chasis de la lente de objetivo (4) a la
posición 3x y vuelva a enfocar hasta que
el espécimen quede definido.
NOTA: Puede tener que ajustar la distancia
interpupilar de los oculares para una vista
mejor. Gire los oculares arriba y abajo para
ajustar la distancia del ocular. Cierre el ojo
derecho y gire la dioptría del ocular izquierdo
(2) hasta que la imagen quede definida
en el ocular. Ahora se habrá establecido la
distancia interpupilar y solamente tendrá que
enfocar con el mando de enfoquen (8).
ILUMINACIÓN
NOTA: Puede iluminar más un espécimen
usando una fuente de luz adicional
como una linterna, lámpara de
escritorio, de sobremesa o una luz
cenital potente.
CUIDADOS, MANTENIMIENTO
Y GARANTÍA
Su microscopio Celestron Labs es un
instrumento óptico de precisión y debe
tratarse con cuidado en todo momento.
Siga estas recomendaciones de cuidados y
mantenimiento y su microscopio necesitará
de muy poco mantenimiento durante su
vida útil.
• Cuando termine de usar el microscopio,
saque cualquier espécimen que quede
sobre el soporte.
• Coloque siempre la bolsa de plástico o la
cubierta para polvo sobre el microscopio
cuando no lo use para mantenerlo limpio.
• Guarde el microscopio en un
lugar seco y limpio.
• Tenga mucho cuidado si usa su
microscopio a la luz del sol directa para
evitar daños al microscopio o a su vista.
• Para transportar su microscopio,
coloque una mano sobre el “brazo” del
microscopio y la otra mano bajo la base
como apoyo. No agarre el microscopio por
el mando de enfoque ni el cabezal.
• Limpie las superficies externas (metales y
plásticos) con una gamuza humedecida.
• No limpie nunca las superficies ópticas
con gamuzas o papel, se pueden rayar con
facilidad. En su lugar, use una perilla o un
pincel de pelo de camello.
• Para limpiar las huellas dactilares de
las superficies ópticas, use un agente
limpiador de lentes y papel para lentes,
disponibles en la mayoría de tiendas
de fotografía. Al limpiar, no frote en
círculos, podría provocar líneas y rayar la
superficie.
• No desmonte nunca el microscopio ni
limpie las superficies ópticas internas.
Estas reparaciones deben ser intentadas
exclusivamente por técnicos cualificados
en la fábrica o una instalación de
reparaciones autorizada.
• Cuando manipule portamuestras de
especímenes de cristal, tenga cuidado, los
bordes pueden estar afilados.
© 2021 Celestron • Todos los derechos
reservados
celestron.com/support/warranties
(Los productos o instrucciones pueden
modificarse sin previo aviso u obligación).
Diseñado y pretendido para personas de 14
o más años de edad. Fabricado en China