Loading ...
Loading ...
Loading ...
en Installation instructions
58
¡ The appliance must only be connected using the
power cable provided.
¡ The power cable must be plugged in at the rear of
the appliance until you hear a clicking sound. A 3 m
power cable can be obtained from the after-sales
service.
¡ The power cable must only be replaced with a cable
from the original manufacturer. This is available from
after-sales service.
¡ Contact protection must be guaranteed by the in-
stallation.
¡ If the display on the appliance remains dark, it has
not been connected correctly. Disconnect the appli-
ance from the mains and check the connection.
Electrically connect the appliance with the
protective contact plug
Note:The appliance must only be connected to a pro-
tective contact socket that has been correctly installed.
▶
Insert the plug into the protective contact socket.
When the appliance is installed, the mains plug of
the power cord must be freely accessible. If free ac-
cess is not possible, an isolating switch must be in-
tegrated into the permanent electrical installation ac-
cording to the installation regulations.
Electrically connecting an appliance without a
protective contact plug
Note:Only licensed specialists may connect the appli-
ance. Damage caused by incorrect connection is not
covered under the warranty.
An isolating switch must be integrated into the perman-
ent electrical installation according to the installation
regulations.
1.
Identify the phase and neutral conductors in the
socket.
The appliance may be damaged if it is not connec-
ted correctly.
2.
Connect the hob in accordance with the connection
diagram.
See the rating plate for the voltage.
3.
Connect the wires of the mains power cable accord-
ing to the colour coding:
‒ Green/yellow = Protective conductor
‒ Blue = Neutral conductor
‒ Brown = Phase (external conductor)
32.10 Water connection
In order to safely connect the appliance to the water
connection, follow these instructions.
¡ The appliance is backflow-proof.
¡ Follow the regulations of the local water supply
company.
Connecting the appliance to the water
connection
Note:
The appliance must only be connected to a cold water
connection that fulfils the following conditions:
¡ ¾" connection (26.4mm)
¡ Water pressure 0.2-1MPa (2-10bar)
¡ Max. rated water overpressure 1MPa (10bar)
¡ Min. 10 litres/minute
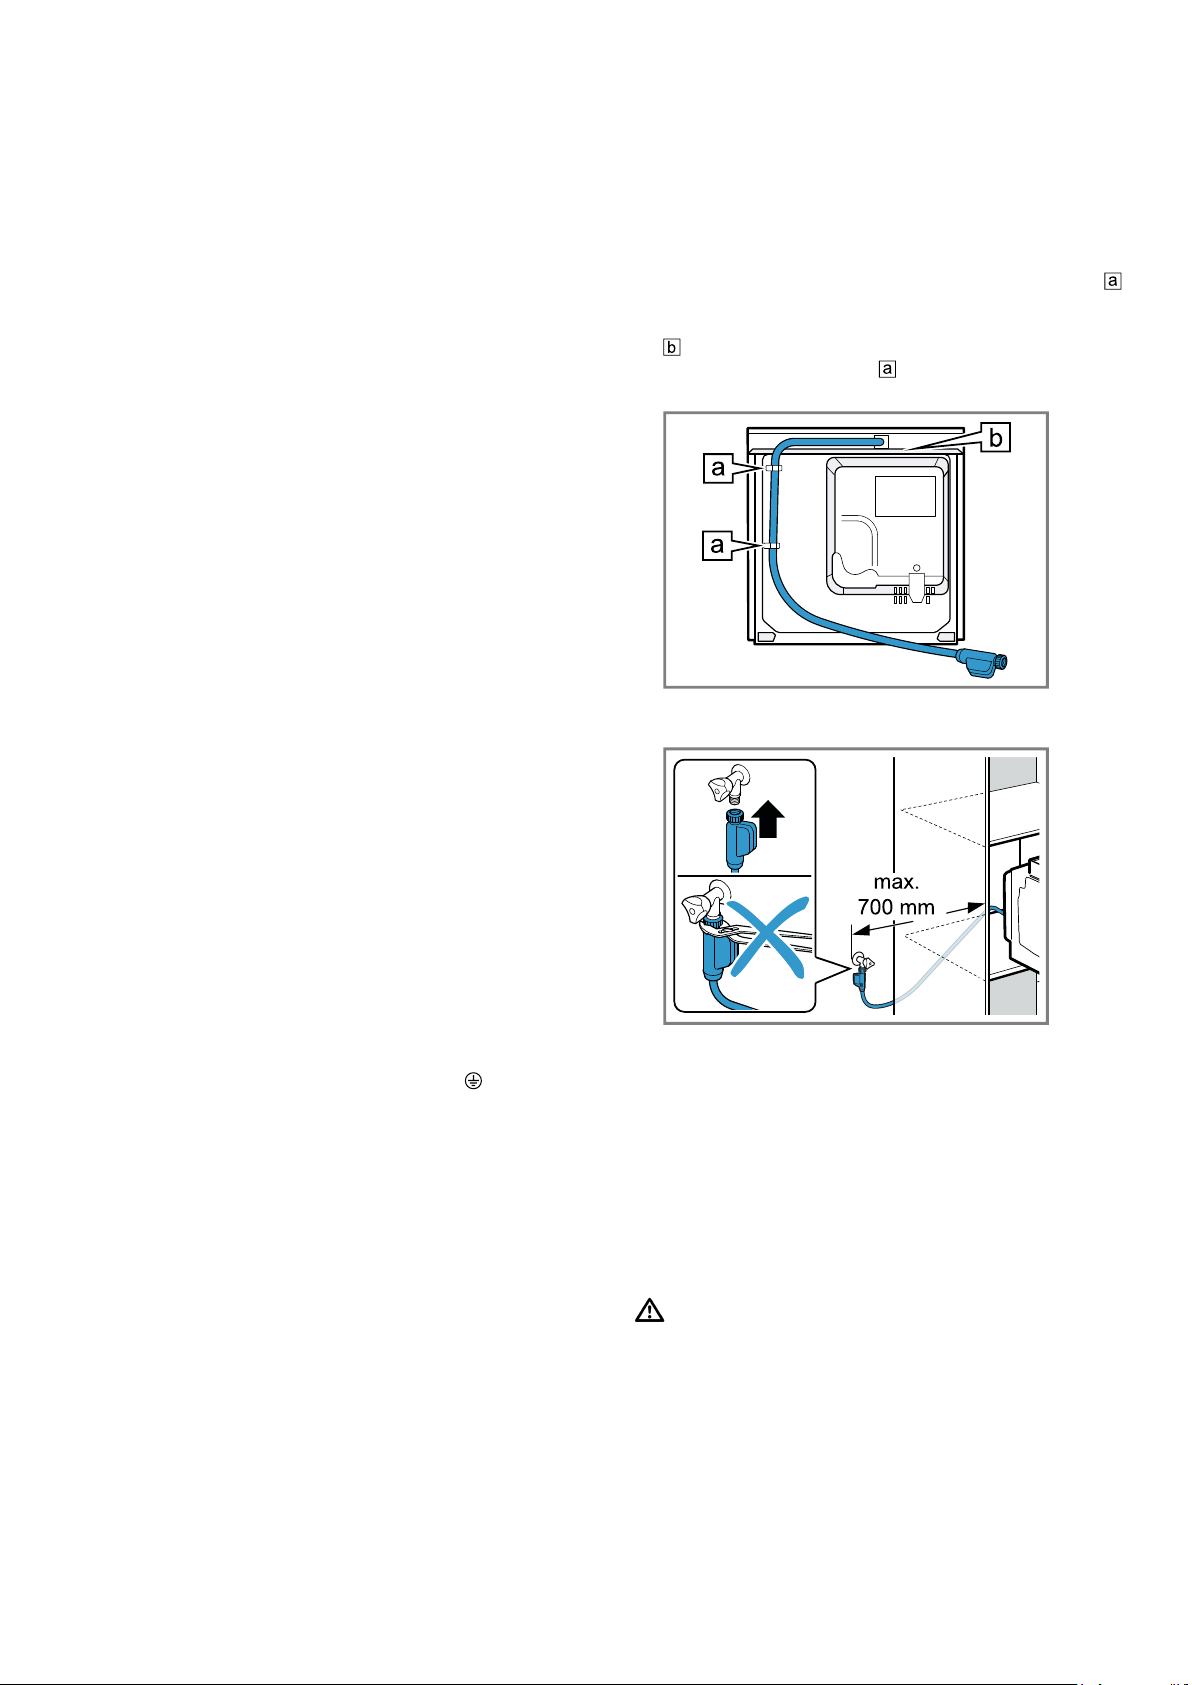
Requirements
¡ The water connection for the supply hose must never
be located directly behind the appliance and must
always be accessible.
¡ The water connection must be 150mm lower than
the upper edge of the appliance.
1.
Remove the upper transport bolt.
2.
Remove the supply hose from the hose clamps
on the rear of the appliance.
3.
Guide the supply hose downwards within the recess
.
4.
Open the hose clamps and reinsert the supply
hose.
5.
Install the supply hose with connection elbow on the
domestic connection.
Only tighten the plastic union nut by hand.
Do not subject the supply hose to tension, trap or
squash it, or bend it too tightly.
If the hose length is not sufficient, you can use a
hose extension. A hose extension with a length of
2m is available from customer service.
6.
Check the water connection for leak-tightness.
In the event of a leak, stop the water again immedi-
ately and tighten the connection.
32.11 Installing the appliance
WARNING‒Risk of injury!
Opening the appliance door without installing the door
handle and panels may result in injury.
▶ Operate the appliance only with the door handle
and the panels fitted.
Note:Do not use a cordless screwdriver to secure the
panels and door handle. It may damage them.
Loading ...
Loading ...
Loading ...