Loading ...
Loading ...
Loading ...
Initial setup 7
f
Start, pause or resume media playback
.
g
/
Skip to the previous or next video file.
h
Return to the previous screen or exit the
current screen.
i
Navigation buttons (Up, Down, Left, Right)
• Navigate items on the screen.
• Press / to change the value for the
current setting
.
j
Quick access to the setup options (e.g.
picture and sound options).
k
Switch the projector on or to standby.
3 Initial setup
Notice
Make sure all devices are disconnected
from their power supplies before
establishing or changing any
connections.
Place the projector
Place the projector on a flat surface such as a
table in front of the projection surface.
Connect to power supply
CAUTION!
Always use the button to turn the
projector on and off.
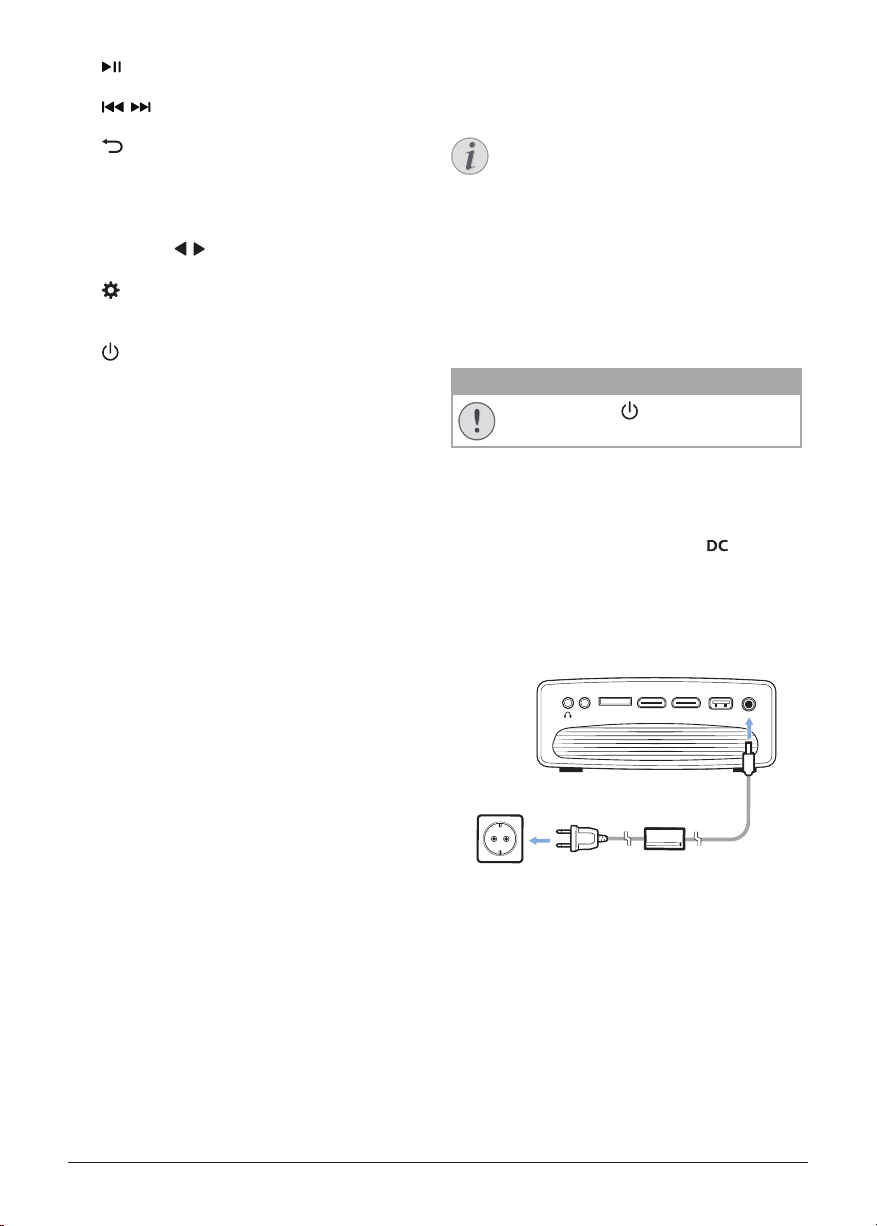
1 Select a supplied power cable with the
correct plug (EU/UK/US/CH).
2 Connect the power cable to the AC adapter.
3 Connect the AC adapter to the
socket
on the projector.
4 Connect the power cable to an electrical
socket.
• The LED on the projector lights up in
red.
a
c
d
MICRO SDAV HDMI 1HDMI 2USB DC
b
Loading ...
Loading ...
Loading ...