Loading ...
Loading ...
Loading ...
14
| Operation
Napoleon.com | BUILT-IN Series
Operation
WARNING! Disassemble rotisserie components when finished cooking, wash with warm soapy water, and store
indoors.
WARNING! Use heat resistant grilling gloves when handling the hot rotisserie components.
WARNING! Disconnect rotisserie plug from the outlet when the grill is not in use.
!
DID YOU
KNOW?
You can remove the
cooking grids if they
interfere with cooking
larger cuts of meat.
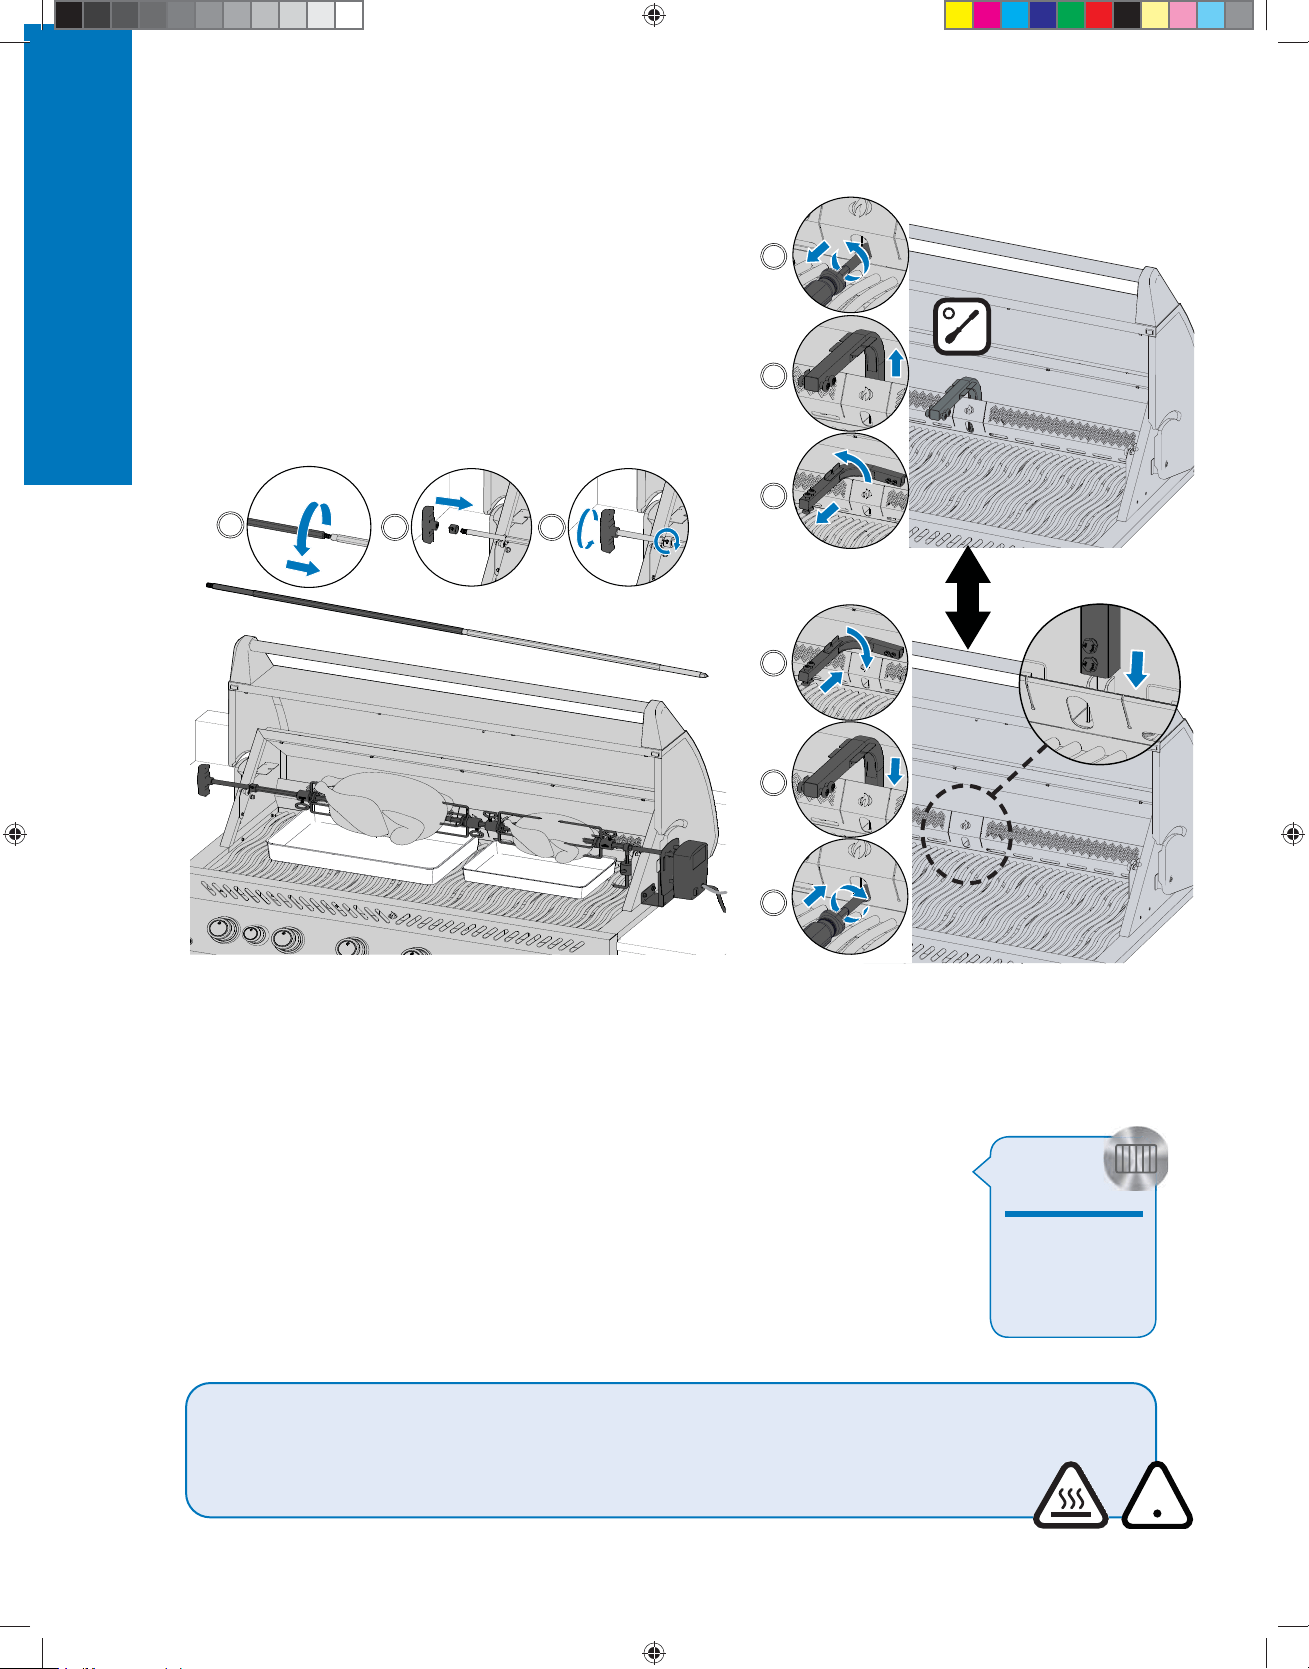
Spit Rod: Option 3
• After removing both warming racks and installing the
rotisserie motor, you need to remove the Rotisserie
Support Arm.
• Carefully remove the two fasteners securing the Rotisserie
Support Arm to the grill.
• Once the Rotisserie Support Arm has been removed,
install the rod extension by inserting the threaded end
and turning clockwise into the corresponding end of the
spit rod.
• Follow steps 3-6 from ''Using the Rear Burner and
Rotisserie Kit'.
2 3
1
3
2
1
3
2
1
7/16"/12mm
7/16"/12mm
x2
x2
x2
x2
Adding Support Arm
Removing Support Arm
Tips about using the Rotisserie:
• Operate the rear burner on high until the meat
browns. Reduce heat. Keep lid closed.
• Use a thermometer to check the internal
temperature of the meat.
• Roasts and poultry should brown on the outside
and stay tender on the inside.
• Use drippings to baste and make gravy.
• A 3-pound chicken takes approximately 1 ½
hours on medium to high.
• Be mindful of your rotisserie motor capacity.
Never overload your equipment.
• Be sure to always set an evenly balanced load
on your rotisserie.
How to cook multiple chickens
1. Tie or skewer wings to the body of the
chickens.
2. Slide rotisserie fork onto spit rod.
3. Thread first chicken onto spit rod until
it is held into place by the rotisserie
fork. Tighten.
4. Thread next 2 chickens onto spit rod
so all the chickens are close together.
5. Slide second rotisserie fork onto spit
rod and push into chicken until all 3
chickens are squeezed together tightly.
Tighten.
Operation
Loading ...
Loading ...
Loading ...