Loading ...
Loading ...
Loading ...
12
Technical data
Power Supply
120 Volts 60 Hz
Amperes Watts
9.2 1100
Installation notes
1. The warming drawer support surface must be a minimum 3/4”
(2cm) thick plywood platform.
It must support 100 pounds.
The platform must be solid, level and flush with the bottom of
the cabinet cut out.
2. Use extreme caution when moving or installing the drawer. It is
very heavy.
DO NOT LIFT THE WARMING DRAWER BY THE DRAWER
HANDLE.
3. Be very careful when moving or installing the warming drawer
to avoid damage to the frame or damage to the cabinets.
4. For best performance results make sure the warming drawer is
leveled before completing installation. There is no way to level
the warming drawer after it has been installed. If the installation
is not level, the door may slide open or not seal tightly, allowing
heat to escape.
NOTE: If installing the warming drawer below another
product, refer to that product’s literature for any installation
requirements.
5. Be careful when placing drawer. DO NOT pinch the conduit
between the drawer back.
WARNING
Before installing or removing, turn power OFF at the service
panel. Lock service panel to prevent power from being turned
ON accidentally.
Securely fasten drawer to cabinet using the screws provided.
Failure to do so could result in warming dreawer moving or
tipping during use and causing damage to the drawer or
cabinets or personal injury.
Know how to disconnect the power to the warming drawer at
the circuit breaker or fuse box in case of an emergency.
CAUTION
Unit is heavy and requires at least two people or proper
equipment to move.
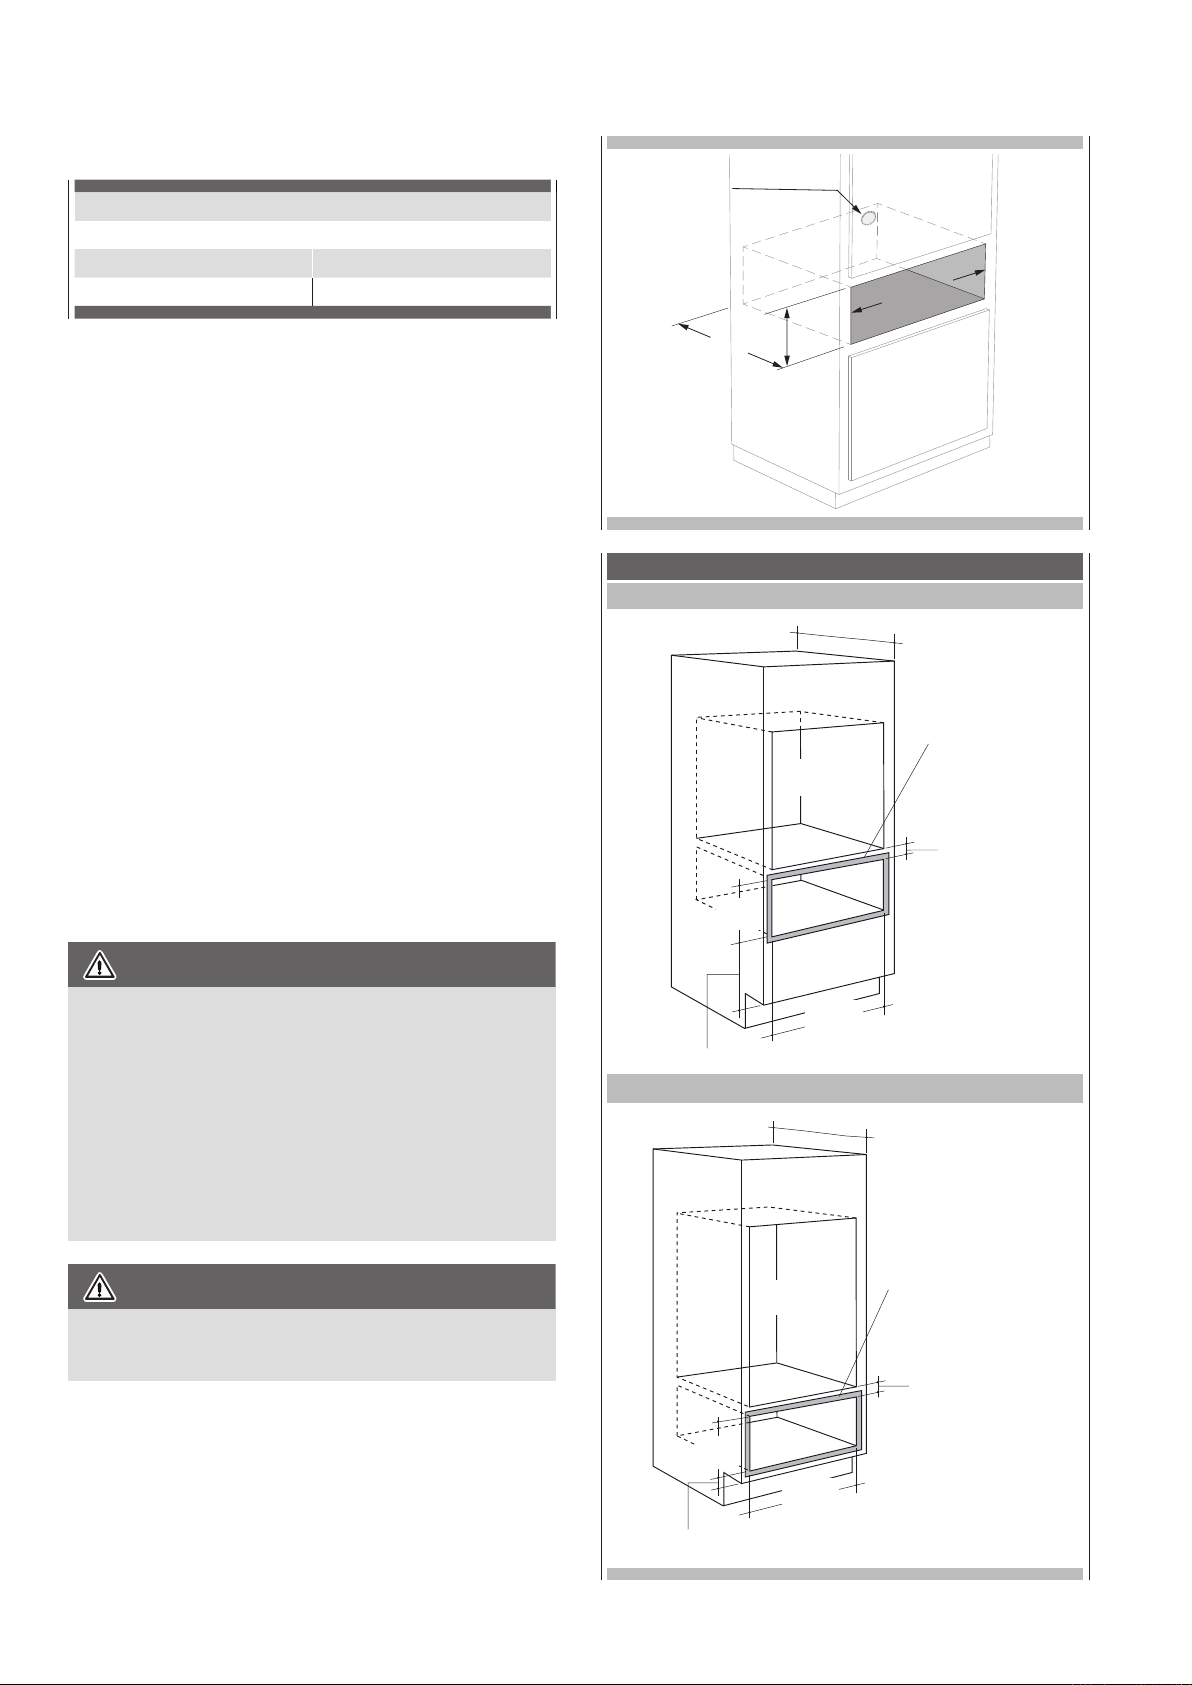
Electrical Location
24" (610)
9-1/4"
(235)
28-7/16
(722)
INSTALLATION OPTIONS
INSTALLATION BELOW A SINGLE OVEN
1” Min. Above Toekick or Adjust o Oven Installation Height
24” (610) Min. Inside
Oven
Cutout
3/4” Min.
(20) Min.
9-1/4”
(235)
28-3/8”
(722)
Allow 5/8”
Overlapon All Sides
INSTALLATION BELOW A DOUBLE OVEN
1” Min. Above Toekick
24” (610) Min. Inside
3/4” Min.
(20) Min.
28-3/8”
(722)
9-1/4”
(235)
Oven
Cutout
Allow 5/8” Overlap
on All Sides
Loading ...
Loading ...
Loading ...