Loading ...
Loading ...
Loading ...
en Installation instructions
18
3.
Use the enclosed screws are suitable only for con-
crete ceilings.
4.
Install the appliance with a fixing material which is
sufficiently stable and has been adjusted accord-
ingly for both the structural conditions and the
weight of the appliance.
5.
Check the cut-out area for existing cables of other
appliances.
Preparing the ceiling
1.
Cover the hob to prevent damage.
2.
Determine the position of the frame and thereby the
middle based on the position of the hob.
3.
Ensure that there are no electrical wires, gas pipes
or water pipes in the area where holes are to be
drilled.
4.
Drill four holes with a diameter of 6 mm for the fix-
ing.
5.
Drill the hole depth in accordance with the length of
the screws.
Fitting the frame
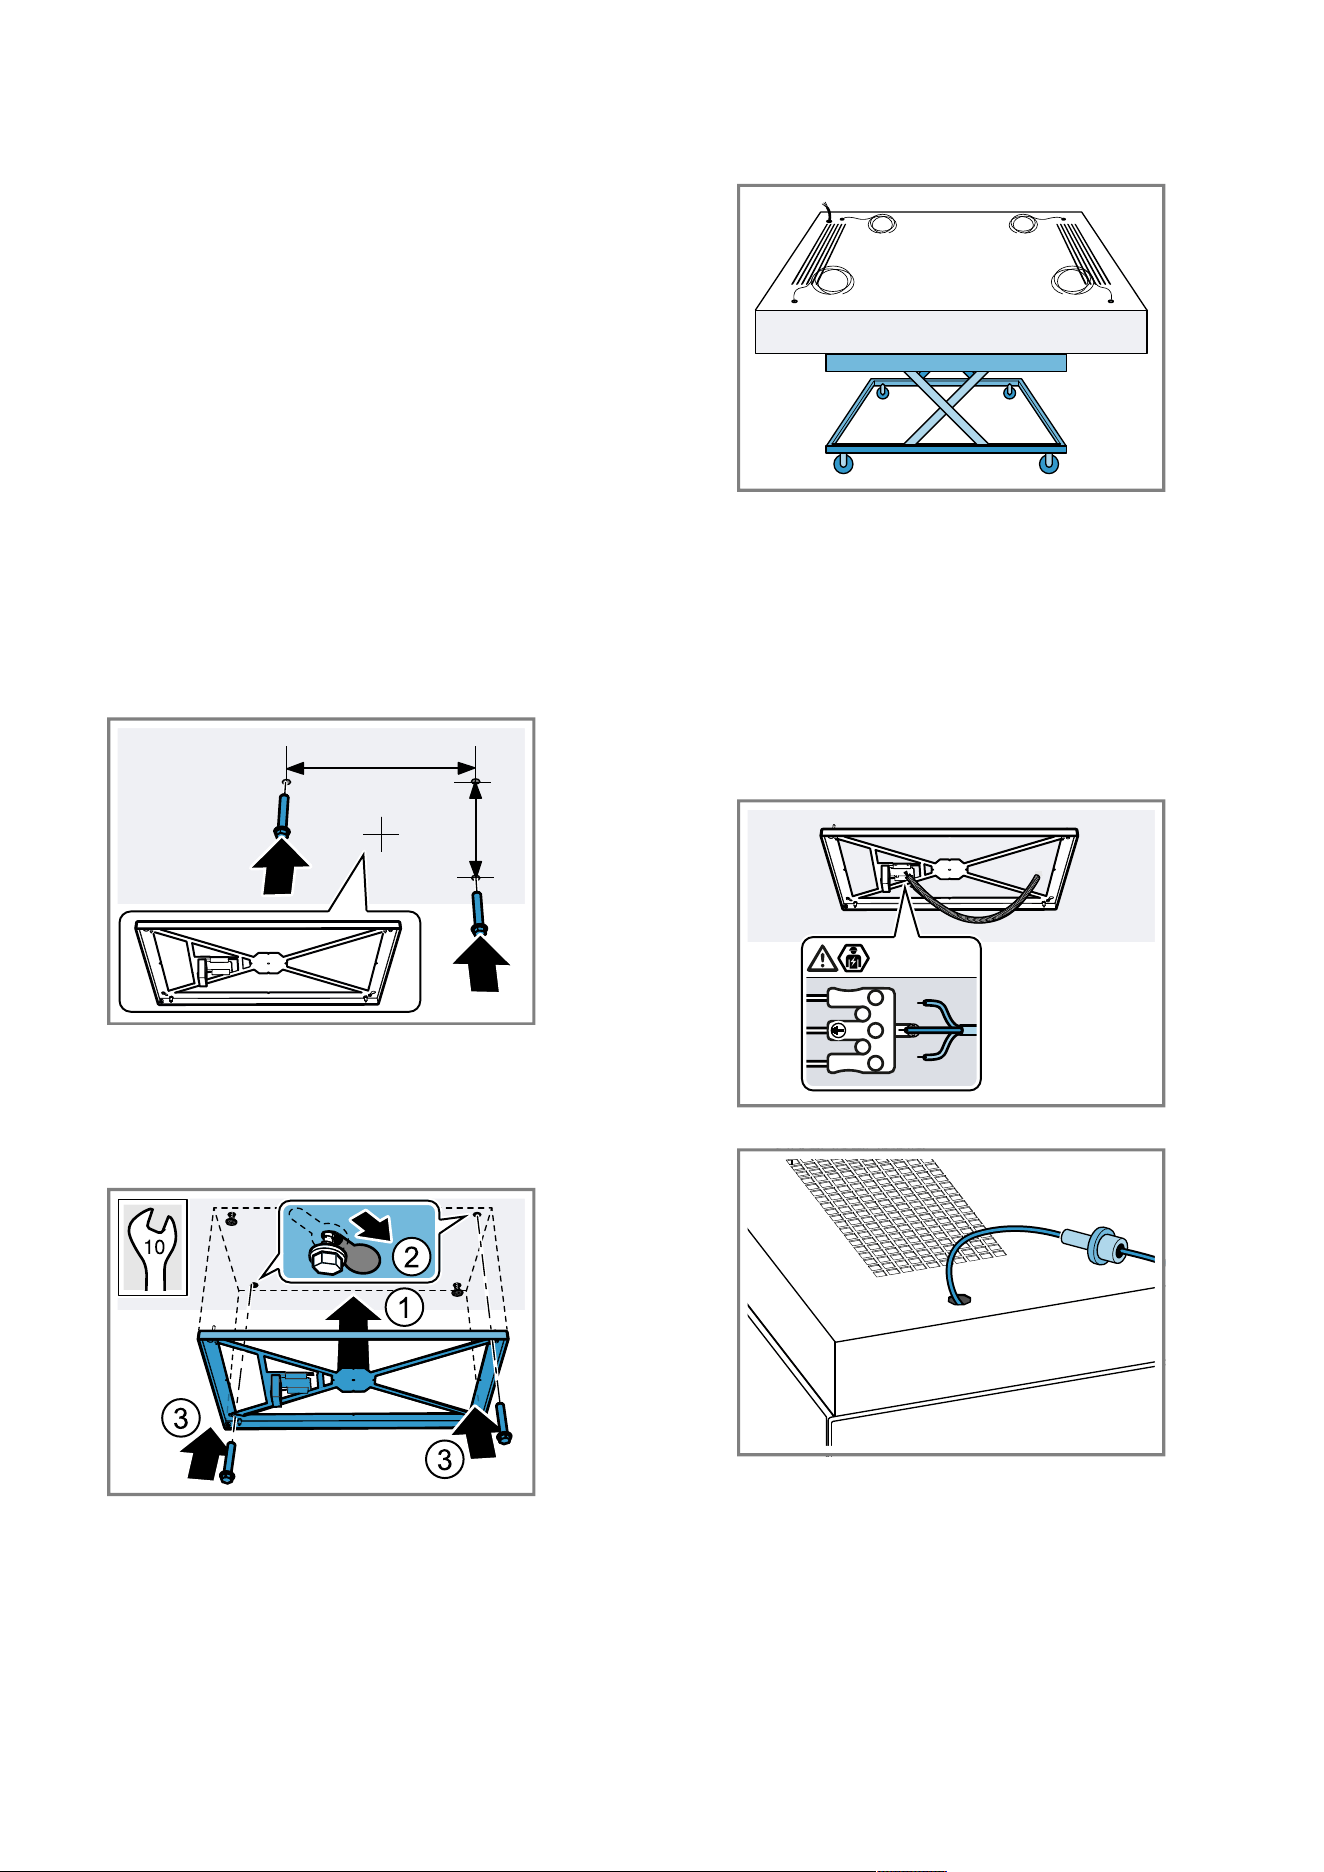
1.
Screw the two opposite screws into the ceiling until
they protrude out of the ceiling by approx. 7 mm.
900 mm
492 mm
Note the correct position of the screws and the
frame.
2.
Guide the frame through the screws on the ceiling.
3.
Move the frame so that the screws lock into place in
the key hole openings and can be screwed in
tightly.
4.
Align the frame and use two screws to secure it in
place.
5.
Place a scissor lift table or another suitable device
under the appliance.
Do not place the scissor lift table on the hob.
6.
Position the appliance on the scissor lift table so
that the appliance is on the frame.
Do not place the appliance on the grease filters as
these could be damaged.
7.
Leave a gap of at least 700 mm between the hob
and the lower edge of the appliance.
When securing cables, ensure that the maximum
distance between the frame cover and the top edge
of the appliance is 1.20 m.
Connecting the appliance
1.
Pull the protective tube over the on-site cable.
Shorten the protective tube if necessary.
2.
Insert the on-site cable into the terminal plug.
LN
3.
Thread the 4 cables into the lock nuts.
To avoid damaging the appliance's limit switch, do
not insert the lock nuts into the openings.
Loading ...
Loading ...
Loading ...