Loading ...
Loading ...
Loading ...
17
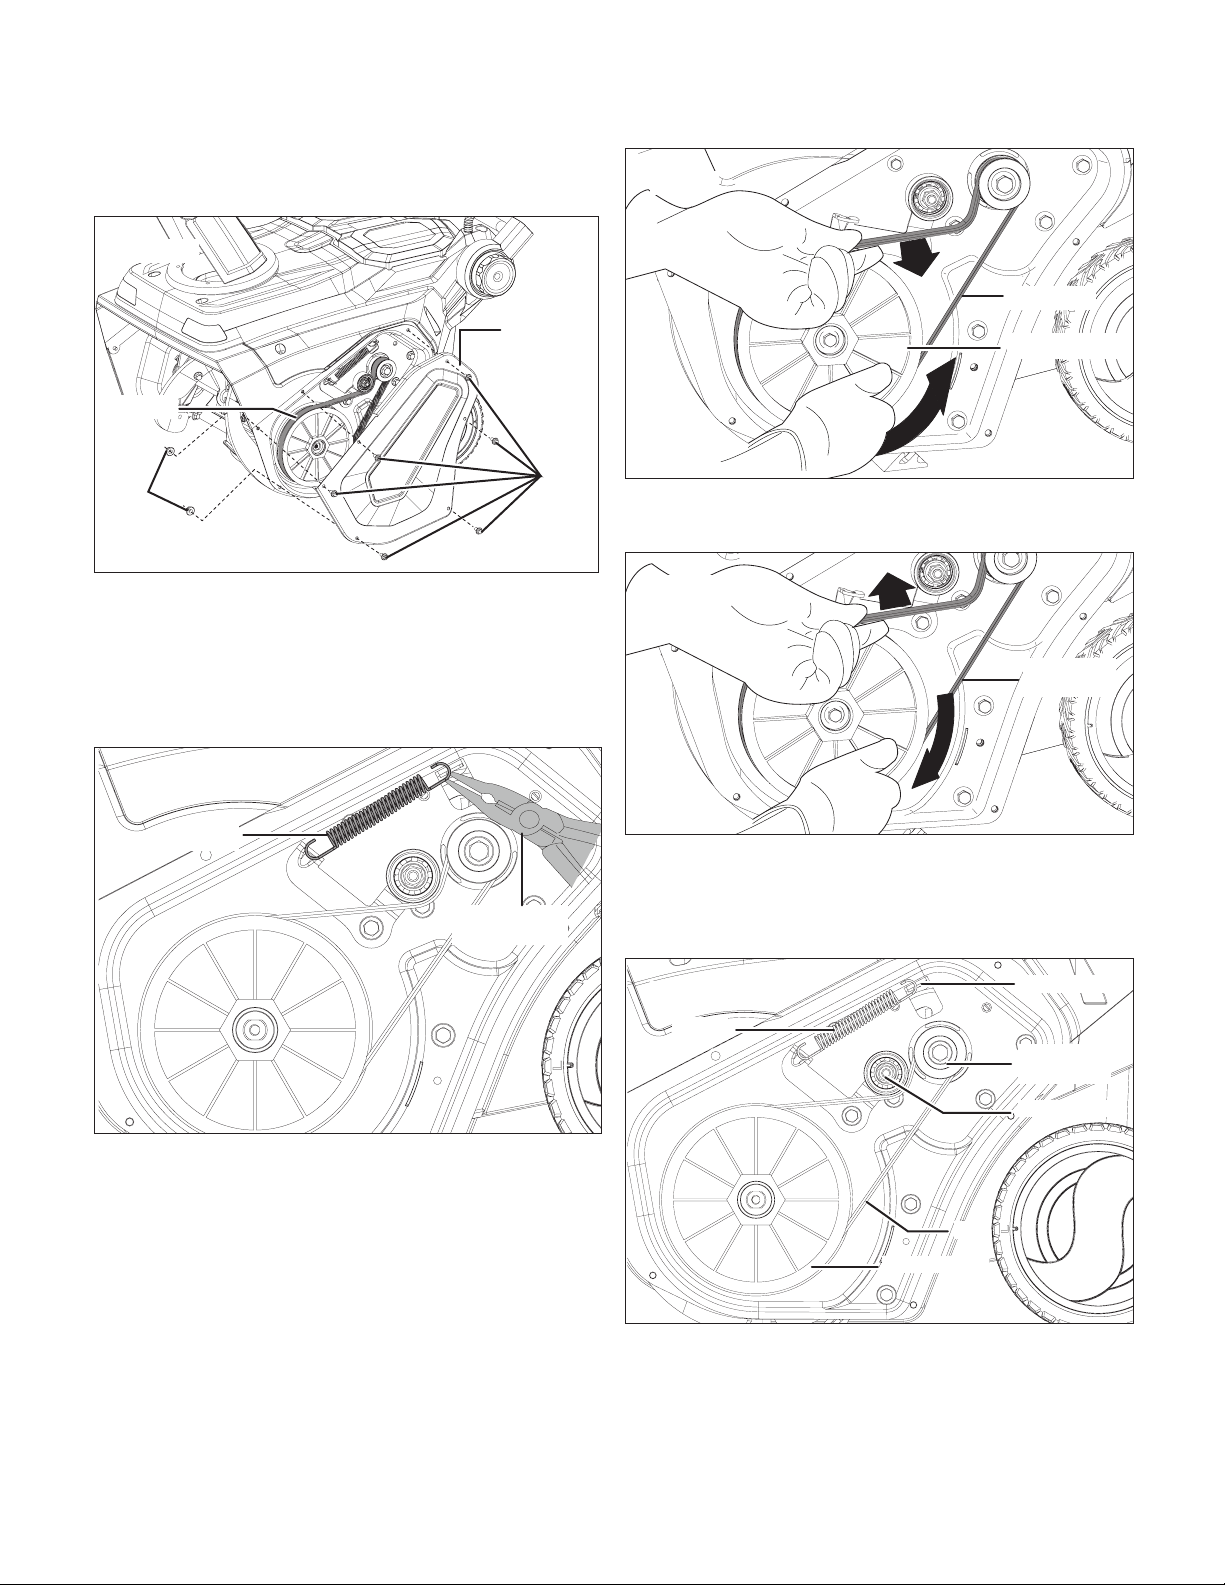
2. Use 2 10 mm wrenches to remove the bolts and nuts that
areusedtoxtherightsidepanel.Thenremovetheright
sidepaneltoexposethebelt,asshown(Fig.26).
NOTE: The 2 bolts located on the left have 2 nuts on the back,
while the other 4 bolts don't. Use one 10 mm wrench to hold
the left two bolts steady and remove the nuts with the other 10
mmwrenchrst,andthenremoveallthebolts.
3. Use the needle nose pliers to remove the spring from the
hook to release the belt tension (Fig. 27).
4. Remove the drive belt by slowly turning the auger pulley
counterclockwise while pulling the belt outwards (Fig. 28).
5. Install the new drive belt, rotating it onto the pulleys
(Fig. 29).
NOTE:Rotatethenewdrivebeltrstaroundtheenginepulley,
thentheidlepulley,andnallyaroundtheaugerpulley.Slowly
turn the auger pulley clockwise to drive the belt inwards
(Fig. 30).
6. Use needle nose pliers to reinstall the spring onto the
hook to tension the belt. Replace the side panel on the
unit, secure with the original hardware. The snow blower is
ready to use.
Fig. 26
Right side
panel
Bolts
Nuts
Old belt
Fig. 27
Needle nose
pliers
Spring
Fig. 28
Drive belt
Auger pulley
Fig. 29
New drive
belt
Fig. 30
Spring
Spring hook
Engine
pulley
Idle pulley
Auger pulley
Belt
Loading ...
Loading ...
Loading ...