Loading ...
Loading ...
Loading ...
8 ENGLISH
ASSEMBLY
CAUTION: Always be sure that the tool is
switched o and the battery cartridge is removed
before carrying out any work on the tool.
Removing and installing driver bit
CAUTION:
Be careful not to touch the sharp edges of
screws while reassembling the components and attachments.
CAUTION: Handle accessories and attach-
ments with care. Always be sure to hold acces-
sories and attachments body rmly when instal-
lation and uninstallation to avoid them falling or
slipping o from your hands.
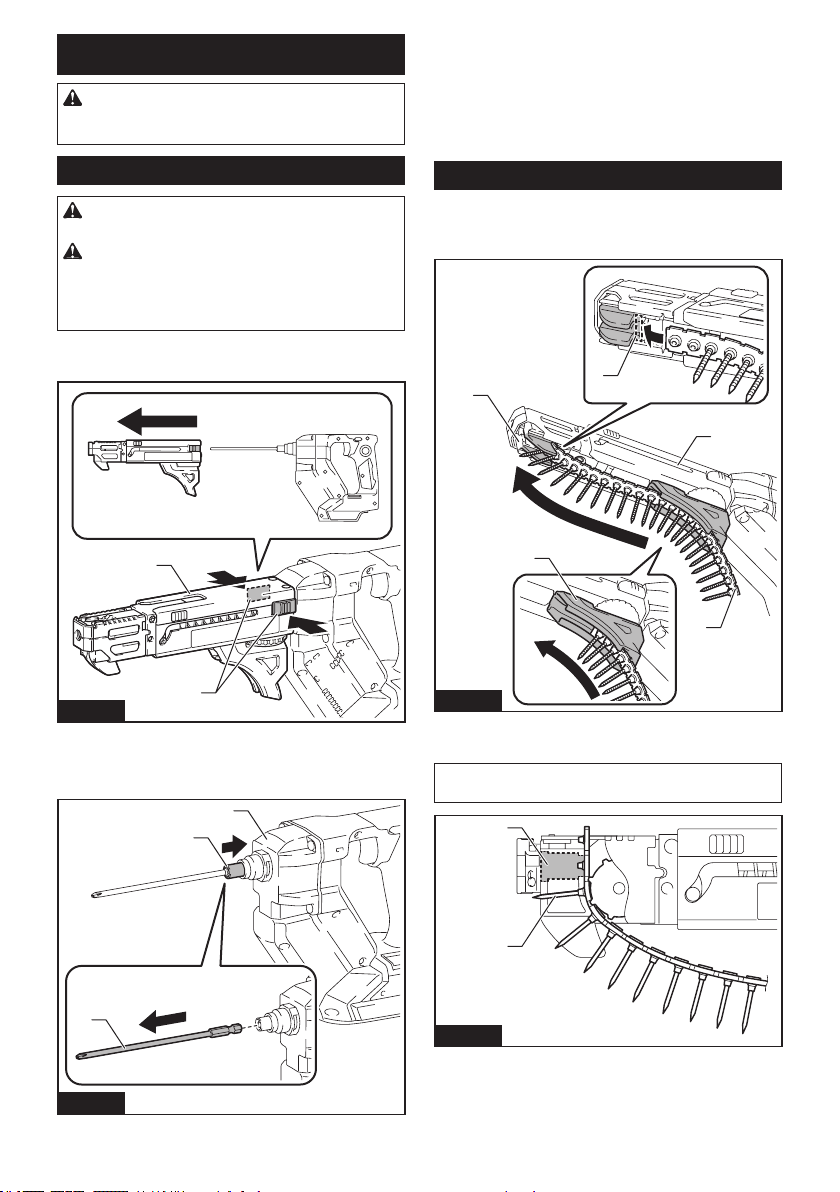
1. Press and hold the release buttons on each side
of the casing, and then pull the casing apart.
1
2
Fig.9
► 1. Release buttons 2. Casing
2. To remove the driver bit, pull it o while pushing
and holding the spindle into the gear housing.
1
2
3
Fig.10
► 1. Driver bit 2. Spindle 3. Gear housing
3. To install a driver bit, place it into the spindle hole
as far as it will go while pushing and holding the spin-
dle into the gear housing. Then release the spindle to
secure the driver bit.
4. Reset the casing back onto the gear housing while
holding its body rmly until the release buttons on each
side of the casing lock in place.
Installing screw strip
Insert a screw strip through the screw strip guide on
the casing, and then insert it through the screw loading
guide in the feeder box.
1
3
5
2
4
Fig.11
► 1. Screw strip 2. Screw strip guide 3. Casing
4. Screw loading guide 5. Feeder box
NOTICE: Make sure to set the rst screw in the
second row next to the driving position.
1
2
Fig.12
► 1. First screw 2. Driving position
Loading ...
Loading ...
Loading ...