Loading ...
Loading ...
Loading ...

ENGLISH
8
• Only use
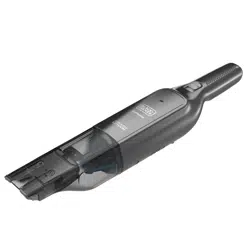
BLACK+DECKER r
eplacement filter: HLVCF10
Replacing the Filters
The filters should be replaced every 6to 9months and
whenever worn or damaged. Replacement filters are
available from your BLACK+DECKERdealer.
Visit www.blackanddecker.com to locatedealers.
• Remove the old filters as describedin
Cleaning theFilters
.
• Fit the new filters as describedin Cleaning theFilters.
Cleaning the Filters (Fig. G)
Removing Pre-filter
1. Place the dust bowl over a trash bin and remove the dust
bowl
5
from the main housing
4
by twisting the dust
bowl
5
counterclockwise and pulling the dust bowl
away from the mainhousing.
2. Remove the filter assembly
10
by pulling it out of the
dustbowl.
3. Twist counterclockwise and pull the pre-filter
11
to
seperate it from thefilter
12
.
4. Remove the pre-filter and shake or lightly brush any dust
from thefilter and pre-filter.
5. Empty any dust from the dust bowl
5
into a trashbin
and wash ifnecessary. Ensure that the dust bowl is
completely dry beforeusing.
6. Wash the pre-filter
11
and filter
12
regularly using
warm, soapy water. Ensure that both are completely dry
for 12 hours beforeusing.
7. Install the pre-filter onto the filter, ensuring the filter
tabs
20
aligns with the pre-filter slots
19
and rotate the
pre-filter clockwise to lock it firmly intoposition.
8. Install the filter assembly into the dust bowl.
9. Install the dust bowl onto the main housing, ensuring
the dust bowl tabs
18
aligns with the main housing
slots
17
as shown in Fig.G and rotate the dust bowl
clockwise to lock it firmly intoposition.
Cleaning the Filter
1. Once the filter and pre-filter are removed from the
dust bowl shake off or lightly brush any dust from the
pre-filter
11
and filter
12
.
2. Rinse out the dust bowl with warm soapywater.
3. Wash the filters regularly using warm, soapy water and
ensure that it is completely dry before using again. The
cleaner the filter is, the better the product will perform.
4. It is very important that the filters are completely dry and
correctly in position beforeuse.
5. Ensure the filters are completely dry for 12 hours
beforerefitting.
6. Follow instructions in the Removing pre‑filter section for
assemblyinstructions.
Dust Bowl (Fig. G)
WARNING: Never use this cordless hand
vacuum without itsfilters.
IMPORTANT: Maximum dust collection will only be
obtained with clean filters and an empty dust bowl. If dust
begins to fall back out of the product after it is switched off,
this indicates that the dust bowl is full and requires emptying
To Empty the Dust Bowl (Fig.G)
1. Place the dust bowl over a trash bin and remove the dust
bowl
5
from the main housing
4
by twisting the dust
bowl
5
counterclockwise and pulling the dust bowl
away from the mainhousing.
2. Remove the filter assembly
10
by pulling it out of the
dustbowl
5
.
3. Shake or lightly brush any dust from thefilter assembly.
4. Empty the dust from the dust bowl
5
into a trashbin
and wash ifnecessary. Ensure that the dust bowl is
completely dry beforeusing.
5. Place filter assembly into position in the dust bowl.
6. Install the dust bowl
5
onto the main housing
4
,
ensuring the dust bowl tabs
18
aligns with the main
housing slots
17
as shown in Fig.G and rotate the dust
bowl clockwise to lock it firmly intoposition.
Cleaning
WARNING: Blow dirt and dust out
of all air vents with clean, dry air at least once a
week. To minimize the risk of eye injury, always
wear ANSI Z87.1approved eye protection when
performingthisprocedure.
WARNING: Never use solvents or other
harsh chemicals for cleaning the non‑metallic parts
of the tool. These chemicals may weaken the plastic
materials used in these parts. Use a cloth dampened
only with water and mild soap. Never let any liquid get
inside the tool; never immerse any part of the tool into
aliquid.
MAINTENANCE
WARNING: To reduce the risk of
serious personal injury, turn unit off and lock
off the tool before making any adjustments or
removing/installing attachments or accessories.
An accidental start‑up can causeinjury.
Your BLACK+DECKER power tool has been designed to
operate over a long period of time with a minimum of
maintenance. Continuous satisfactory operation depends
upon proper tool care and regularcleaning.
Loading ...
Loading ...
Loading ...