Loading ...
Loading ...
Loading ...

15
INSTALLING & CLEANING
FOAM WET FILTER
INSTALLING FOAM WET FILTER
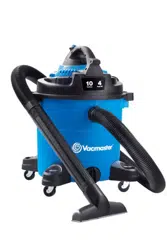
1. Verify that the power cord is disconnected from the outlet (Fig. 1).
2. Remove power head and place in upside down position. Follow instructions to remove the
cartridge lter on page 14.
3. Carefully slide foam wet lter down over the lter cage making sure the cage is completely
covered (Fig. 2 & 3) .
4. Place the power head onto the collection tank.
CLEANING FOAM WET FILTER
1. With the removed power head in an upside down position, carefully remove the foam wet lter
(Fig. 4).
2. Use a mild soap and water solution to wash the foam wet lter and rinse with clean water (Fig. 5).
3. Allow the lter to air dry for 24 hours before installing onto the lter cage.
1 2 3 4
5
TROUBLESHOOTING
WARNING:
TO REDUCE THE RISK OF ELECTRIC SHOCK, UNPLUG BEFORE
TROUBLESHOOTING.
PROBLEM POSSIBLE CAUSE SOLUTION
The wet/dry Vacuum will not
operate.
No power supply.
Check power supply – cord,
breakers, fuses.
Faulty power cord.
Unplug and check the power
cord. If damaged, have it
repaired by a professional.
Collection tank is full. Empty the collection tank.
Switch in the wrong position.
Press the ON ‘I’ button on the
power head.
The dust comes out from the
motor cover.
The cartridge lter is missing or
damaged.
Attach or replace the cartridge
lter.
Vacuum has been used to
collect ne dust, such as dry
wall dust, replace soot, or ash,
without a ne dust lter.
Remove the standard cartridge
lter and install the appropriate
ne dust cartridge lter.
Reduced efciency and motor/
speed vibration
There is a blockage in the
nozzle or hose, or the collection
tank inlet. Or dust lter blocked
by ne dust.
Take off the lter and clean itor
install a new cartridge lter.
Loading ...
Loading ...