Loading ...
Loading ...
Loading ...
25
Other Functions
Importing Tones into the RD-88
1. Press the [MENU] button.
2. Use the cursor [ ] [ ] buttons to select “UTILITY,”
and then press the [ENTER] button.
3. Use the cursor [ ] [ ] buttons to select “IMPORT
TONE,” and then press the [ENTER] button.
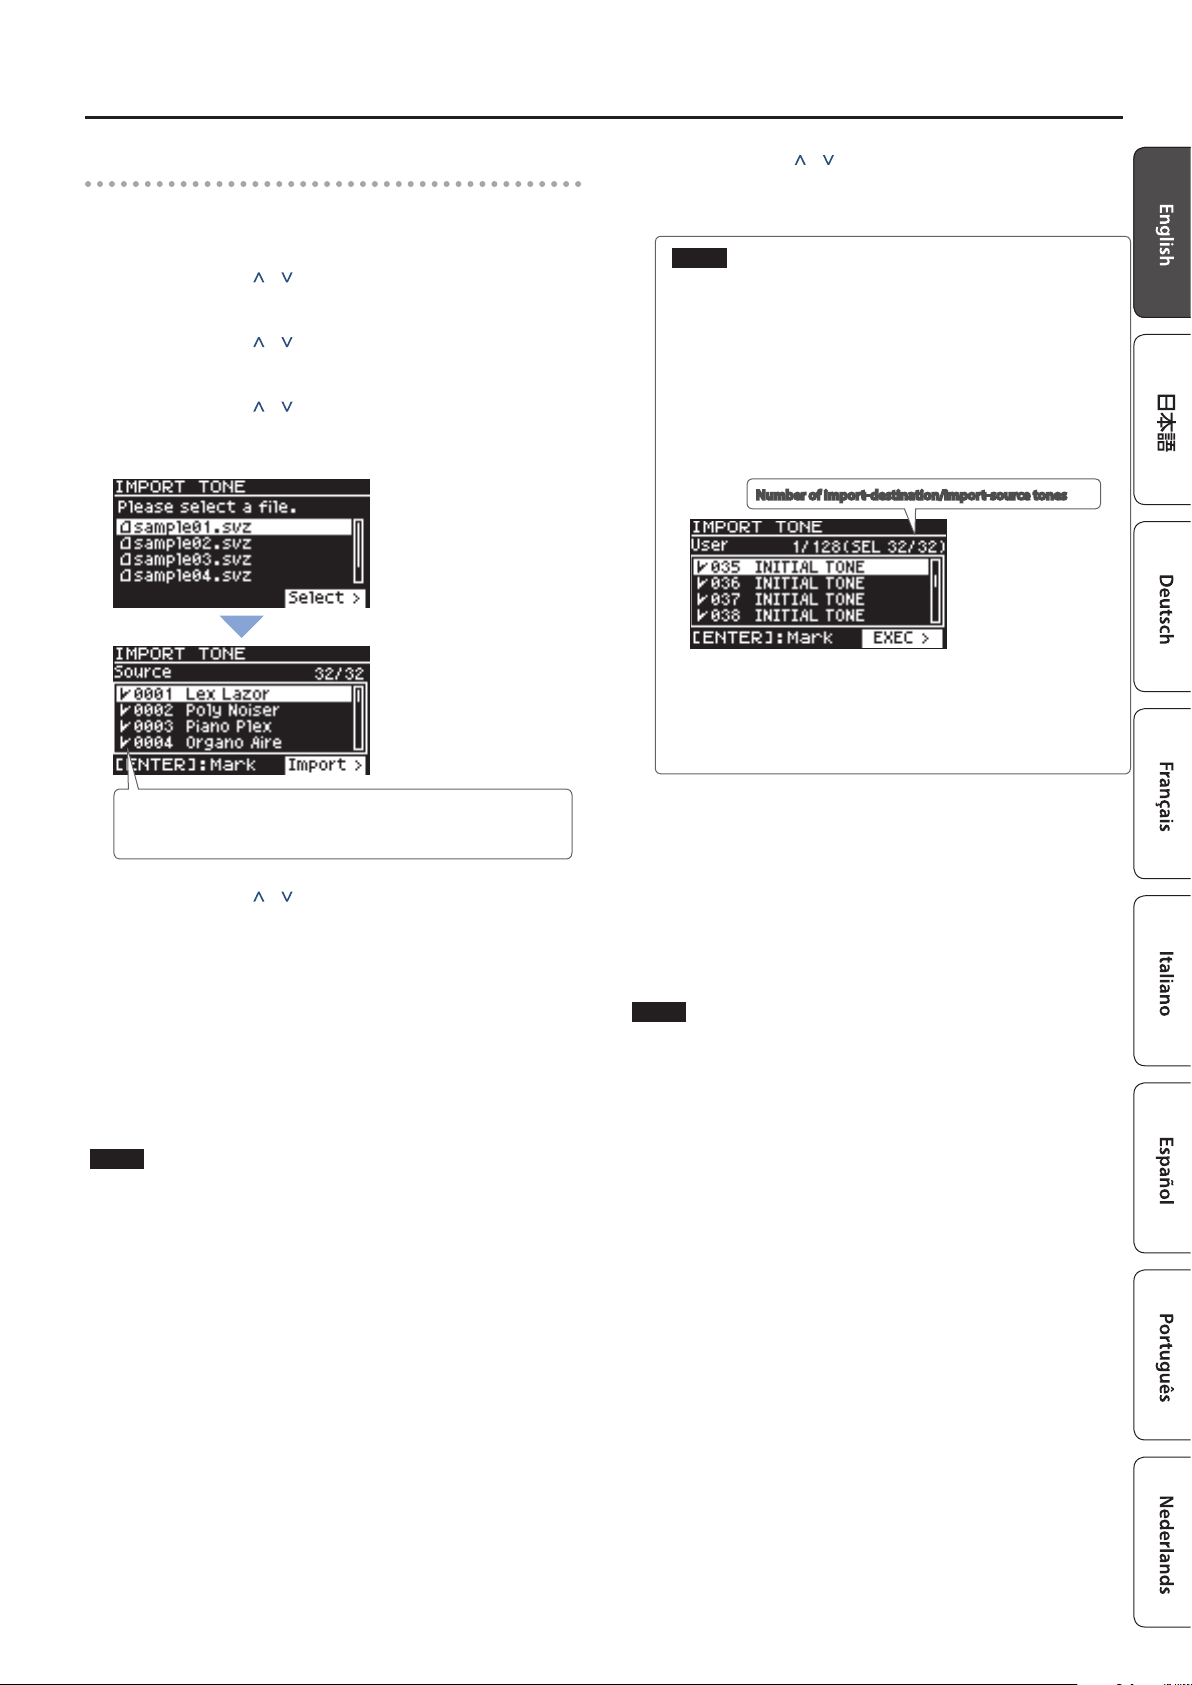
4. Use the cursor [ ] [ ] buttons to select the le that
contains the tone(s) that you want to import, and
then press the cursor [>] button.
According to the number of tones that can be imported, the tones to
be imported will be selected automatically (check marks are assigned
automatically).
5. Use the cursor [ ] [ ] buttons to select the tone
that you want to import, and then use the [ENTER]
button to add a check mark.
Instead of using the [ENTER] button, you can also use the [INC]
[DEC] buttons to assign check marks.
To select or de-select all tones, hold down the [SHIFT] button and
press the [INC] [DEC] buttons.
To select or de-select a specic range of tones, press the [ENTER]
button at the beginning of the range; then at the end of the
range, hold down the [SHIFT] button and press the [ENTER]
button.
NOTE
Drum kit tones cannot be imported.
6. Press the cursor [>] button.
7. Use the cursor [ ] [ ] buttons to select the import-
destination tone, and then press the [ENTER]
button to add a check mark.
NOTE
5 An “ * ” is displayed for tones used in scene.
5 An indication of “NEW” is shown for newly imported tones.
5 Be aware that the import-destination tone you select will be
overwritten.
5 If the import-destination has fewer tones than the import-
source, not all of the selected tones will be imported.
The number of tones is shown in the upper right of the
screen.
Number of import-destination/import-source tones
5 If there is a tone named “INITIAL TONE,” it is automatically
selected as the import-destination tone (a check mark is
added automatically).
If you want to keep that tone, clear the check mark.
8. Press the cursor [>] button.
A conrmation screen appears.
If you decide to cancel, press the [EXIT] button.
9. To execute, use the cursor [>] button to select “OK,”
and then press the [ENTER] button.
When import is completed, the message “Import Tone
Completed!” appears.
NOTE
Never turn o the power or disconnect the USB ash drive during
a process, such as while the "Processing..." display is shown.
Loading ...
Loading ...
Loading ...