Loading ...
Loading ...
Loading ...
Broadcast Overlay A
L
Texts, images and watermark can be overlaid onto
recorded videos and live streaming videos from a
smartphone or tablet device by importing the SDP
file for broadcast.
Available when [System] is set to “HD” or “HD
+Web”.
Use the SDP Generator to create the SDP file for
broadcast.
0
For information on SDP Generator, please
contact your local dealer or download from our
website.
http://www.jvc.net
Caution :
0
Regardless of the recording resolution
(1920x1080, 1440x1080, 1280x720), the SDP
file resolution that can be used on this camera
recorder is fixed at 1920x1080.
Memo :
0
Configuring Type to “Broadcast” in the factory
settings displays a sample of the overlaid image.
0
Check the display and operation in advance
before recording or live streaming starts.
Importing and Configuring Settings for
SDP Files for Broadcast
Memo :
0
When the recording format is “HD+Web”, the
scoreboard display is always overlaid on the
“Web” recording clip.
0
The scoreboard display is always overlaid on
live video streaming.
0
The settings cannot be changed during
recording or live streaming.
1
Set [Overlay Settings]
B [Overlay Function]
to “Enable”.
When [System] is configured to a setting other
than “HD” and “HD+Web”, this item is fixed at
“Disable”.
2
Use [Overlay Settings]
B [
Import User
Layout] to import the file.
To use an overlay other than the SDP file at
factory default, import the SDP file for broadcast
to the camera.
3
Select the file for overlay from the imported
file in [Overlay Settings]
B [Layout].
4
Select “Broadcast” in [Overlay Settings]
B
[
Type].
When the SDP file selected in [Layout] is
created in a type other than “Broadcast”, or
when the recording resolution of the
“Broadcast” type of the SDP file is different from
the recording resolution of the current camera,
“Broadcast” is not displayed in [Type].
0
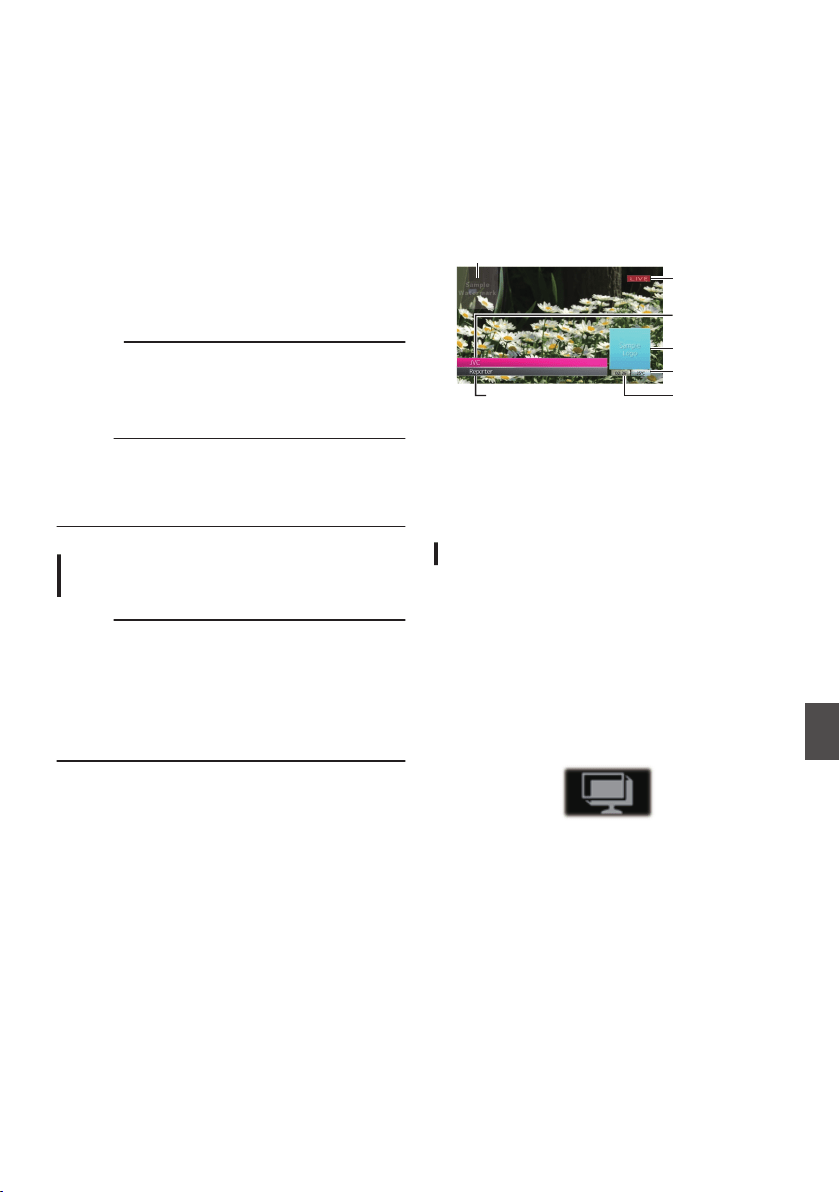
Broadcast:
.
Watermark
Logo
Live Mark
Text 3
TimeText 2
Text 1
0
None: No display
5
Select the display in [Overlay Settings]
B
[Output]
B [HD Recording]/[HDMI]
(A
P151 [ HD Recording ] )
(A P151 [ HDMI ] )
Entering Overlay Text
1
Connect this camera recorder to the
network.
(A P
186 [Connecting to the Network] )
2
Connect from a web browser.
(A P
194 [Connecting from a Web Browser] )
3
When the web browser screen appears,
press the overlay icon at the top of the
screen or the [Overlay Control] button to
display the input screen.
.
4
One of the following screens appears
according to the setting for
[Type] in the
camera recorder menu.
Broadcast Overlay A L
231
Overlay A L
Loading ...
Loading ...
Loading ...