Loading ...
Loading ...
Loading ...
Installation Instructions (cont'd)
USE WITHOUT POWER CORD (cont'd)
3. A standard ½" conduit opening has been made in the water
beater junction box for the conduit connection.
4. Use wire nuts and connect the power supply wiring to the
wires inside the water heater's junction box.
5. The water heater must be electrically "grounded" by the
installer. A green ground screw has been provided on the
water heater's junction box. Connect ground wire to this
location. For complete grounding details and all allowable
exceptions, refer to local codes or in the absence of local
codes, with the latest edition of the National Electrical Code,
ANSI/NFPA 70.
6. Replace the wiring junction cover using the screw
provided.
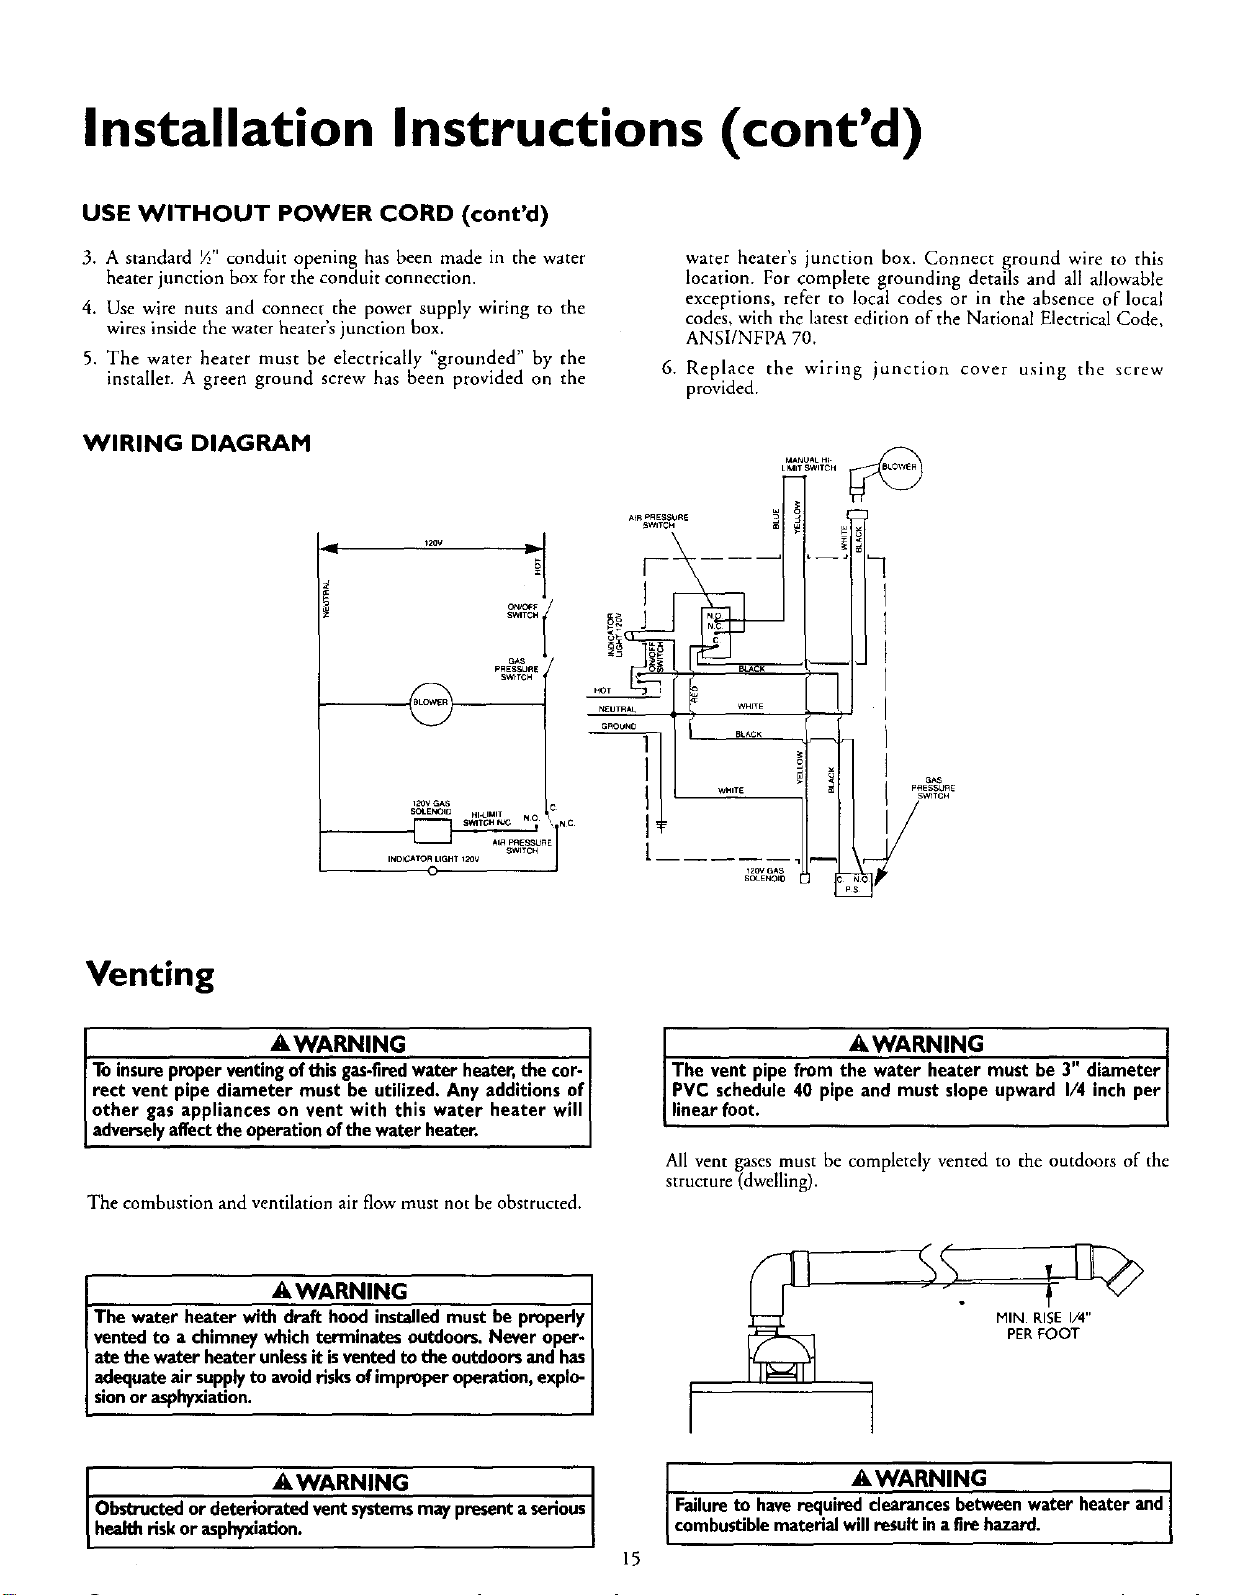
WIRING DIAGRAM
o_o_
SWITCH
OAS
P_E_RE
SW_rCH
I_OVGAS
SOLEN_O HI_M T NO
REswlTCH
INOI_TOR UGHT I_OV
O
NC
A_RP_ESSUnE
_WlrCH
HOT
_EUTR_ _JTE
...... 11 w.,,0.....
t
t20V _AS
SOLENOIO
!l
ir oAs
P_ESSUnE
S_TCH
__ /
Venting
_,WARNING
Toinsureproperventingofthisgas.firedwater heater,the cor-
rect vent pipe diameter must be utilized. Any additionsof
other gasapplianceson vent with this water heater will
adverselyaffecttheoperationofthewaterheater,
The combustion andventilation air flow must not be obstructed.
_,WARNING 3" diametert
The vent pipefrom the water heater must be I/4 inchper/
PVC schedule40 pipeand must slopeupward
linearfoot.
J
All vent gases must be completely vented to the outdoors of the
structure (dwelling).
_,WARNING
The water heater with draft hoodinstalledmustbe properlyI
vented to a chimneywhichterminatesoutdoors.Never oper-
atethe water heaterunlessit isventedtothe outdoorsandhas
adequateairsupplyto avoidrisksofimproperoperation,explo-
sionor asphyxiation.
_,WARNING
Obstructedor deterioratedvent systemsmay presenta serious
healthrisk or asphyxation.
15
•,WARNING I
Failureto haverequired clearancesbetweenwater heaterand
combustiblematerialwillresult inafire hazard.
I
Loading ...
Loading ...
Loading ...