
Loading ...
Loading ...
Loading ...
CARE & USE/INSTALLATION
|
19
INITIALIZING THE REMOTE CONTROL SYSTEM
On the wireless wall switch press the “OFF” button.
Confirm that the red LED flashes. The LED will flash every
time that any of the 4 buttons are pushed. This confirms
that the unit is functioning, and that the button selection
has been confirmed.
Press the ‘ON’ button on the wall switch to confirm. You
will hear ‘clicking’ coming from the heater. Press the ‘OFF’
button immediately and proceed to the next section ‘BASIC
OPERATION OF YOUR HEATER’ page 20. The receiver
is located inside the valve compartment and is accessible
through the louvered plate on the right END CAP of the
heater. If this plate is still off from the battery installation,
then proceed to the next paragraph. Otherwise, remove
the 2 screws holding the end plate in position, and rotate
the plate, from the bottom, until the plate is free from the
heater. Allow the plate to hang below the heater (it is
connected to the battery wires).
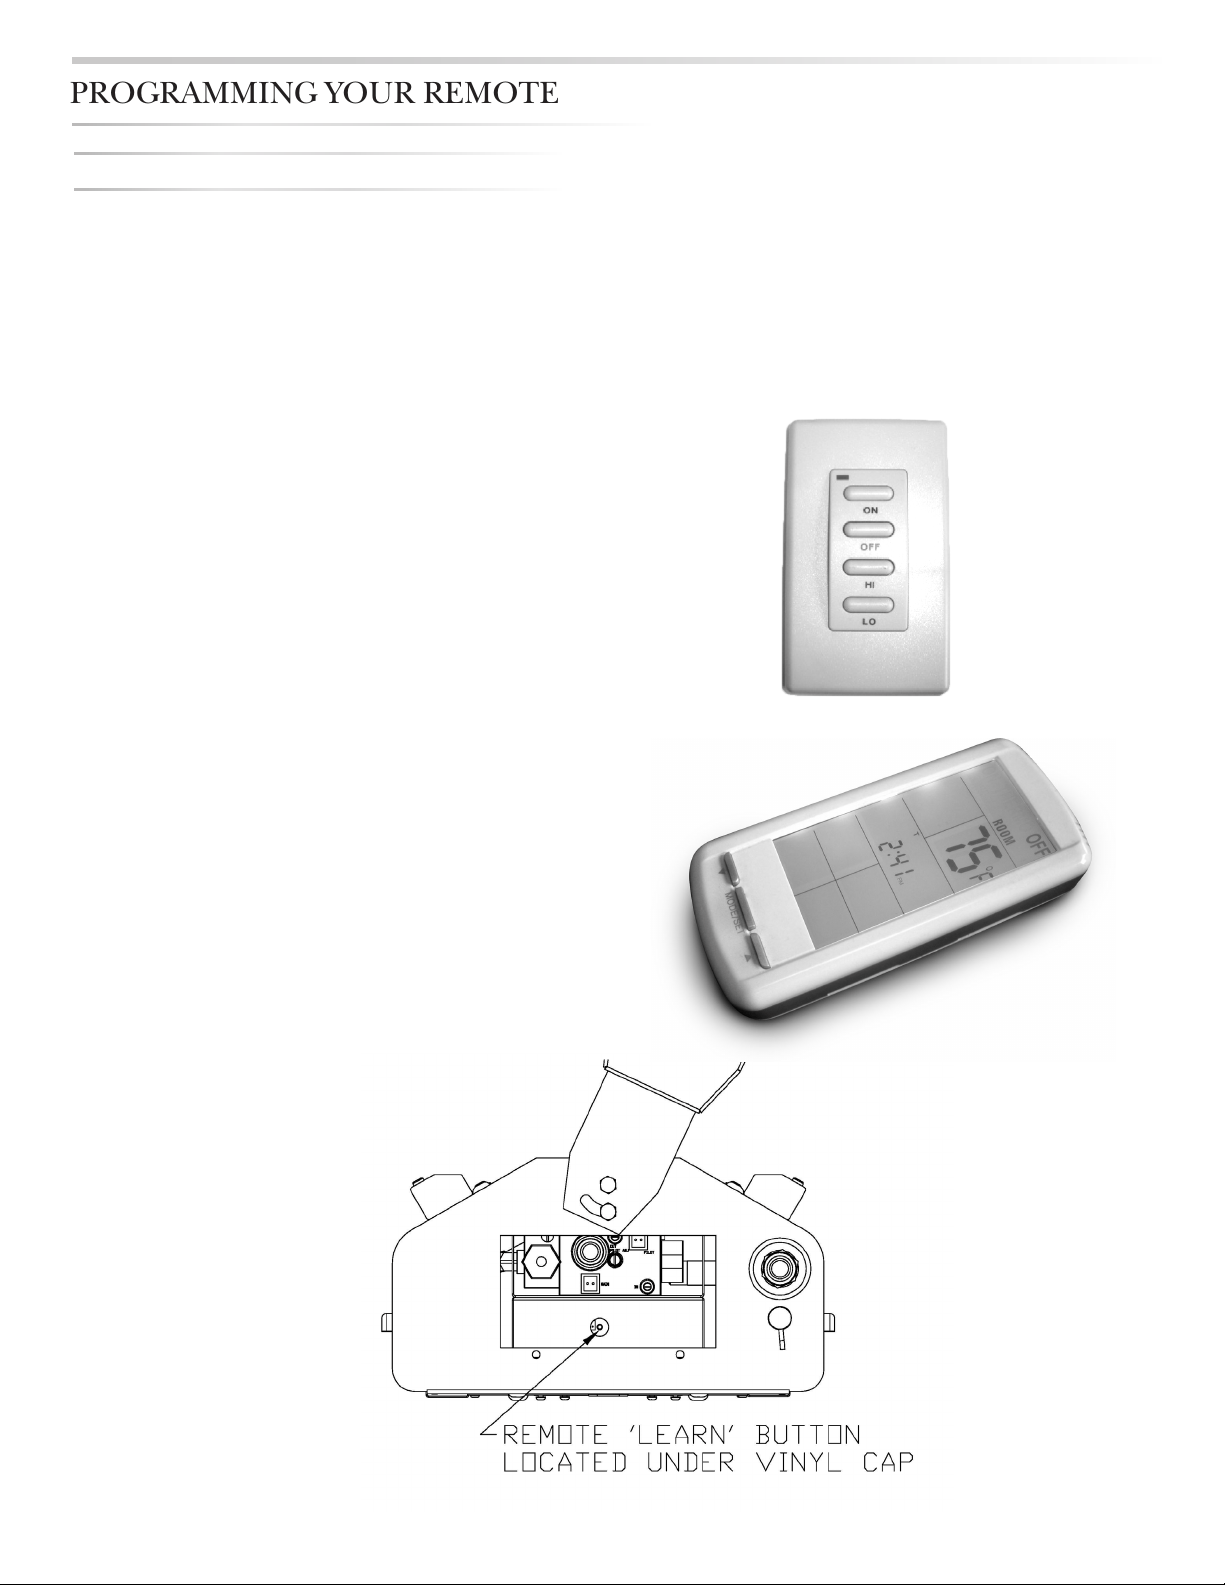
Look inside the compartment and locate the black vinyl
cover cap on the side of the module enclosure. Peel the
cap off with your finger nail or screw driver. Look inside the
box and notice the small button on the side of the receiver.
This is the LEARN button. See the illustration below. With
the wall switch in one hand, and a paper clip or the tip
of a writing pen in the other hand, press and release the
‘LEARN’ button of the receiver. You will hear one beep.
Now press the ‘ON’ button on the wall switch. Once the
code is accepted, you will hear four beeps in rapid
succession. You should now hear the pilot sparking rapidly.
This indicates that your programming was successful. If the
pilot did not begin to spark, then repeat the above
process. After programming, press the ‘OFF’ button to turn
the system off.
NOTE: The wireless wall switch can now be mounted (if
not previously mounted), on a flat surface, at your desired
location. Use the screws provided with the switch or double
sided tape for mounting (not provided).
PROGRAMMING YOUR REMOTE
Loading ...
Loading ...
Loading ...