Loading ...
Loading ...
Loading ...
1. Prepare Battery
WEAR EYE AND FACE SHIELD.
WASH HANDS OR CLOTHING IMMEDI-
ATELY IF ACCIDENTALLY IN CONTACT
WITH BATTERY ACID.
DO NOT SMOKE. FUMES FROM
CHARGED BATTERY ACID ARE EX-
PLOSIVE.
READ THE INSTRUCTIONS INCLUDED
WITH THE BATTERY VENT CAPS IN
THE BAG OF PARTS. ALWAYS WEAR
GLOVES, CLOTHING AND GOGGLES
TO PROTECT YOUR HANDS, SKIN AND
EYES.
Fill and charge battery (before installing) NOTE: SEE DE-
TAILED INSTRUCTIONS PACKAGED WITH BATTERY
VENT CAPS FOUND IN BAG OF PARTS.
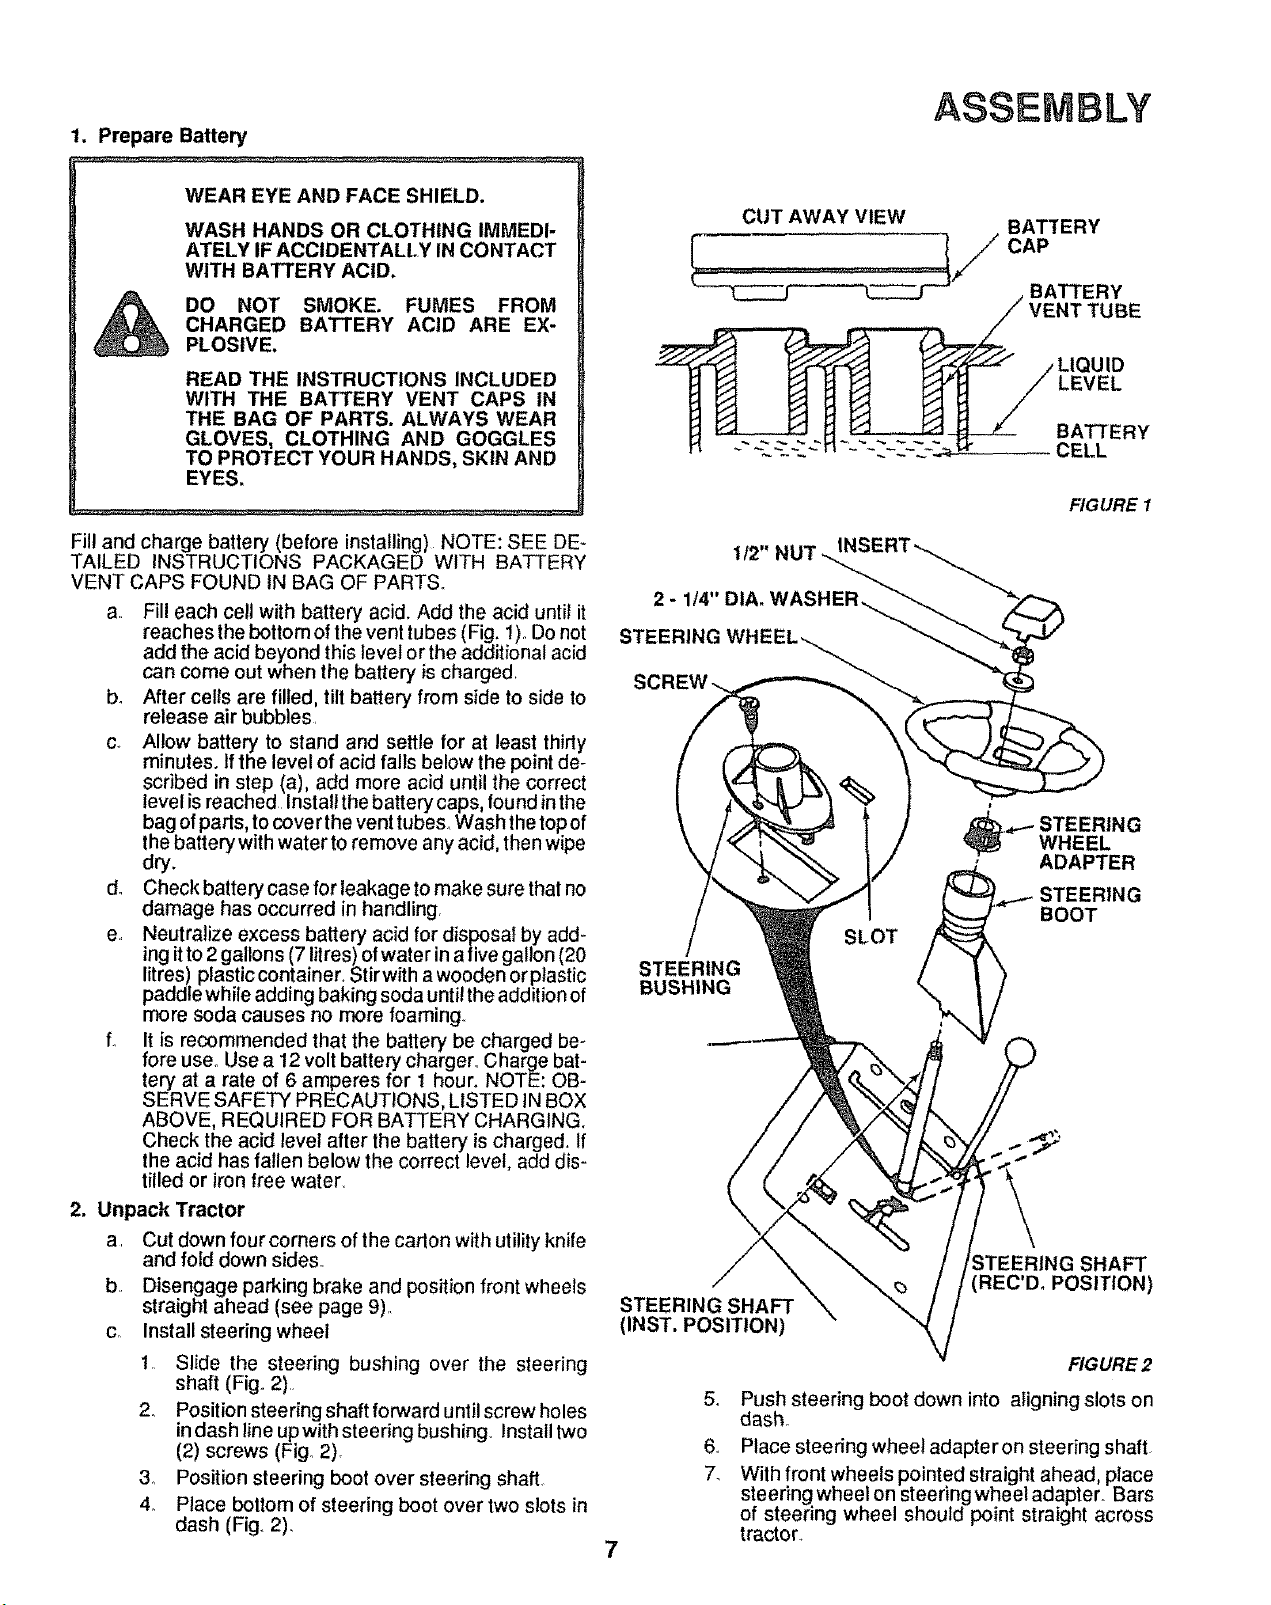
a Fill each cell with battery acid. Add the acid until it
reaches the bottom of the vent tubes (Fig. 1)oDo not
add the acid beyond this level or the additional acid
can come out when the battery is charged,
b. After cells are filled, tilt battery from side to side to
release air bubbles
c. Allow battery to stand and settle for at least thirty
minutes. If the level of acid falls below the point de-
scribed in step (a), add more acid until the correct
level isreached Install the battery caps, found inthe
bag of parts, to cove rthe vent tubes_ Wash thetop of
the battery with water to remove any acid, then wipe
dry.
d. Check battery case for leakage to make sure thai no
damage has occurred in handling,
e, Neutralize excess battery acid for disposal by add-
ing itto 2 gallons (7 Itres) of water in a five gallon (20
litres) plastic container, Stir with a wooden or plastic
paddle while adding baking soda until the addition of
more soda causes no more foaming.
fo It is recommended that the battery be charged be-
fore use. Use a 12 volt battery charger, Charge bat-
ten/at a rate of 6 amperes for 1 hour. NOTE: OB-
SERVE SAFETY PRECAUTIONS, LISTED IN BOX
ABOVE, REQUIRED FOR BATTERY CHARGING.
Check the acid level after the battery ischarged. If
the acid has fallen below the correct level, add dis-
tilled or iron free water.
2. Unpack Tractor
a Cut down fourcorners of the carton with utility knife
and fold down sides.
b Disengage parking brake and position front wheels
straight ahead (see page 9)
c, Install steering wheel
1, Slide the steering bushing over the steering
shaft (Fig,, 2)
2. Position steering shaft forward until screw holes
in dash lineupwith steering bushing. Install two
(2) screws (Fig° 2).
3o Position steering boot over steering shaft
4. Place bottom of steering boot over two slots in
dash (Fig,,2).
ASSEMBLY
CUT AWAY VIEW .......
...... ] Ir .,BATTERY
_,Z VENT TUBE
II III 11"I/,,V,L
I::l v'_ _J _ v_ r_ BATTERY
H _ _ _._1'I ~._~:-:-:_ CELL
1/2" NUT
2 - 1/4" DIA. WASHERs...
FIGURE 1
j_,_-_-STEERING
WHEEL
ADAPTER
STEERING
BOOT
STEERING
BUSHING
STEERING SHAFT
(REC'Do POSITION)
STEERING SHAFT
(INST. POSITION)
FIGURE 2
7
5. Push steering boot down into aligning slots on
dash.
6 Place steering wheeladapteron steering shaft
7. With front wheels pointed straight ahead, place
steering wheel on steering wheel adapter. Bars
of steering wheel should point straight across
tractor.
Loading ...
Loading ...
Loading ...