Loading ...
Loading ...

3 Remove the parts from dishwasher with clean hands. If items are
not completely dry, place items on a clean, unused tea towel or
paper towel to air-dry thoroughly before storing. Do not use a tea
towel to rub or pat the items dry.
Step 3: Disinfecting
Supplies needed:
- A household pot
- Drinking-quality water
Caution: During disinfection with boiling water, prevent the
bottle or other parts from touching the side of the pot. This
can cause irreversible product deformation or damage that
Philips cannot be held liable for.
1 Fill a household pot with enough water to cover all parts and
place all parts in the pot. Let the water boil for 5minutes. Make
sure the parts do not touch the side of the pot.
2 Allow the water to cool down.
3 Gently remove the parts from the water. Place the parts on a clean
surface, clean, unused tea towel or drying rack to air-dry.
4 Store the dry items safely until needed. Ensure the clean pump
parts, bottle brushes and wash bowls have air-dried thoroughly
before storing. Items must be completely dry to help prevent
germs and mold from growing. Store the dry items in a clean,
protected area.
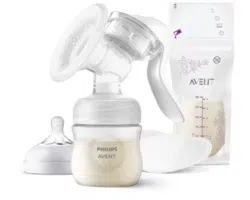
Assembling the breast pump
Make sure you have cleaned and disinfected the parts of the breast
pump that come into contact with breast milk.
Warning: Wash your hands thoroughly with soap and water
before you touch breast pump parts and breasts to prevent
contamination. Avoid touching the inside of containers or lids.
Warning: Be careful, when you have disinfected the
breast pump parts by boiling them, they can be very hot. To
prevent burns, only start assembling the breast pump when
disinfected parts have cooled down.
Check the breast pump kit parts for wear or damage before use and
replace them if necessary.
Note: Correct placement of the cushion and the silicone
diaphragm is essential for the breast pump to form a proper vacuum.
1 Insert the white valve into the pump body from underneath. Push
the valve in as far as possible (Fig. 2).
2 Screw the pump body clockwise onto the bottle until it is securely
xed (Fig. 3).
3 Push the stem into the silicone diaphragm fully to the end (Fig. 4).
4 Insert the silicone diaphragm into the pump body from above.
Make sure it ts securely around the rim by pressing down with
your ngers to ensure a perfect seal (Fig. 5).
5 Attach the handle onto the diaphragm with stem by hooking the
hole in the handle over the end of the stem. Push down the
handle onto the pump body until it clicks into place (Fig. 6).
6 Place the cushion into the pump body (Fig. 7) and make sure that
the rim covers the pump body. Push the inner part of the cushion
into the funnel. Make sure that you push the cushion inwards
completely, up to the line indicated with an arrow on the pump
body (Fig. 8).
Note: Place the cushion cover over the cushion to keep the breast
pump clean while you prepare for expressing.
Using the breast pump
Warning: Always use the breast pump with the cushion.
Note: Contact your healthcare professional in case of questions or
if you experience side eects.
Operating the breast pump
1 Wash your hands thoroughly with soap and water and make sure
that your breast is clean.
2 Press the assembled pump body against your breast. Make sure
that your nipple is centered, so that the cushion creates an airtight
seal.
3 Gently start to press down the handle until you feel the suction on
your breast (Fig. 9). Then allow the handle to return to its resting
position. Repeat this step rapidly 5 or 6times to initiate the
‘let-down’ reex.
Note: You do not have to press down the handle fully. Press it
down as much as is comfortable for you. Your milk will soon start
owing, even though you are not using all the suction the pump
can generate.
4 When the milk starts owing, adopt a slower rhythm by pressing
down the handle and keeping it pressed down for a moment
before you let it return to its resting position. Continue with this
rhythm while your milk is owing. If your hand becomes tired, try
to use the other hand or pump from the other breast.
Note: Do not worry if your milk does not ow immediately.
Relax and continue pumping. Repositioning the breast pump on
your breast from time to time can help stimulate milk ow.
5 Continue pumping until you feel your breast is empty.
6 When you have nished expressing, carefully remove the breast
pump from your breast and unscrew the bottle from the pump
body. Clean the other used parts of the breast pump (see
‚Cleaning and disinfecting‘).
After use
Warning: Only store breast milk collected with a clean and
disinfected pump.
If you intend to feed your baby with the expressed breast milk
within 4days, you can store the breast milk in the refrigerator in an
assembled Philips Avent bottle. Otherwise, you can store breast milk
in the freezer for up to 6months.
Warning: Refrigerate or freeze expressed breast milk
immediately, label with date and time, or keep it at a room
temperature of up to 77°F (25°C) for a maximum of 4hours
before you feed your baby.
1 To store the breast milk: close the bottle with the sealing disc and
the screw ring (Fig. 10).
2 To prepare the bottle for feeding your baby: place a feeding
nipple in a screw ring and screw the assembled screw ring onto
the bottle. Seal the feeding nipple with the bottle cap (Fig. 11).
3 Disassemble and clean all parts that have been in contact with
breast milk as soon as possible after pumping (see ‚Cleaning and
disinfecting‘).
Note: For safe use of bottles, please read the separately provided
user manual.
Instructions for storing the breast milk
- Write the date on the storage container. Include your child‘s name
if you are giving the milk to a child care provider.
- Gently swirl the container to mix the cream part of the breast
milk that may rise to the top back into the rest of the milk. Do not
shake the milk. This can make some of the milk’s valuable parts
break down.
- Refrigerate or chill milk right after it is pumped, if possible. You
can put it in the refrigerator, place it in a cooler or insulated
cooler pack, or freeze it in small (2 to 4ounce) batches for later
feedings. Pumped milk at room temperature is ne without being
refrigerated for up to 4hours after pumping.
Loading ...
Loading ...
Loading ...