Loading ...
Loading ...
Loading ...
Empty
Empty
Monthly
D
u
s
t
C
u
p
R
e
l
e
a
s
e
STEP 1
STEP 2
1.800.798.7398
9
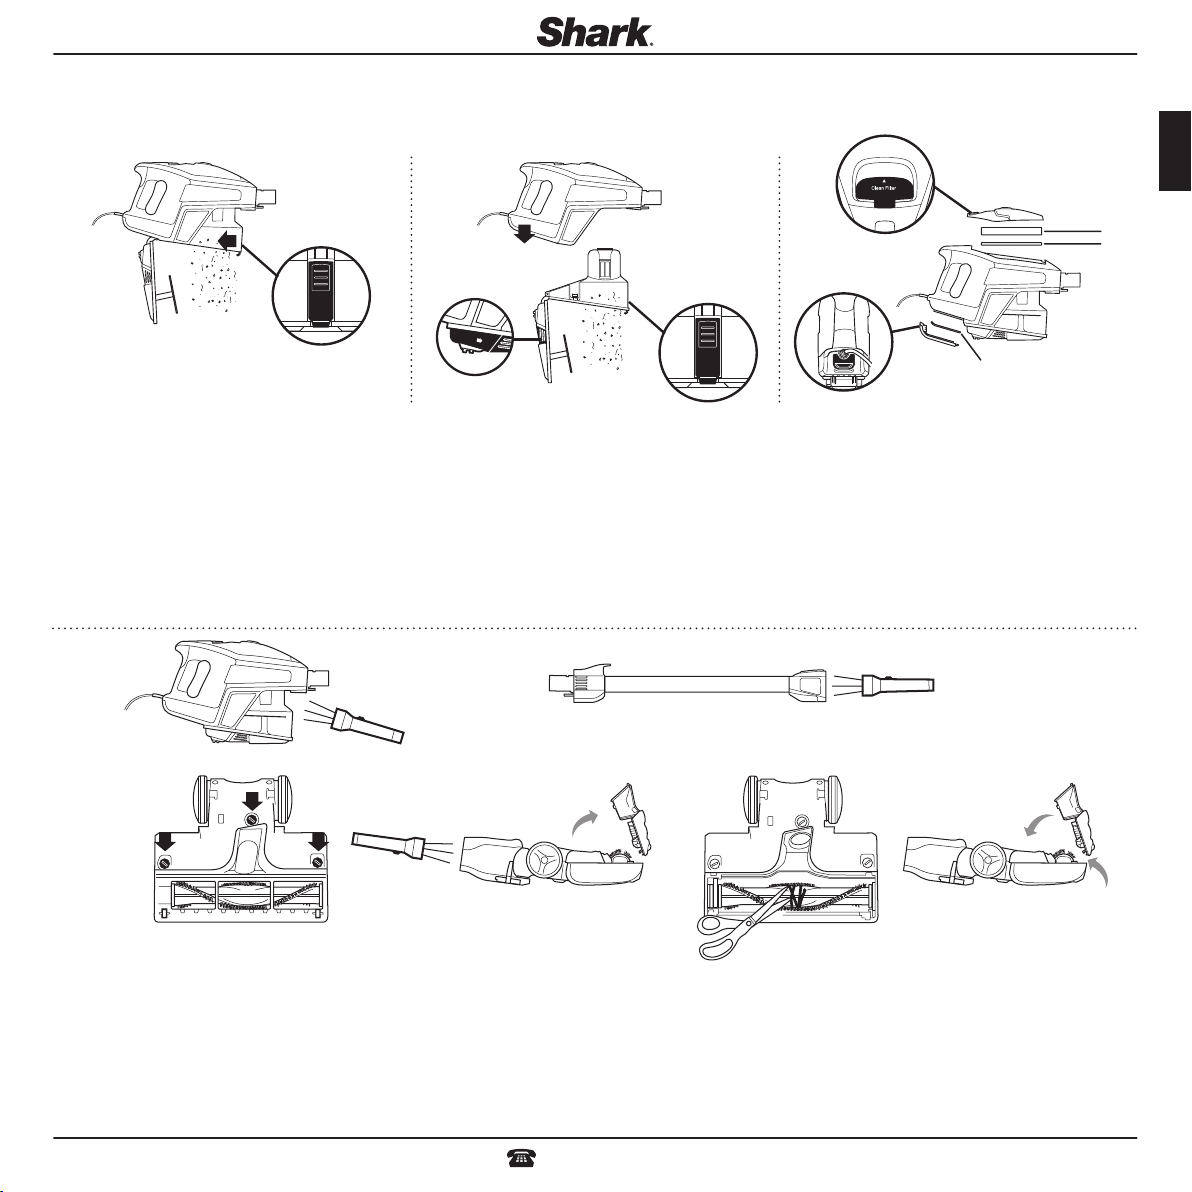
To keep your vacuum’s suction power optimal, follow these instructions.
Make sure unit is off and cord unplugged.
EMPTY THE DUST CUP
1 Press the WAND RELEASE button on the top of the
wand to disconnect it from the handheld portion.
OR
Remove the dust cup from the handheld vacuum by
squeezing the two DUST CUP RELEASE buttons on
both sides of the base at the same time and pulling it
out.
2 Hold dust cup over a trash bin and press the EMPTY
button on the front of the dust cup. The bottom lid
will open, allowing the debris to fall out.
NOTE: Clean the dust screen inside the dust cup as
required.
3 Once dust cup is empty, close the bottom lid and
insert dust cup back into handheld and you will hear it
click into place.
NOTE: Empty dust cup when debris reaches the MAX
fill line.
CLEAN THE FILTERS
1 Access the Pre-Motor foam and felt filters by lifting
the latch on the top of the handheld vacuum. Remove
and hand wash them every month. Let air dry
completely before replacing. Tap loose dirt off filters
between washes as needed. Insert the felt filter first
and then place the foam filter on top of it.
2 Access the Post-Motor filter under the handle.
Remove and hand wash once a year. Let air dry
completely before replacing.
TO CHECK FOR BLOCKAGES, REMOVE AND INSPECT:
HANDHELD AND WAND
1 Remove the wand from the handheld portion and
check all dust cup intake openings.
2 Remove the floor nozzle from the wand and check the
wand for blockages.
BOTTOM OF FLOOR NOZZLE
1 Use a coin to unlock the three locks on the bottom of
the floor nozzle.
2 A portion of the base is removable to allow for better
access to the brushroll and exposure to the airway.
Shine a flashlight from the bottom to check for
possible blockage in the airway.
3 Remove any string, carpet fibers or hair that may be
wrapped around the brushroll. There is a groove along
the brush bar that allows a pair of scissors to cut
across it to loosen up the debris.
4 To re-assemble, replace base by lining it up along the
front of the nozzle. Push down to snap into place until
you hear a click. Lock the three locks.
Post-Motor filter
(1084FTV320)
Pre-Motor filters
(1080FTV320)
Foam
Felt
English
MAINTENANCE
Loading ...
Loading ...
Loading ...