Loading ...
Loading ...
Loading ...
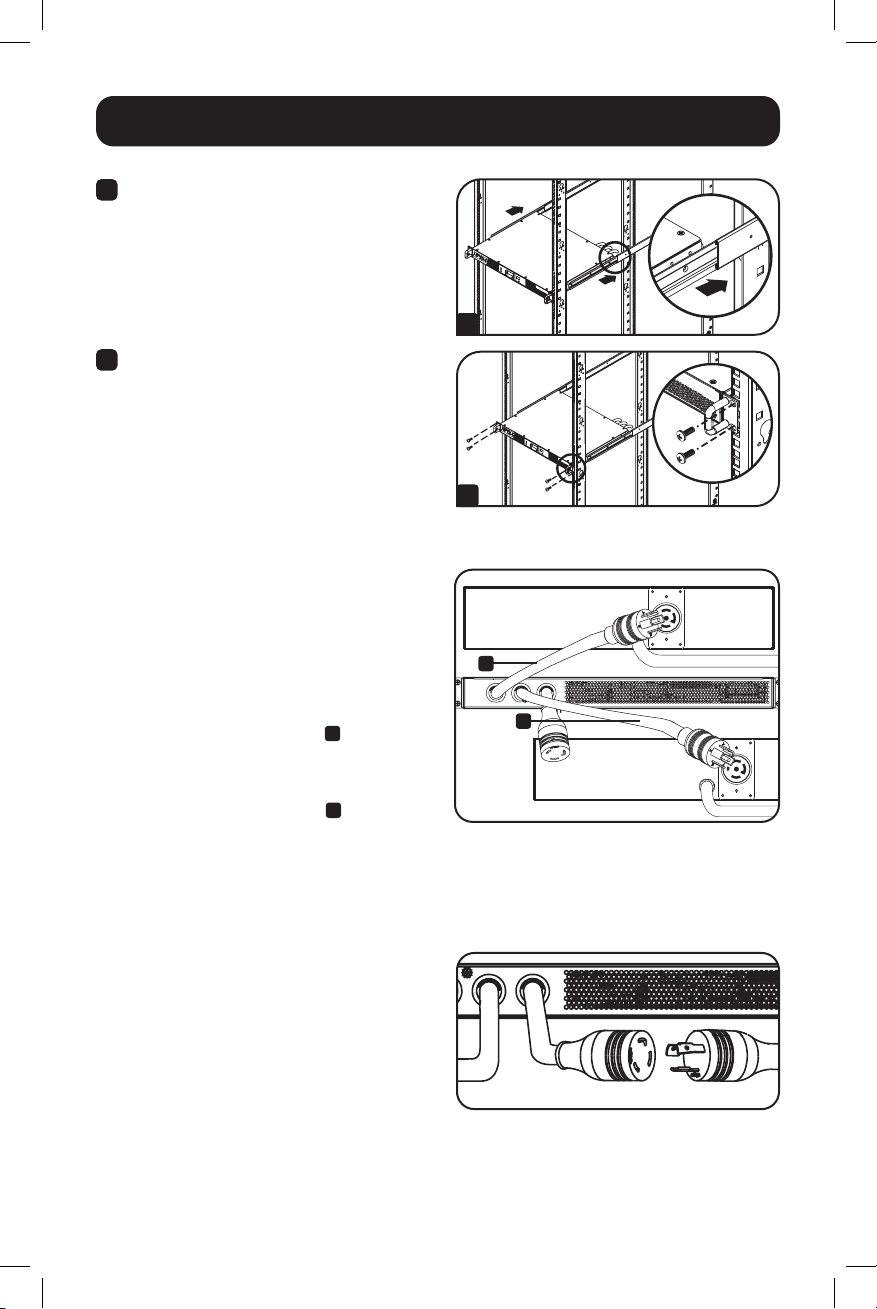
6
2. Installation
2.2 Connecting the ATS
2.2.1 Connect ATS Input Plugs
Note: The ATS comes equipped with two AC power
inputs: Source A and Source B. Source A is the
default preferred (primary) source. See Navigating
Config Menus and Submenus section for
instructions on changing the preferred source. The
connection instructions below assume Source A is the
preferred source.
Connect the Source A input plug
A
to a
preferred AC power source. Under normal
operating conditions, the ATS will provide AC
power from the Source A input source.
Connect the Source B input plug
B
to an
alternative source of grounded AC power. Do
not plug the Source B input into the same
power source as the Source A input. The ATS
will provide AC power from the Source B input
only if the Source A input becomes unavailable
or unstable.
2.2.2 Connect Equipment
to the ATS
Do not exceed the load rating of the ATS. The
electrical current used will be displayed in
amperes on the digital meter.
H
Align the front and rear bracket segments
and slide the front rail segments onto the
rear rail segments.
I
Align the mounting ears on the ATS with
the front vertical mounting rails of the
enclosure. Then insert and tighten four
Phillips flat-head mounting screws with cup
washers (provided with your rack
enclosure).
H
I
A
B
21-06-222-933683.indb 621-06-222-933683.indb 6 11/29/2021 3:56:15 PM11/29/2021 3:56:15 PM
Loading ...
Loading ...
Loading ...