Loading ...
Loading ...
Loading ...
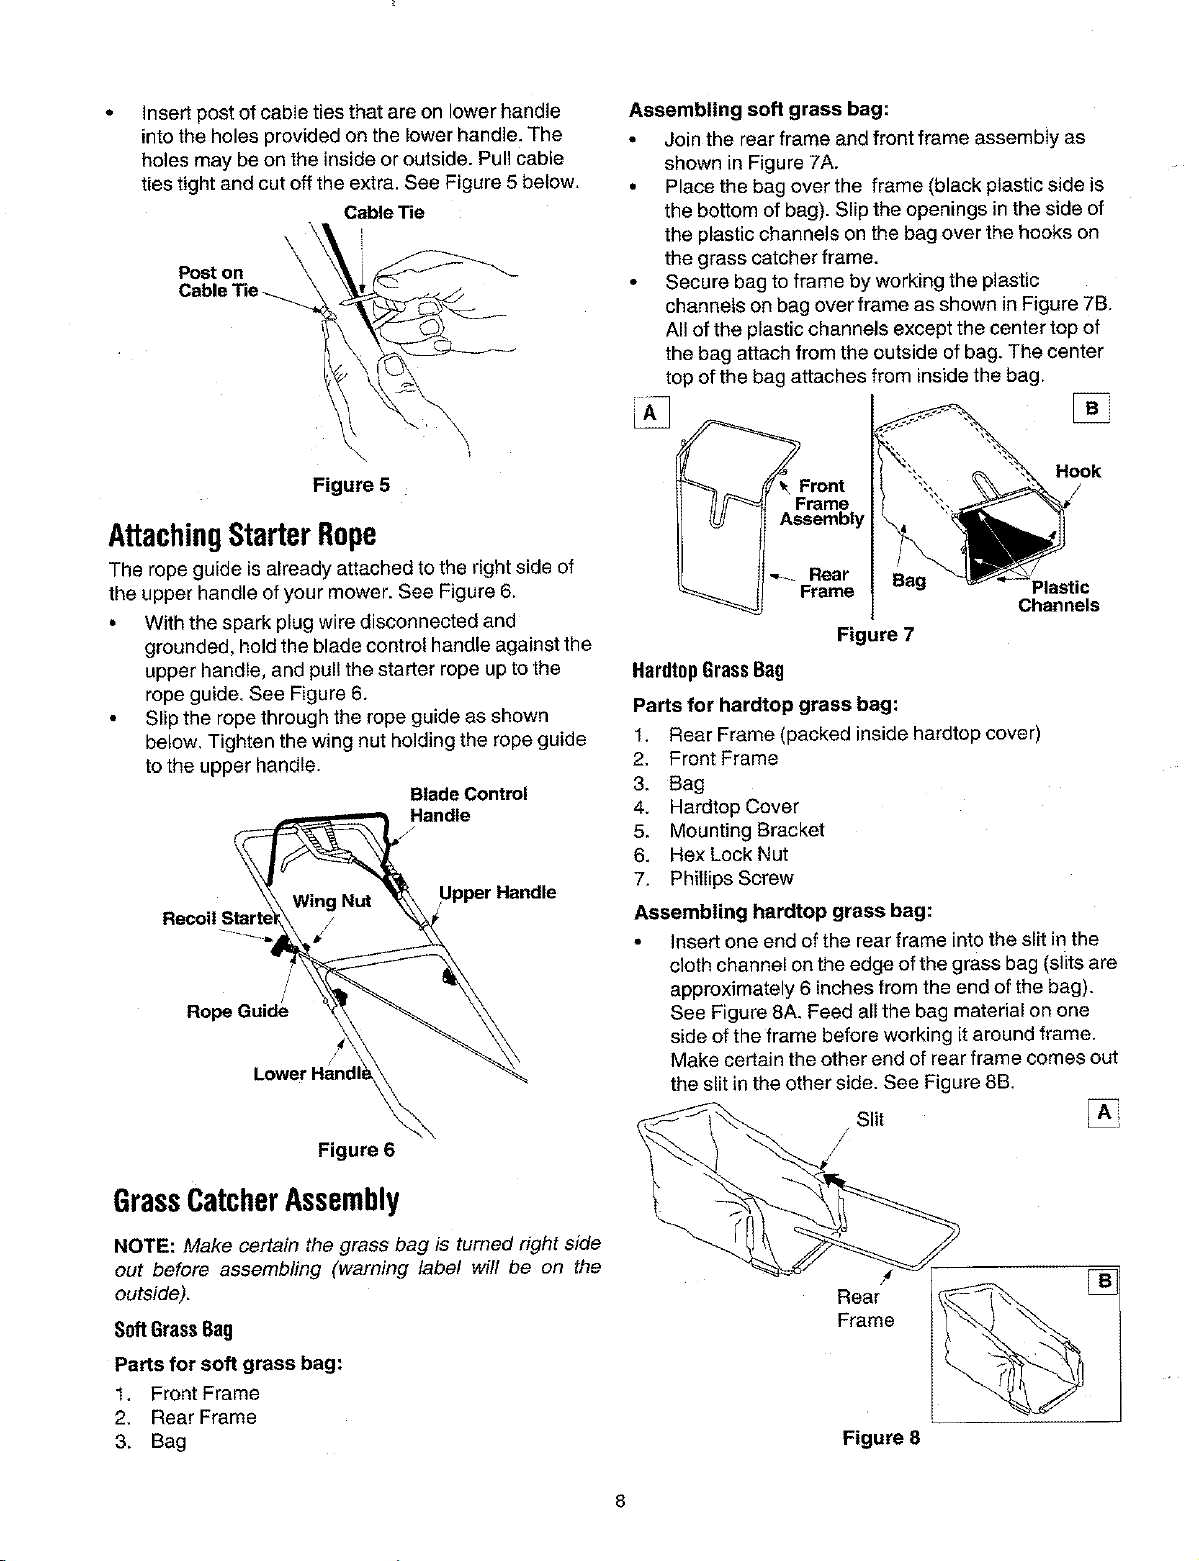
Insert post of cable ties that are on lower handle
into the holes provided on the lower handle. The
holes may be on the inside or outside. Pull cable
ties tight and cut off the extra, See Figure 5 below,
Cable Tie
\
Poston
Assembling soft grass bag:
• Join the rear frame and front frame assembly as
shown in Figure 7A.
• Place the bag over the frame (black plastic side is
the bottom of bag). Slip the openings in the side of
the plastic channels on the bag over the hooks on
the grass catcher frame.
• Secure bag to frame by working the plastic
channets on bag over frame as shown in Figure 7B.
All of the plastic channels except the center top of
the bag attach from the outside of bag. The center
top of the bag attaches from inside the bag.
Figure 5
AttachingStarterRope
The rope guide is already attached to the right side of
the upper handle of your mower. See Figure 6,
• With the spark plug wire disconnected and
grounded, hold the blade control handle against the
upper handle, and pull the starter rope up to the
rope guide. See Figure 6.
• Slip the rope through the rope guide as shown
below, Tighten the wing nut holding the rope guide
to the upper handle.
BladeControl
Handle
Upper Handle
/
/
Rope Guide
/
Figure 6
GrassCatcherAssembly
NOTE: Make certain the grass bag is turned right side
out before assembling (warning label will be on the
outside).
SoftGrassBag
Parts for soft grass bag:
1. Front Frame
2. Rear Frame
3. Bag
Frame
Assembly
Hook
Rear
Frame
Plastic
Channels
Figure 7
HardtopGrassBag
Parts for hardtop grass bag:
1, Rear Frame (packed inside hardtop cover)
2. Front Frame
3. Bag
4. Hardtop Cover
5. Mounting Bracket
6. Hex LockNut
7. Phillips Screw
Assembling hardtop grass bag:
• insert one end of the rear frame into the slit in the
cloth channel on the edge of the grass bag (slits are
approximately 6 inches from the end of the bag).
See Figure 8A. Feed all the bag material on one
side of the frame before working it around frame.
Make certain the other end of rear frame comes out
the slit in the other side. See Figure 8B,
Slit
/
Rear []
Frame
Figure 8
8
Loading ...
Loading ...
Loading ...