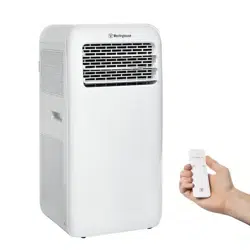
Loading ...
Loading ...
Loading ...

Westinghouse Outdoor Power Equipment | 9
WARNING
ELECTRIC SHOCK HAZARDS
Before cleaning maintaning the air conditioner, turn
off the unit and disconnect power.
Do not spray or splash water or other liquids onto the
unit; this may cause electric shock.
Do not use corrosive detergents to clean the
appliance; this may damage the plastic components,
and cause electric shock.
Do not use volatile liquids (such as paint thinner or
gas) to clean the air conditioner. This may damage
the appearance of air conditioner.
CLEANING OUTER CASE AND GRILLE
See Figure 28, page 19.
If there’s dust on the surface of outer case, use a soft towel
to wipe it. If the outer case is very dirty or greasy, use a
soft cloth dampened with mild detergent and water. Do NOT
allow water to drip in to the unit.
Use cleaner or soft brush to clean the grille.
CLEANING THE AIR FILTERS
See Figures 29 - 31, page 19.
NOTICE
The lters should be cleaned
once every three months. Clean the lters more
frequently if the unit is used in dusty environments.
Dirty air lters reduce air ow, decrease unit efciency,
and could prevent the unit from working properly.
The air conditioner has two air lters. One lter is accessible
from the exhaust side and the other is accessible from the
opposite side. The steps for removing and cleaning both
lters are the same.
lUnplug the air conditioner.
lOpen and remove the rear lter door.
lSlide the lter away from the air conditioner unit.
lRinse the rear lter door and lter with water to clean. If
the lter is very dirty, clean it with warm water and a mild
detergent. Do not use harsh chemicals or hot water.
NOTE: Allow the lter to dry completely before placing it
back in the unit.
NOTICE
Allow lters to air dry. Do not
attempt to dry lters with re or forced air. Doing
so could warp the frame of the lter or create a re
hazard.
lReplace the lter and lter door.
CLEANING THE EXHAUST DUCT
lUnplug the air conditioner.
lRemove the exhaust duct from the air conditoner and
window panel as described earlier in the Assembly
sectoin.
lClean the exhaust duct with warm water and a mild
detergent.
lAllow the exhaust duct to dry and then reinstall.
DRAINING COLLECTED WATER
See Figures 32, page 19.
When too much water has built up inside the unit, the air
conditoner will buzz eight times and the display will show
“H8”.
To drain the chasis:
lUnplug the air conditioner.
lMove the unit to an suitable location for draining.
lRemove the drain plug and allow the water to drain.
NOTE: Do not tilt the unit. Keep it vertical while moving
and draining.
lReinstall the drain plug.
WARNING
Be careful not to spill drain water
and make sure the drain plug is completley in place
before resuming operation. Liquid spilling or leaking
from the unit could result in electric shock, a slippery
surface, or property damage.
MAINTENANCE CHECK LIST
Before Use-Season:
lUnplug the air conditioner.
lEnsure that air inlets and air outlets are not blocked.
lVerify that the power cord and desired outlet are in good
condition.
lMake sure the air lters are clean.
lMake sure the remote control batteries are installed and
in good condition.
lEnsure that exhaust duct and window vent kit (if applicable)
is installed securely.
lVerify that exhaust duct is in good condition.
After Use-Season:
lUnplug the air conditioner.
lClean outer case, grille, and air lters.
lDrain the chasis.
lVerify that the window panel assembly is in good
condition. If the window panel assembly is damaged
contact customer service.
CARE AND MAINTENANCE
Loading ...
Loading ...
Loading ...