Loading ...
Loading ...
Loading ...

Once the battery installation process is complete, please note that nothing will
appear on the tester display until it is connected to a 6 or 12 Volt battery.
Note: When the internal batteries run out of power, the tester display will read
“INTERNAL BATTERY LOW”. When this happens, replace internal batteries
before performing any additional tests.
Loading Printer Paper
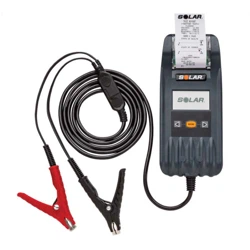
You must be properly connected to a battery (See Battery Tester Operation: Battery
Testing, steps 1-3) with internal batteries installed to load paper.
Open paper chamber cover. Set the paper roll into the paper chamber, oriented such
that the paper feeds off the bottom of the roll.
Feed the paper from the roll until the paper begins to feed past the cutter. Close the
paper chamber.
Note: The tester uses standard thermal paper, available from most office supply
stores.
Tester Configuration
Note: The tester does not have a back button or any means by which to
backtrack through the various functional steps. At any point in a particular
process, there are only two ways to get back to either the Home Screen or the
Function Screen: complete the current process, or disconnect and reconnect the
tester.
You must be properly connected to a battery (See Battery Tester Operation: Battery
Testing, steps 1-3) with internal batteries installed to configure the tester.
Upon proper battery connection (with internal batteries installed), the tester display
will splash the SOLAR logo for two seconds and then proceed to the Home Screen.
The Home Screen shows the battery status by providing the Open Circuit Voltage
of the connected battery. Press “ENTER” to enter the Function Screen, which offers
three options: BATTERY TEST, SYSTEM TEST or CONFIGURATION. Using the
Arrow Keys, scroll down to CONFIGURATION and press “ENTER” (center button) to
go to the CONFIGURATIONScreen.
The CONFIGURATION Screen provides five options: LANGUAGE, SET DATE,
BRIGHTNESS, COUNTER AND CUSTOMIZE. To set the default language for the
tester, scroll to LANGUAGE and press “ENTER”. Using the Arrow Keys, toggle to
your preferred language and Press “ENTER”. You will return to the Function Screen.
Loading ...
Loading ...
Loading ...