Loading ...
Loading ...
Loading ...
16 English
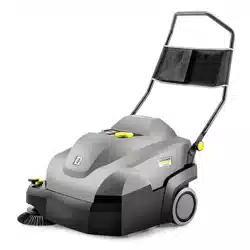
Replacing the side brush
Changing the side brush when the device is tilted is described.
ATTENTION
Risk of injury and damage
Remove the rechargeable battery and the sweep container be-
fore tilting the device.
Secure the tipped device before changing the side brush.
1 Lock
2 Side brushes
3 Mount
1. Remove the waste container.
2. Take the battery out.
3. Tilt the device to the rear and secure it against tipping down.
4. Unscrew the lock on the underside.
a Open: Turn anticlockwise
b Close: Turn clockwise
5. Remove the side brush.
6. If necessary, clean the mount.
7. Connect the new side brush to the mount and fasten it in place
with the lock.
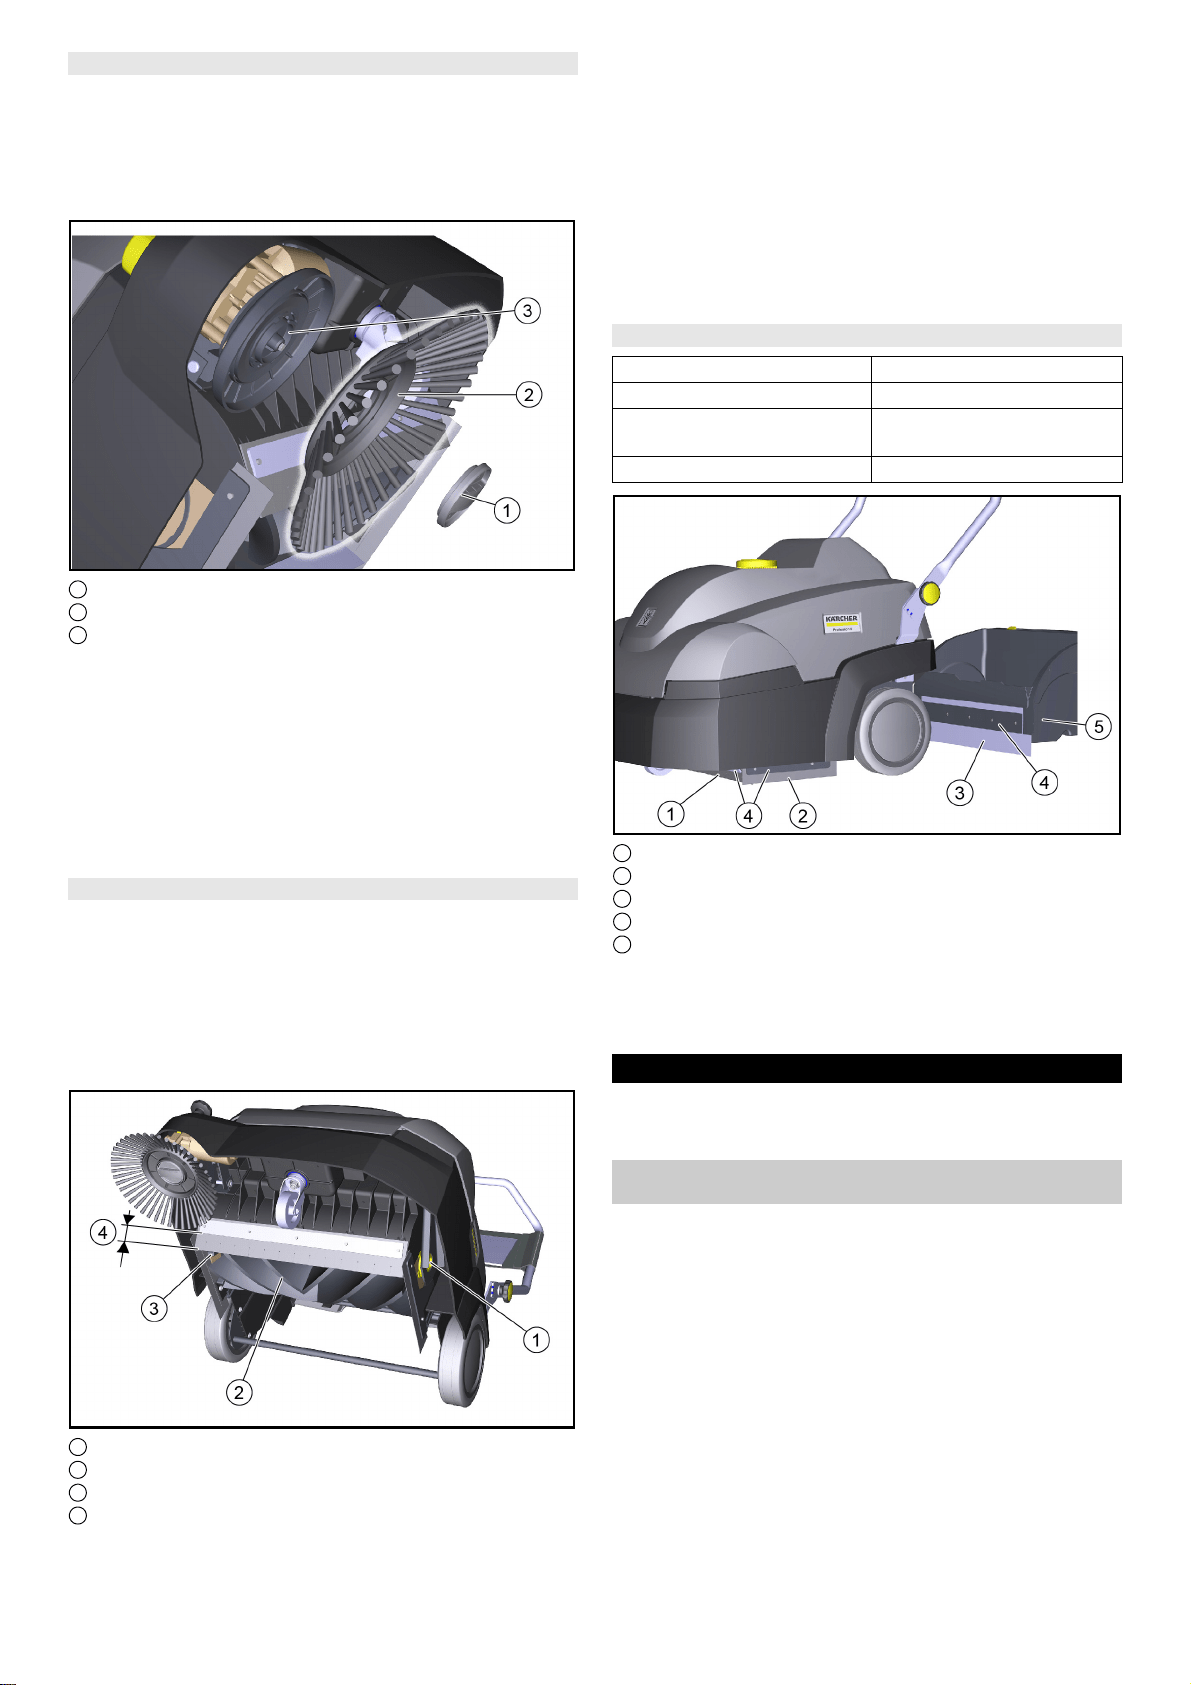
Check / change roller brush
Check and change the roller brush with the device tilted.
ATTENTION
Risk of injury and damage
Remove the battery pack and the sweep container before tilting
the device.
Secure the tipped device before replacing the roller brush.
When inserting the new roller brush, make sure that no bristles
are caught in the hole of the roller brush swing arm.
1 Bearing shell
2 Roller brush
3 Drive journal
4 Distance between sealing strip and retaining plate
– Target value: 28–30 mm
1. Remove the battery pack.
2. Remove the waste container.
3. Tilt the device to the rear and secure it against tipping down.
4. Remove the wrapped ribbons and cords from the roller brush.
5. Remove dirt from the drive journal.
6. To change the roller brush, grasp the roller brush by the base
body. press to the left and pull out downwards.
7. Fit the new roller brush on the drive journal (left). On the oppo-
site side, latch the bearing shell in the hole of the rotary brush
swing arm.
8. When the device is tilted, check the adjustment of the front
sealing strip, readjust if necessary.
Replacing / setting the sealing strips
1 Front sealing strip
2 Side sealing strip
3 Rear sealing strip (not adjustable)
4 Fastening
5 Waste container
1. Unfasten the fastening of the sealing strips.
2. Set the sealing strip by shifting it in the elongated holes.
a Refer to the table for the values.
3. Once the settings are correct, fasten the sealing strips.
Troubleshooting guide
Note
Contact the Customer Service department in the case of any
faults not listed!
Roller brush/side brush not running or running
incorrectly
Switch off the on/off switch (position I).
Charge the rechargeable battery.
Latch the rechargeable battery in place correctly.
Electronics switched off the device due to overload (LED flash-
es). When switching on again, note:
a Switch off the device using the on/off switch.
b Raise the roller brush by lifting the twist grip and turning it all
the way up anticlockwise.
c Switch on the device at the on/off switch.
Check the roller brush / side brush for any tangled pieces of
tape.
Check the belt.
Fully close the device cover (cover switch).
Sealing strips Setting values
Side sealing strips Distance from floor 1 - 2 mm
Front sealing strip Distance between sealing strip
and retaining plate 28–30 mm
Rear sealing strip Not adjustable
Loading ...
Loading ...
Loading ...