Loading ...
Loading ...
Loading ...
14 English
Sweeping with roller brush and side brush
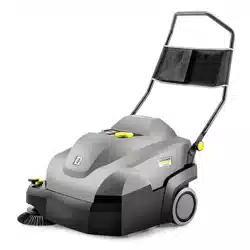
1 On/off switch
2 Roller brush contact pressure adjustment (twist grip)
3 Roller brush contact pressure display
– LED does not light up: Lower the roller brush further
– Green LED: correct adjustment
– LED red: Raise the roller brush
4 Lower the side brush
5 Side brush adjustment
– Adjust contact pressure
– Raise the side brush
1. Switch on the device at the on/off switch (position I).
a Roller brush and side brushes rotate.
2. Push the device forward by the push handle and start clean-
ing. Use the roller brush contact pressure adjustment, depend-
ing on the textile pile.
a To adjust, lift the twist grip, then turn.
b The correct contact pressure is indicated by a green LED.
3. For cleaning close to the edge, lower the side brushes by
pressing the side brush lowering button.
a If necessary, use the side brush adjustment and set the con-
tact pressure.
4. To pick up larger objects (20 mm), press the push handle down
a little so that the roller brush can move the objects into the
waste container.
5. An automatic cleaning of the pre-filter ensures continuous
work.
6. Always recharge the rechargeable batteries in good time.
a During the sweeping operation, the display in the battery
shows the remaining time in minutes.
b When the device is switched off, the battery charge is dis-
played in%.
Stopping and parking the device
1. To finish the work, switch off the device with the on/off switch
(position 0).
2. Park the device on a level surface.
3. Lift the twist grip of the roller brush and turn it anticlockwise all
the way up.
4. Pull the lowered side brush up on the adjustment. The side
brush locks into place.
5. Empty the waste container.
6. Clean the dust filter and pre-filter.
7. Charge the battery.
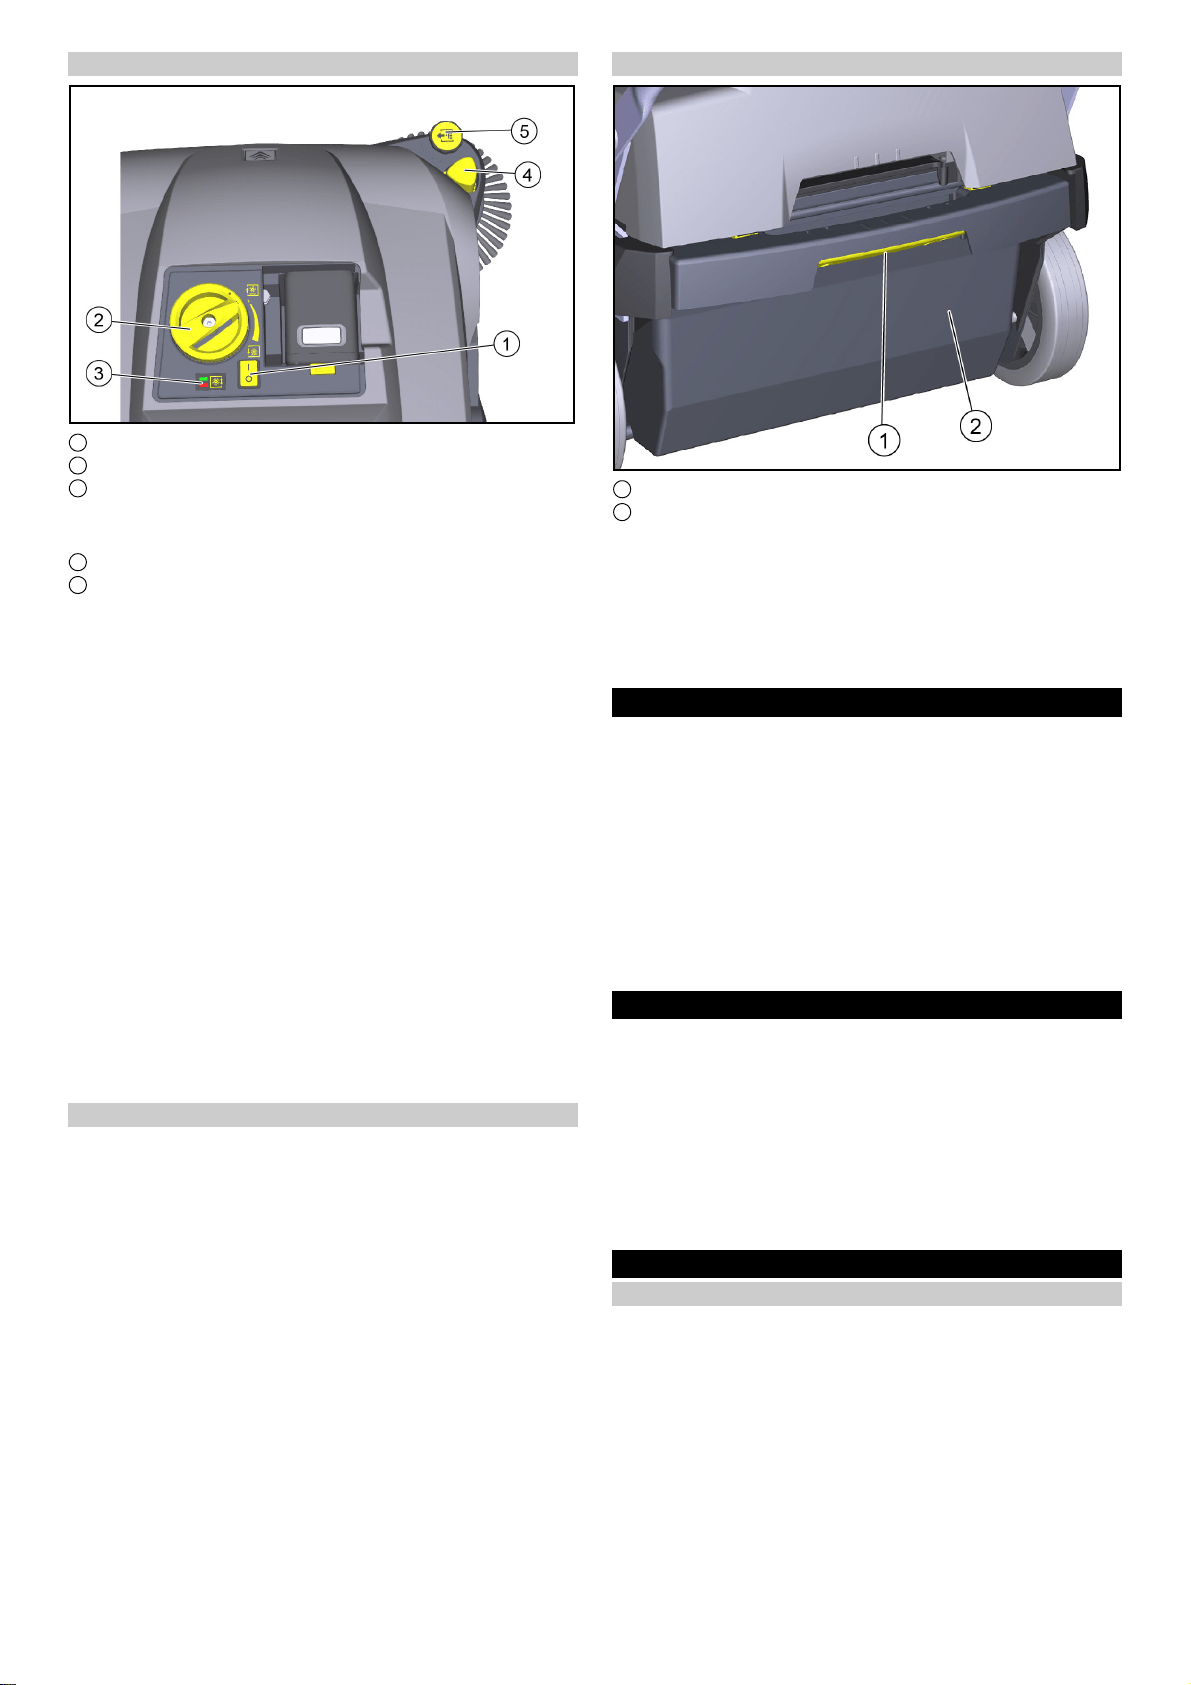
Emptying the waste container
1 Waste container lock
2 Waste container
1. Actuate the waste container lock (pull backwards).
2. Tilt the waste container to the rear and pull it out.
3. Empty the waste container or remove the dust bag (option).
4. Insert the waste container and push it all the way to the front.
If necessary, insert the dust bag (option) beforehand as de-
scribed in the chapter "Dust bag (option)".
5. Check whether the waste container has clicked into place.
Transport
몇 CAUTION
Risk of injury and damage
Be aware of the weight of the device during transportation.
1. Switch off the device at the on/off switch.
2. Lift the twist grip of the roller brush and turn it anticlockwise all
the way up.
3. Secure the device to the wheels with wedges.
4. Secure the device with ropes or lashing straps.
a At the front of the frame under the device cover.
b At the rear in the push handle attachment area.
5. When transporting in vehicles, secure the device against slip-
ping and tipping over according to the applicable guidelines.
Storage
몇 WARNING
Risk of injury and damage
Note the weight of the device.
1. Place the device in a dry, protected place on an even surface.
2. Remove the battery.
a Observe the battery storage instructions in the operating in-
structions.
3. Clean the device inside and out.
4. Lift the twist grip of the roller brush and turn it anticlockwise all
the way up.
Care and maintenance
General notes
DANGER
Risk of accidents and injuries due to unintentional move-
ment of the device
Switch off the device and remove the rechargeable battery before
carrying out any care and maintenance work.
Loading ...
Loading ...
Loading ...