Loading ...
Loading ...
Loading ...
15
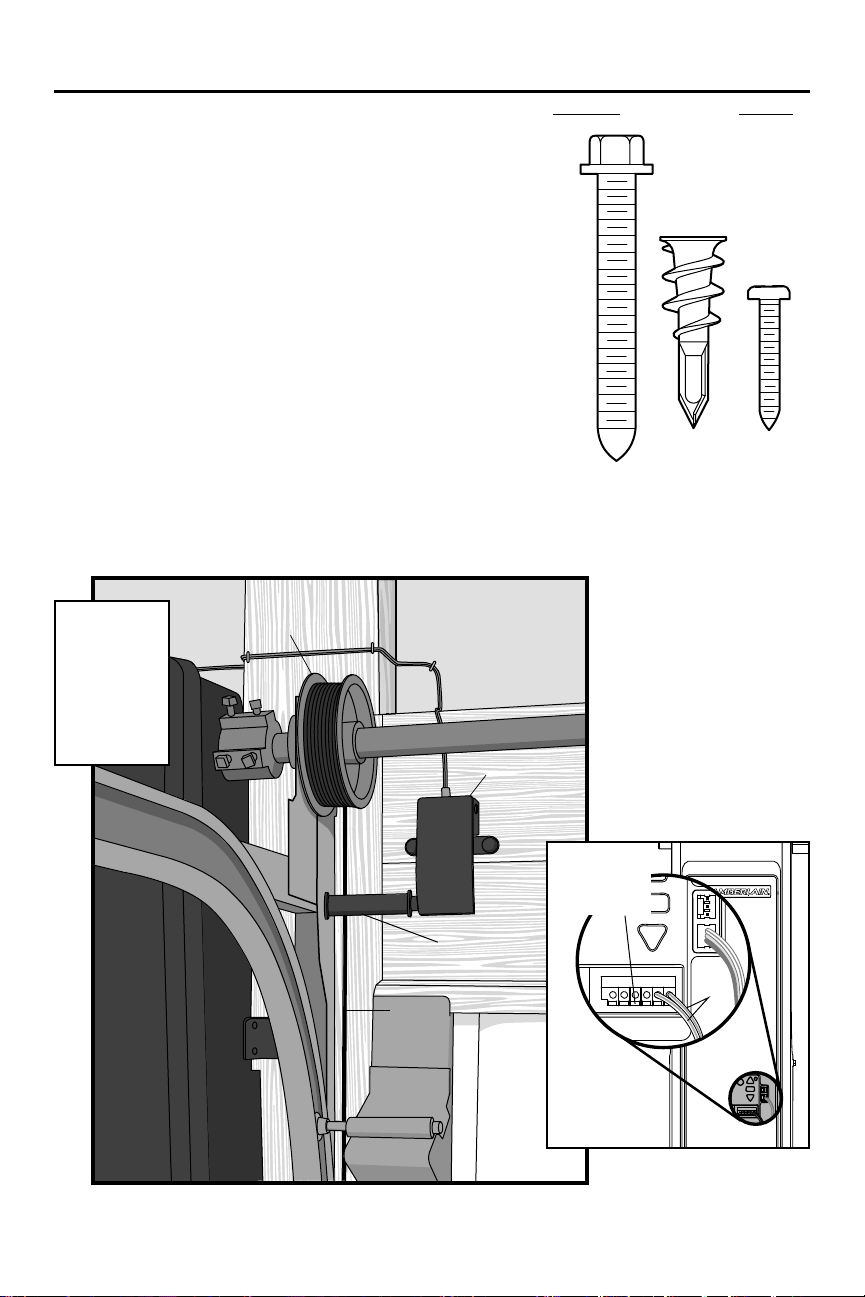
Attach the Cable Tension Monitor
7
Drum
Header
Cable
Wall
Cable Tension
Monitor
Cable Tension
Monitor Roller
To insert or
release wire,
push in tab with
screwdriver tip
WHT/
GRN
YOU WILL NEED
Wall Anchor (2)
Screws
#8-32x1" (2)
Drywall Anchor
(screw-in) (2)
Screw
14-10x2" (2)
Installation (continued)
1. Mark and drill 3/16 inch pilot holes for screws. If the cable tension monitor
cannot be mounted into wood, it can be mounted into 1/2 inch (1 cm)
or greater drywall using the drywall anchors (2) and the #8 screws (2)
provided in the hardware bag.
2. Attach the cable tension monitor to the wall using the hardware provided.
Check that the roller is on top of the cable.
3. Run wire to garage door opener. Securely affix wire to wall and ceiling.
Secure any additional wire away from the moving parts of the door.
4. Connect wire to the green quick-connect terminals on the garage door
opener.
NOTE: Cable must have tension through entire door travel. Check there is no
slack in cable on opposite side of garage door during normal operation. If
slack occurs during door travel, contact a trained door systems technician .
A second cable tension monitor (Model 041A6104) may be installed for
additional security. When two cable tension monitors are installed, the door
will not close or will reverse if either one of the monitors detects slack or is
disconnected.
Shim or add wood
block if needed.
The cable tension
monitor MUST
be flush with the
mounting surface.
The cable tension
monitor roller
must be free from
obstructions.
Garage door opener
Loading ...
Loading ...
Loading ...