
Loading ...
Loading ...
Loading ...
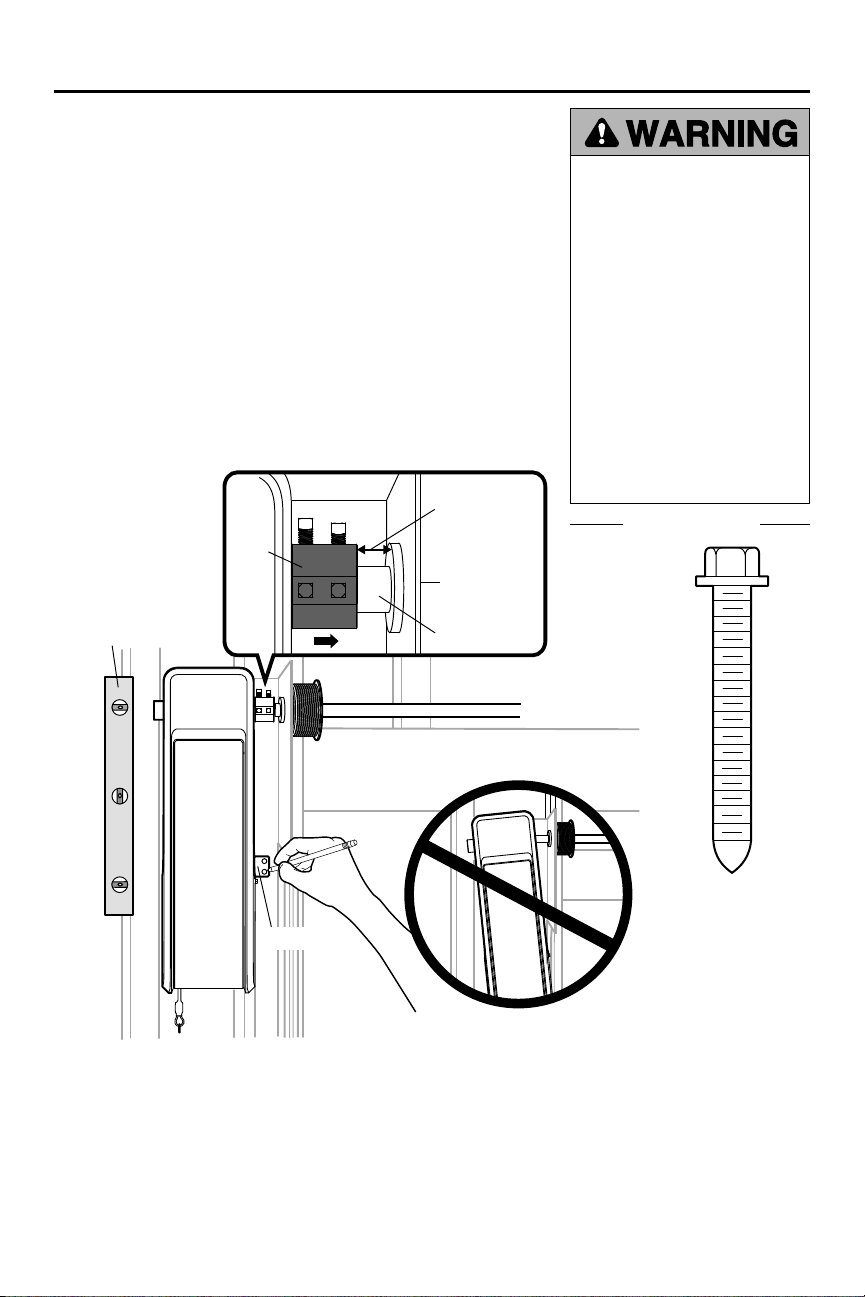
11
Bearing
Plate
Collar
Torsion Bar
.25" min. space
between
bearing and
collar
Opener MUST be
parallel to door
Mounting Bracket
YOU WILL NEED
Position and Mount the Garage Door Opener
2
1. Close the garage door completely.
2. Slide the garage door opener onto the end of the torsion bar. Ensure the
collar does NOT touch the bearing plate.
3. Use a level to align the garage door opener parallel to the door. Verify the
mounting bracket installation wall is a solid surface, such as wood, concrete
or a door/flag bracket.
IMPORTANT: If installing on drywall, the mounting bracket MUST be
attached to a stud.
4. When the garage door opener is properly aligned, mark the mounting
bracket holes. If necessary, tighten collar screws on the torsion bar to hold
garage door opener in place while marking holes.
NOTE: The garage door opener does not have to be flush to the wall.
To prevent possible SERIOUS
INJURY or DEATH:
• Concrete anchors MUST be
used if mounting bracket into
masonry.
• NEVER try to loosen, move or
adjust garage door, springs,
cables, pulleys, brackets or
their hardware, ALL of which
are under EXTREME tension.
• ALWAYS call a trained door
systems technician if garage
door binds, sticks or is out of
balance. An unbalanced garage
door might NOT reverse when
required.
• Garage door opener MUST be
mounted at a right angle to the
torsion bar to avoid premature
wear on the collar.
Screw
14-10x2" (2)
Installation (continued)
Loading ...
Loading ...
Loading ...