Loading ...
Loading ...
Loading ...

15
ENGLISH
WARNING: Do not touch blade. It is sharp and may
cause seriousinjury.
WARNING: Ensure the can opener attachment is
assembled to the motor as detailed in the INSTALLING
AND REMOVING ATTACHMENTSsection.
Opening a Can (Fig. O–Q)
IMPORTANT: The can needs to remain vertical at alltimes.
NOTE: Can opener cuts cans from the side below the can's
end seam
61
instead of thetop.
1. Set the variable‑speed dial
4
to 5.
2. Ensure the lever
38
on the can opener
36
is vertical as
shown in Fig. O.
3. Slide the can opener onto the can so the blade
37
comes in contact with the side of thecan.
4. Align the can opener center line
39
with the center of
the can as shown in Fig. P.
5. Ensure the can sits flush against the can opener base
40
the side wall
41
, and inside the can opener recess
42
as shown in Fig. P. The can must stay in contact with the
base, wall, and recess at alltimes.
6. Push the lever down to puncture the can as shown in
Fig.P. Ensure the lever is engaged and the can is fully
punctured. Keep lever down while opening thecan.
7. After puncturing, lift the can slightly off the surface so it
rotates freely whileopening.
8. Turn the unit on as described in the ON / OFF section.
9. Once the top of the can is fully cut off, release the unlock
button
2
and power button
3
to stop the motor
6
.
10. Ensure the motor has completely stopped before lifting
the can opener off the can. The can lid will be attached to
the can opener as long as the lever is still down.
11. Hold the can opener over the garbage and pull the lever
up as shown in Fig. Q to release the cantop.
12. After opening the can, disassemble the can opener from
the motor by turning the attachment counterclockwise
13. Clean the attachment as needed. For more information,
refer to cleaning section.
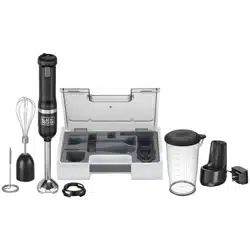
OPERATION
WARNING: To reduce the risk of serious personal
injury, turn unit off and keep away from the
power button before making any adjustments or
removing/installing attachments or accessories.
An accidental start‑up can causeinjury.
CAN OPENER
BCKM101CN
Intended Use
This can opener is intended for residential use only. It cuts the
side of cans to openthem.
DO NOT let children come into contact with theappliance.
WARNING: Ensure the wine opener attachment head
is assembled to the motor as detailed in the INSTALLING
AND REMOVING ATTACHMENTSsection.
WARNING: Do not touch corkscrew or cutter blades.
They are sharp and may cause seriousinjury.
WARNING: Do not place objects into the wine opener
other than those describedbelow.
Cutting Foil (Fig. L)
NOTE: Foil on top of the wine bottle must be removed
before using the wine opener
30
.
1. Remove the foil cutter
34
from the wineopener.
2. Place the foil cutter on top of the wine bottle so the foil
cutter blades
35
surround the neck of thebottle.
3. Squeeze the sides and turn the cutter around the bottle
until the foil is fullycut.
4. Remove cutter andfoil.
Removing the Cork (Fig. M)
1. Ensure the foil cutter is removed from the wineopener.
2. Place wine bottle on a flatsurface.
3. Set the variable‑speed dial
4
to5.
4. Place the wine opener vertically on top of the bottle and
press down until you feel resistance. The corkscrew
31
will be slightly above thecork.
5. Turn the unit on as described in the ON / OFF section. The
corkscrew will move down into thecork.
6. Once the cork is fully removed, you will see it freely
spinning above the bottle's neck. Release the unlock
button
2
and power button
3
to stop the motor
6
.
7. Ensure the motor has completely stopped before lifting
the wine opener off thebottle.
8. Once the wine opener is off, the internal spring
32
will
automatically push the cork to the end of the corkscrew
and drop the cork out of the wine opener. Place your
hand under the wine opener to catch thecork.
‑ If the cork does not come all the way off of the
corkscrew, manually twist it off.
‑ If the cork is jammed, place a small, flat object into
one of the windows
33
to unjam the cork so it can
be ejected by the spring. Do not turn appliance on
when doingthis.
9. After the bottle is open, disassemble the wine opener from
the motor by turning the attachment counterclockwise
10. Clean the attachment as needed. For more information,
refer to cleaning section.
Storing Wine Opener (Fig. N)
It is recommended to store the wine opener with the foil cutter
34
attached to thebottom.
• Snap the cutter onto the bottom of the wineopener.
Wine Opener Tips and Tricks
• When you can see the cork begin to move freely outside
the bottle, pull the bottle away from theunit.
• Place your hand under the wine cork after removing from
the bottle to easily grab it whenreleasing.
Loading ...
Loading ...
Loading ...