Loading ...
Loading ...
Loading ...
24
9. MAINTENANCE
High voltage risk. During maintenance or repairs, always stop the unit then unplug it to prevent any risk of electric shock. The wearing
of safety glasses and gloves is recommended when handling unit components to prevent any risk of injury that could be caused by the
presence of thin metal.
1. Disconnect power cord.
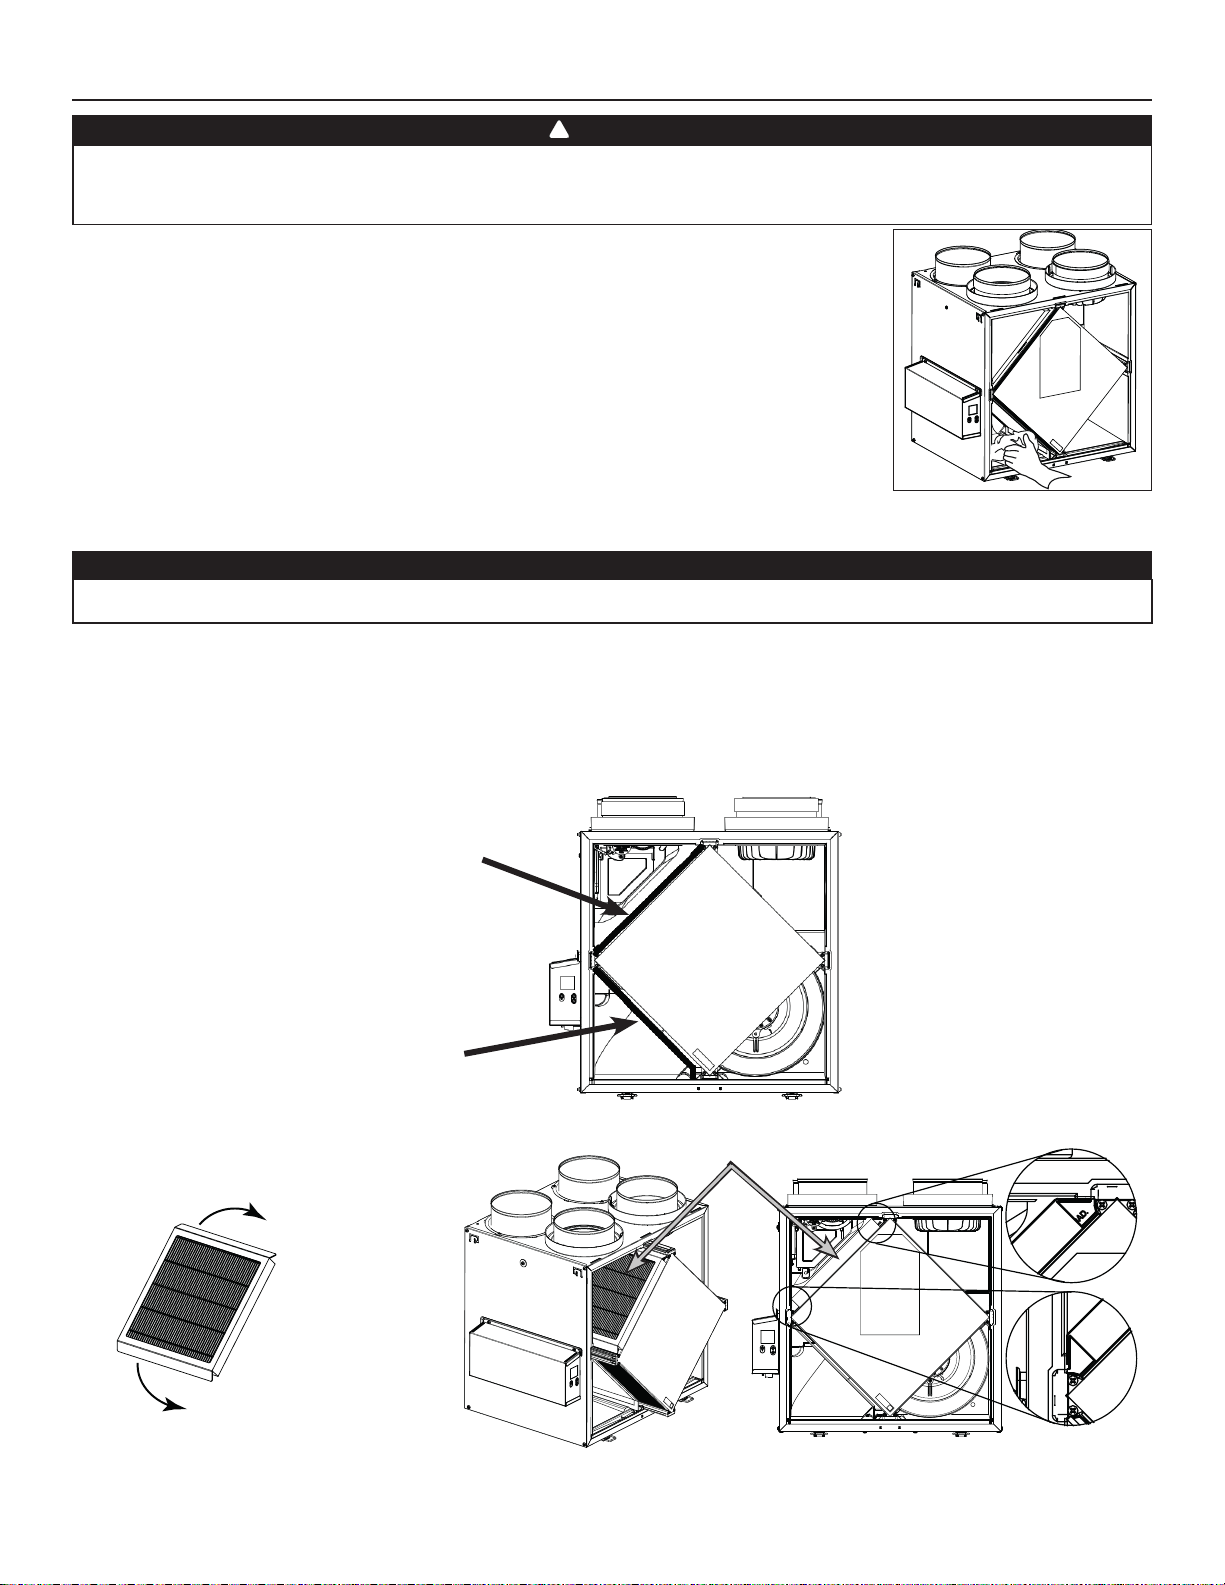
2. The door of this unit is hinged and maintained closed by 2 latches. Open them and set aside.
3. Clean the inside of the door with a damp cloth.
4. Clean filters:
• Remove filters.
• Vacuum to remove most of the dust.
• Wash with a mixture of warm water and mild soap. You may add bleach if you wish to disinfect (one
tablespoon per gallon). Rinse thoroughly. Shake filters to remove excess water and let dry.
Note: The optional MERV13 filter is a disposable filter. It should be replaced when it is too dirty. Vacuum
the MERV13 membrane filter quarterly using the dusting brush attachment to extend its service life.
5. Remove the core.
6. Clean the condensing tray with a damp cloth.
7. Check the exterior air intake hood:
• Make sure there are no leaves, twigs, ice or snow that could be drawn into the vent.
• Clean if necessary.
8. Rotate the blower wheels by hand. If one of the wheels does not rotate easily, contact your installer.
9. Reassemble the components. Pay special attention to the filters by making sure that they are engaged in their slots.
10. Close the unit door and reconnect power supply.
11. Reset filters, if required. If using an optional main wall control (SPEED, DEHUMIDISTAT OR AUTOMATIC), press on the INT/AUTO button for
5 seconds to reset the filters. If using the ADVANCED optional main wall control, follow the instructions on the touch screen.
CAUTION
A blocked air vent or filter, even partially, could cause the unit to malfunction. The comfort provided by the unit could be reduced and
the risk of unit frost could increase. This could cause unit breakdown and/or damage to property.
VD0493
9.1 QUARTERLY
WARNING
!
VD0494
MERV8 FILTER INCLUDED
OPTIONAL MERV13 FILTER OR HEPA MEMBRANE FILTER (EXHAUST FILTER NOT INCLUDED)
EXHAUST FILTER INCLUDED
NOTES: 1. The optional MERV13 filter replaces the MERV8 filter.
2.
MERV13 filter and HEPA membrane filter have the same installation instructions.
Pull the core 3" to 4" out.
Bend the two MERV13 flaps to form a
45-degree angle, as illustrated below.
Install the MERV13 filter over the core as
illustrated hereafter.
Push the core and the MERV13 filter to
the bottom of the unit.
VD0520
45˚
45˚
Loading ...
Loading ...
Loading ...