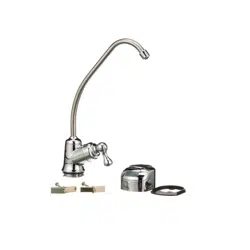
Replacement Installation Instructions
RO FAUCET
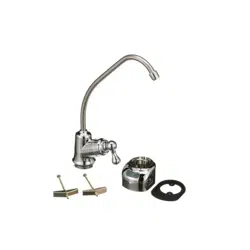
7292674 Faucet & Electronics Base without Airgap
7292682 Faucet & Electronics Base with Airgap (RO)
The connection from the faucet to your drinking water sys-
tem may be different with this replacement faucet than the
faucet originally supplied with the system.
INSTALL REPLACEMENT FAUCET
1. Turn off water to the drinking water system.
2. Loosen old faucet hardware and slide old faucet up
from the countertop.
3. Disconnect all tubing connections from faucet and dis-
card the old faucet and hardware.
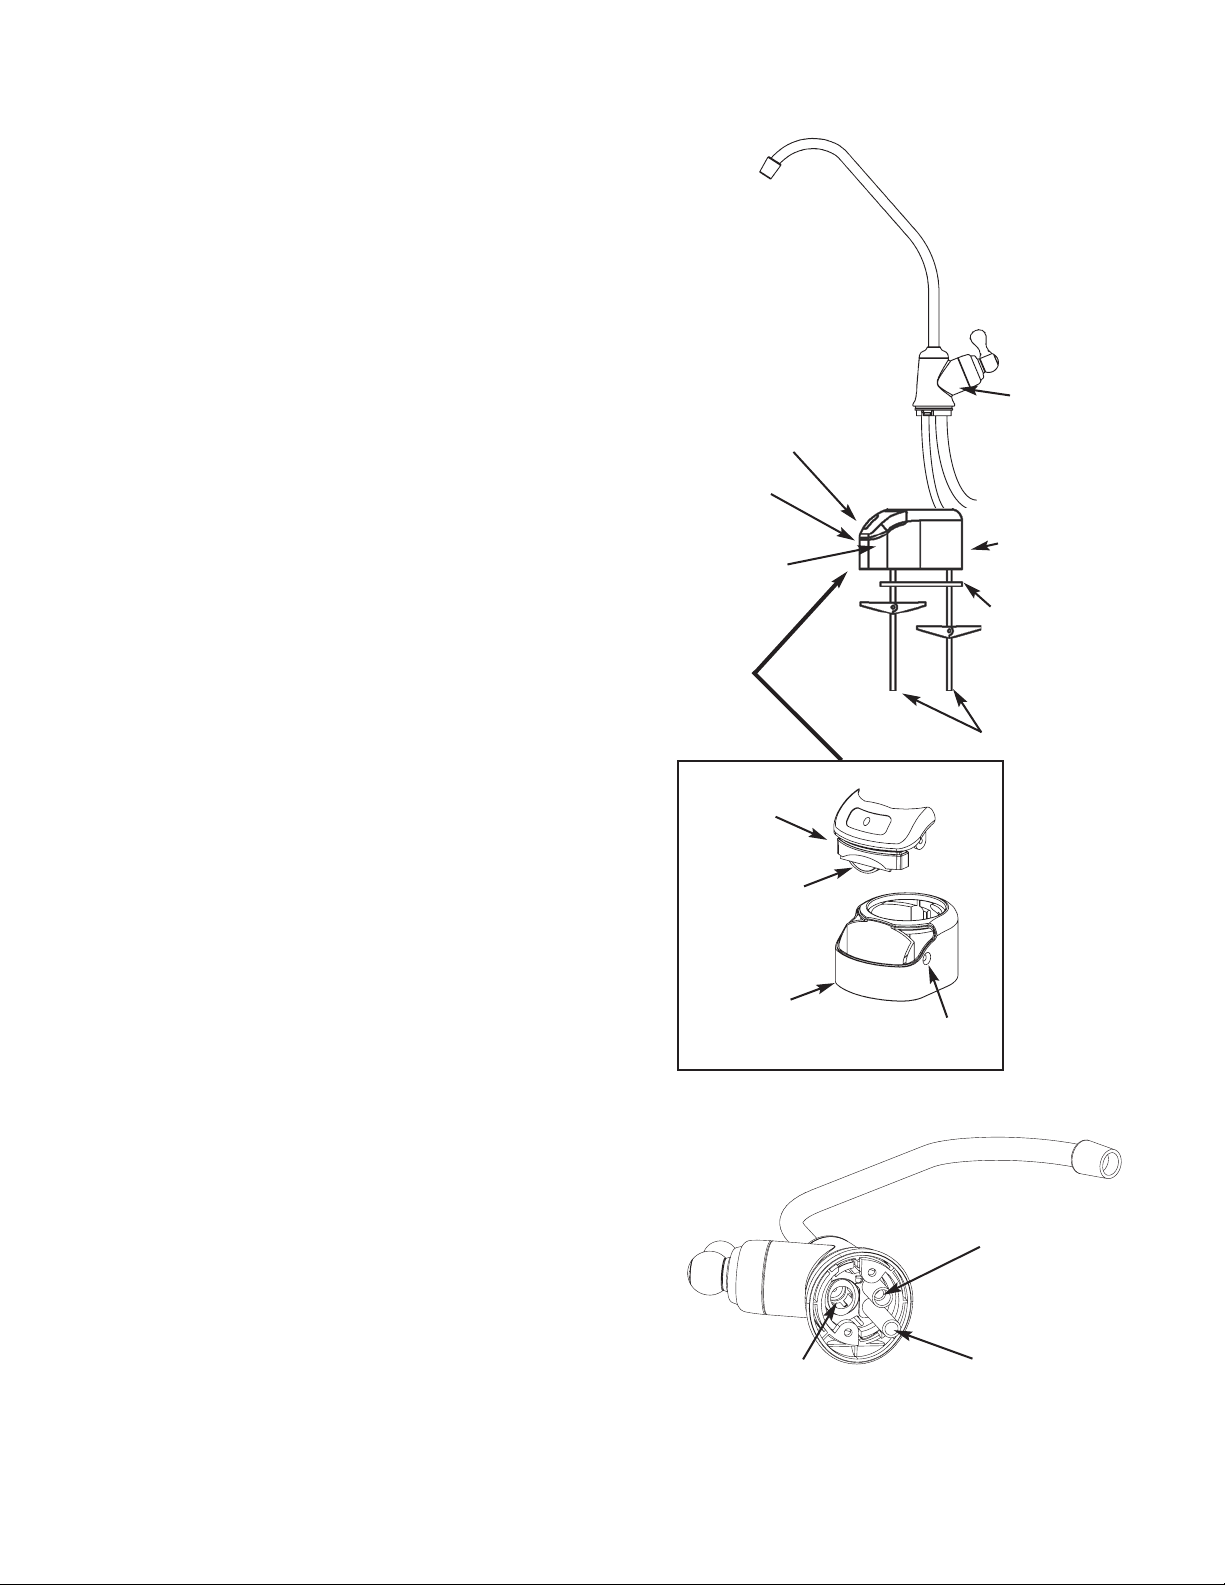
4. Remove the faucet from faucet base (if necessary) by
giving it a 1/4 turn. Mount faucet base to sink hole until
the faucet base is square against the sink surface. The
rubber gasket should be between the sink surface and
the faucet base.
5. Tighten the toggle bolts until the base is firmly mounted
to the sink surface. Do not overtighten.
6. Feed the tubing up through the sink hole and faucet
base.
7. Reattach the 3/8” blue tube to the corresponding fitting
on the new facuet. See Fig 2 for RO system only.
8. RO system only: Snip off about 1/2” length of tubing
from both the 1/4” red tubing and the 3/8” black tubing
before reattaching to the barbs on the new faucet. See
Fig. 2.
9. Work tubing back down and mount the faucet into
faucet base with a 1/4” turn.
10.Turn water back on to the drinking water system.
FAUCET ELECTRONICS
Inside the faucet base is a battery operated 6 month timer. See
Fig. 1.
An amber LED indicator is also located in the front of the faucet
base. This LED will flash continuously after 6 months has
passed. This indicates that it is time to replace the
battery, prefilters and postfilters.
INSTALL BATTERY
To install battery, complete the following steps.
1. Loosen the screw on the right side of the faucet base.
See Fig. 1.
2. Press the battery housing upwards from the front faucet base
until it releases from the faucet base. See Fig. 1.
3. Replace the battery (Maxell CR 2032 or equivalent, not
included). Place battery into the holder with the positive (+)
side facing the back of the holder.
4. When the battery is first replaced it will flash six times and
turn off. This indicates the battery is fully charged. After the
six flashes the timer enters the 6 month time cycle.
NOTE: If the LED repeatedly flashes two times, it is not a
fully charged battery and will need to be replaced.
5. Re-install the timer housing and firmly tighten the mounting
screw. See Fig. 1.
7293298 (Rev. A 1/11/07)
FIG. 2
FIG. 1
BLACK TUBE
3/8” barb fitting
for the black tube
RED TUBE
1/4” barb fitting
for the red tube
BLUE TUBE
3/8” quick connect
fitting for the blue
tube
Faucet
Body
Faucet
Base
Rubber
Gasket
Toggle Bolts
Screw holding
the battery
housing in
place
Timer Housing
Amber LED
Battery
Housing
Battery,
negative (-)
side facing
the front
Faucet
Base
Screw