Loading ...
Loading ...
Loading ...
Clear snow often, before it gets too deep. It is best to
remove the snow as soon as possible after it falls.
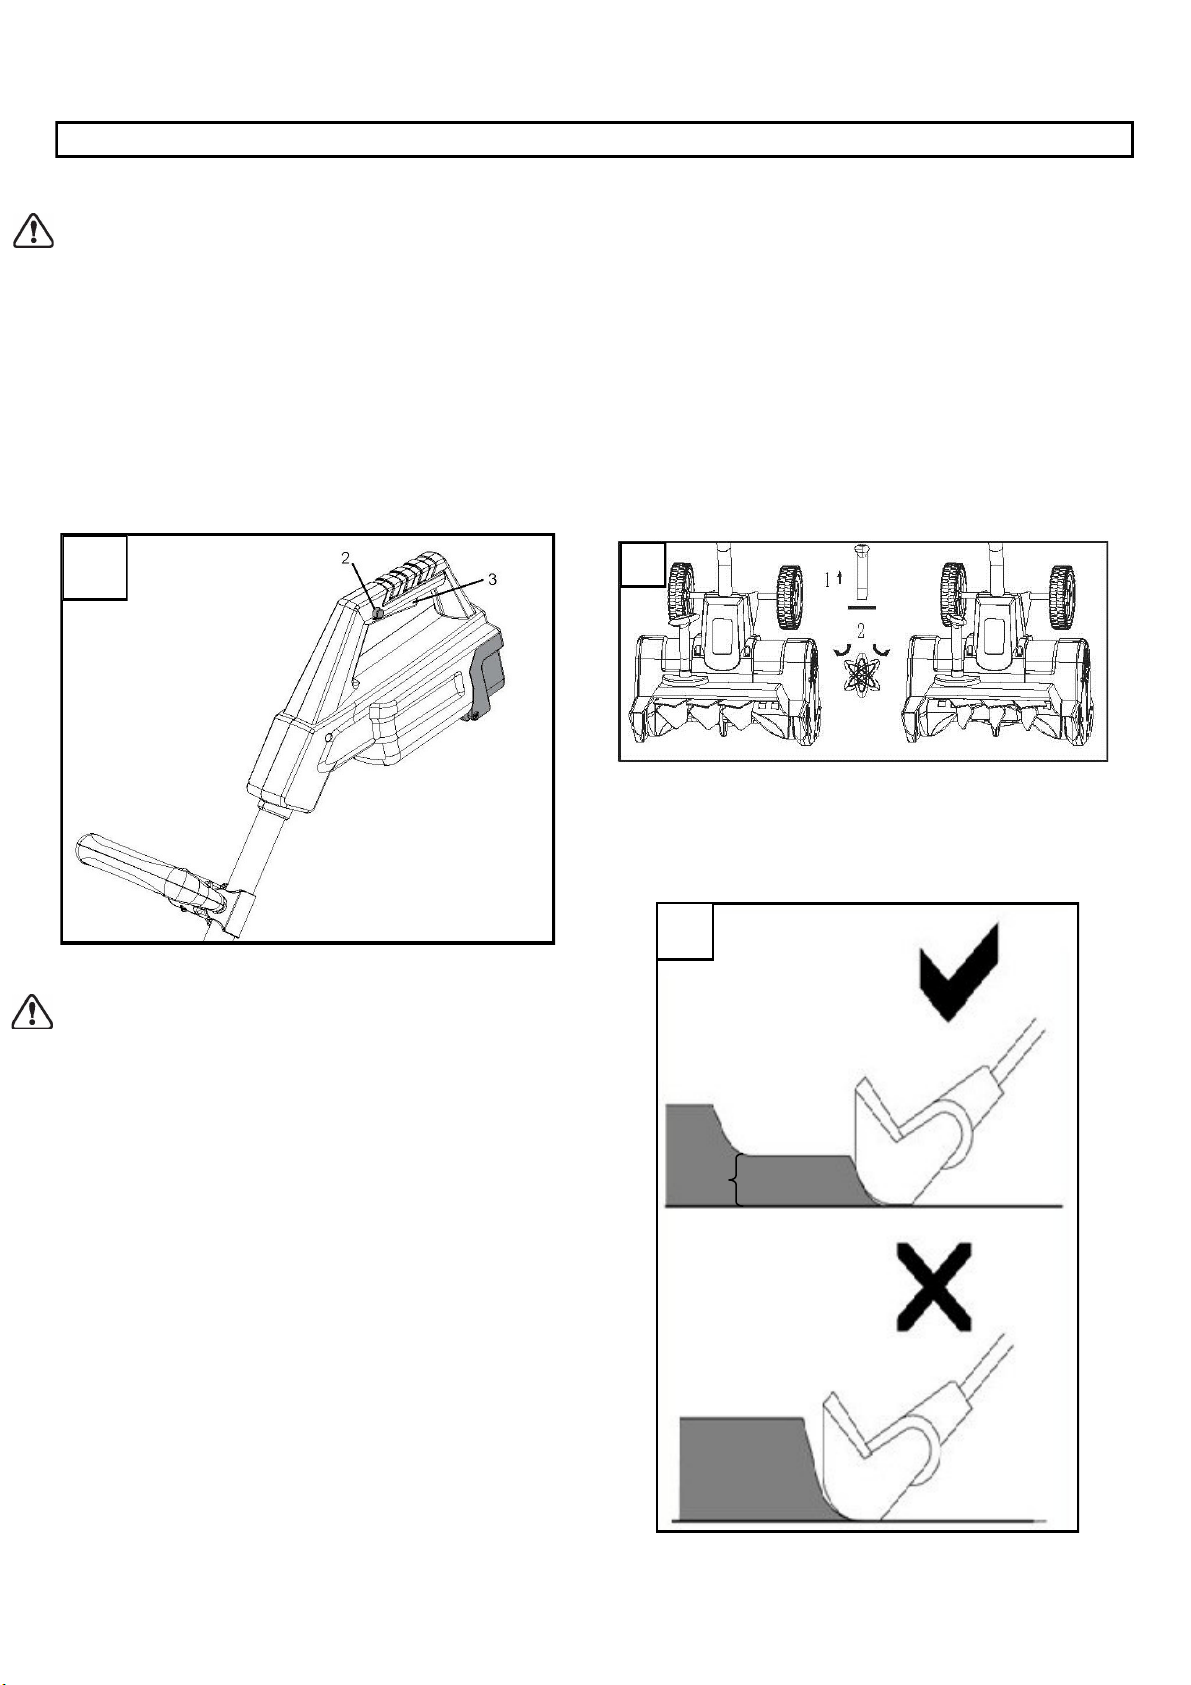
Lift the auger up slightly before starting the snow thrower.
Switch on and tilt the snow thrower forward until the
scraper blade contacts the ground. Push the snow
thrower forward at a comfortable rate of speed, yet slow
enough to clear the path completely. The width and depth
of the snow determines your forward speed.
Pull up and turn the adjusting knob to direct the snow to
the right or to the left. For the most efficient snow
removal, throw the snow downwind and slightly overlap
each swath. (Fig. 5)
The snow thrower can remove up to 8” deep in one pass.
When clearing deeper drifts, hold the snow thrower by
the upper and lower handles and use a swinging or
sweeping motion. Shave off the top layer and make
multiple passes. (Fig. 6).
OPERATING
On/Off Switch (Fig. 4)
WARNING: The auger starts rotating immediately after
the snow thrower is switched on. Keep hands and feet
away from the auger.
To switch ON, hold the snow thrower firmly with two
hands, make sure the auger is not touching any surface
and press the Safety Lock Off Button (2) while squeezing
the On/Off trigger switch (3).
Once the snow thrower is started you can release the
Safety Lock Off Button.
To switch Off simply release the trigger.
Removing snow
WARNING: Before starting work, make sure that the area
to be cleared is free of stones, debris, wires and any oth-
er objects.
Make sure all fasteners on the snow thrower (screws,
nuts, etc.) are fully tightened.
Check the auger for wear and tear at regular intervals.
Position the snow thrower so that snow will discharge in
a safe direction away from the operator and bystanders.
6
Correct
Incorrect
5
8”
4
9
Model SN74016
Loading ...
Loading ...
Loading ...