Loading ...
Loading ...
Loading ...
Regular cleaning and maintenance of your snow thrower
will ensure efficiency and prolong the life of the product.
After each use, take apart and clean out the ice and
debris from the ventilator and its slots, the auger and
the housing.
Only use a cloth soaked with hot water and a soft brush
to clean the snow thrower. Never wet or spray water on
the machine!
Do not use detergents or solvents as these could cause
irreparable damage to the snow thrower. Chemicals can
destroy the plastic parts.
To protect the snow thrower from corrosion when storing
for long periods, lightly oil the metal parts.
Store the appliance in a dry area out of reach of children.
For the user’s safety, worn or damaged parts must be
replaced. Replace with original replacement parts only.
Parts from another snow thrower may not fit properly
causing an unsafe situation.
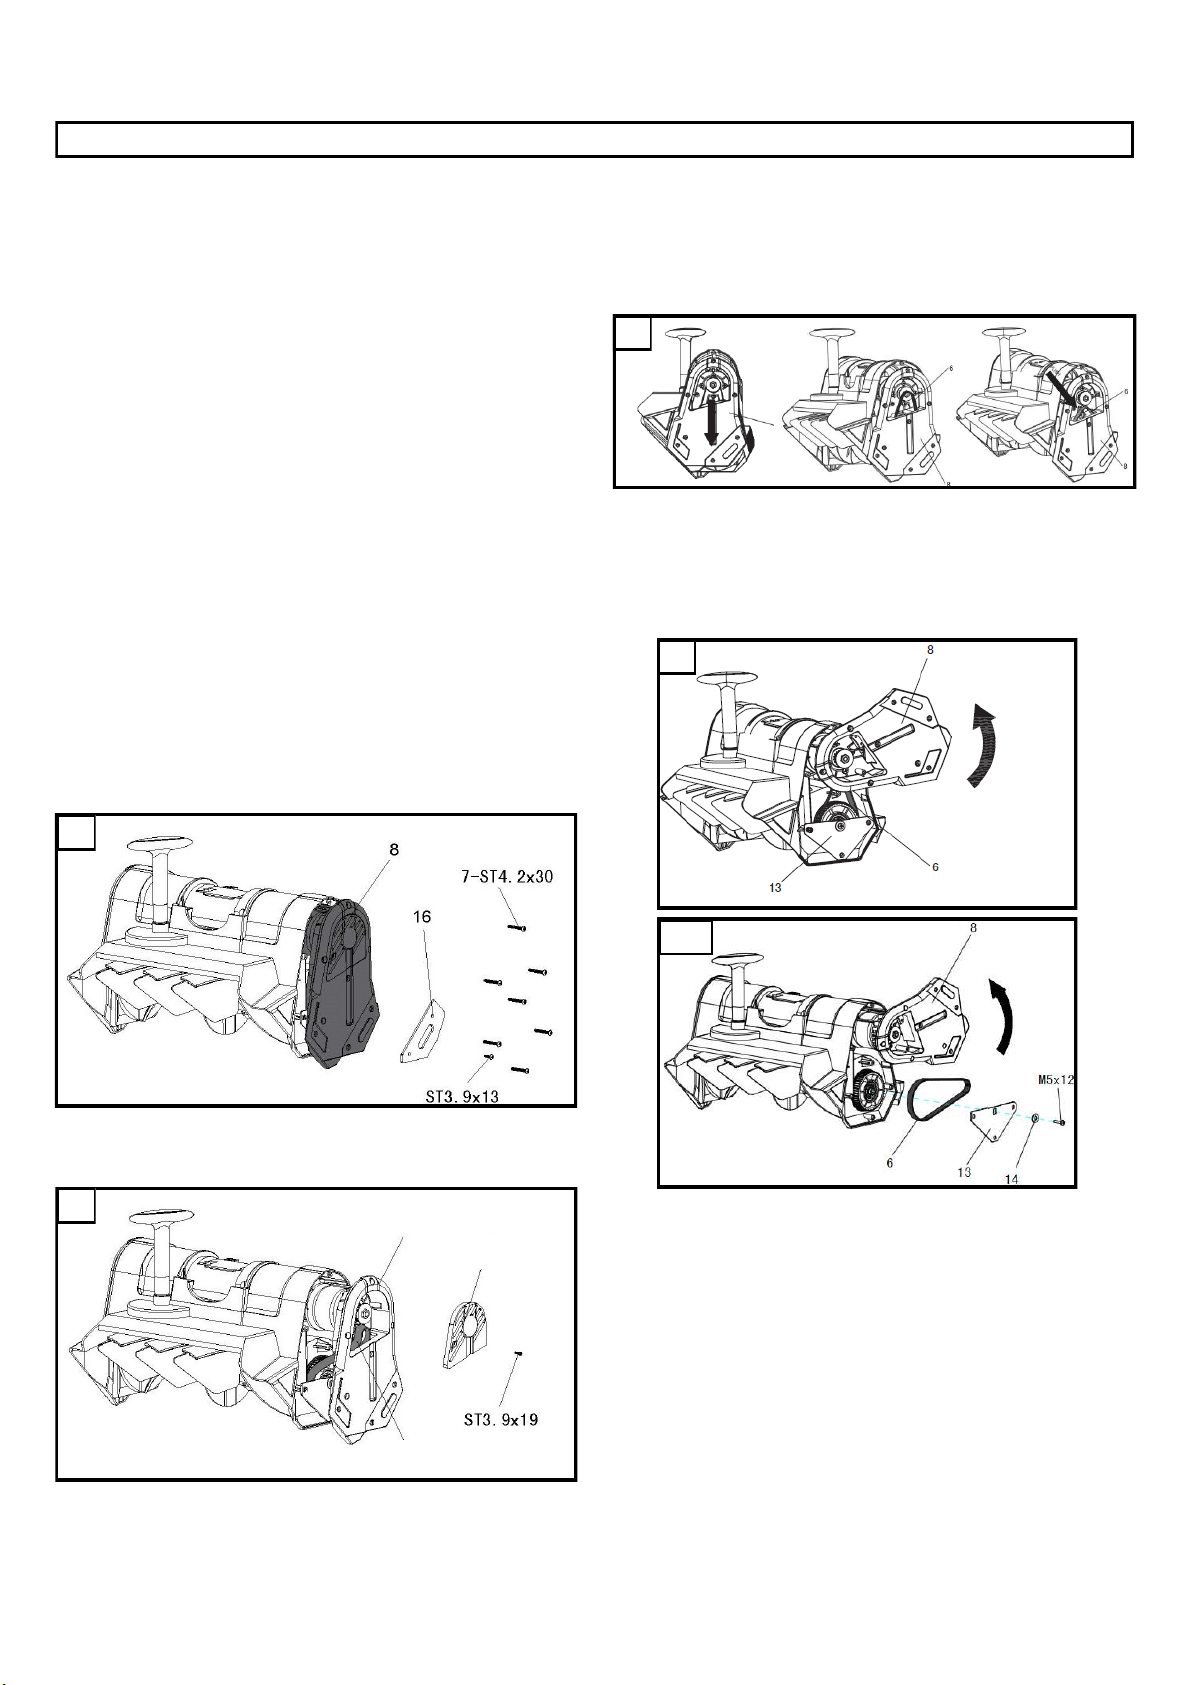
Changing the belt (Fig. 8, 9, 10, 11, 12)
1. Remove friction plate (16) and loosen left side cover
(8) from main body. ( Fig. 8)
2. Remove the side plate (11) from the left plate cover
(8). ( Fig. 9)
MAINTENANCE AND STORAGE
Before carrying out maintenance operations, remove the battery pack.
3. Move the left plate cover (8) downward to loosen the
belt (6). Remove the belt (6) from the wheel and push
it down through the slot in the left plate cover (8).
( Fig. 10)
4. Turn the left plate cover (8) counterclockwise to
expose fix plate (13). Remove M5x12 bolt, washer
(14), fix plate (13), and then remove the belt (6).
5. Replace worn belt with new belt and install the fix
plate (13), left side cover (8), side plate (11), and
friction plate (16) by following the above steps in
reverse order.
8
9
10
11
12
8
11
6
11
Model SN74016
Loading ...
Loading ...
Loading ...