Loading ...
Loading ...
Loading ...
31-5000579 Rev. 2 13
ENGLISH
INSTALLATION INSTRUCTIONS
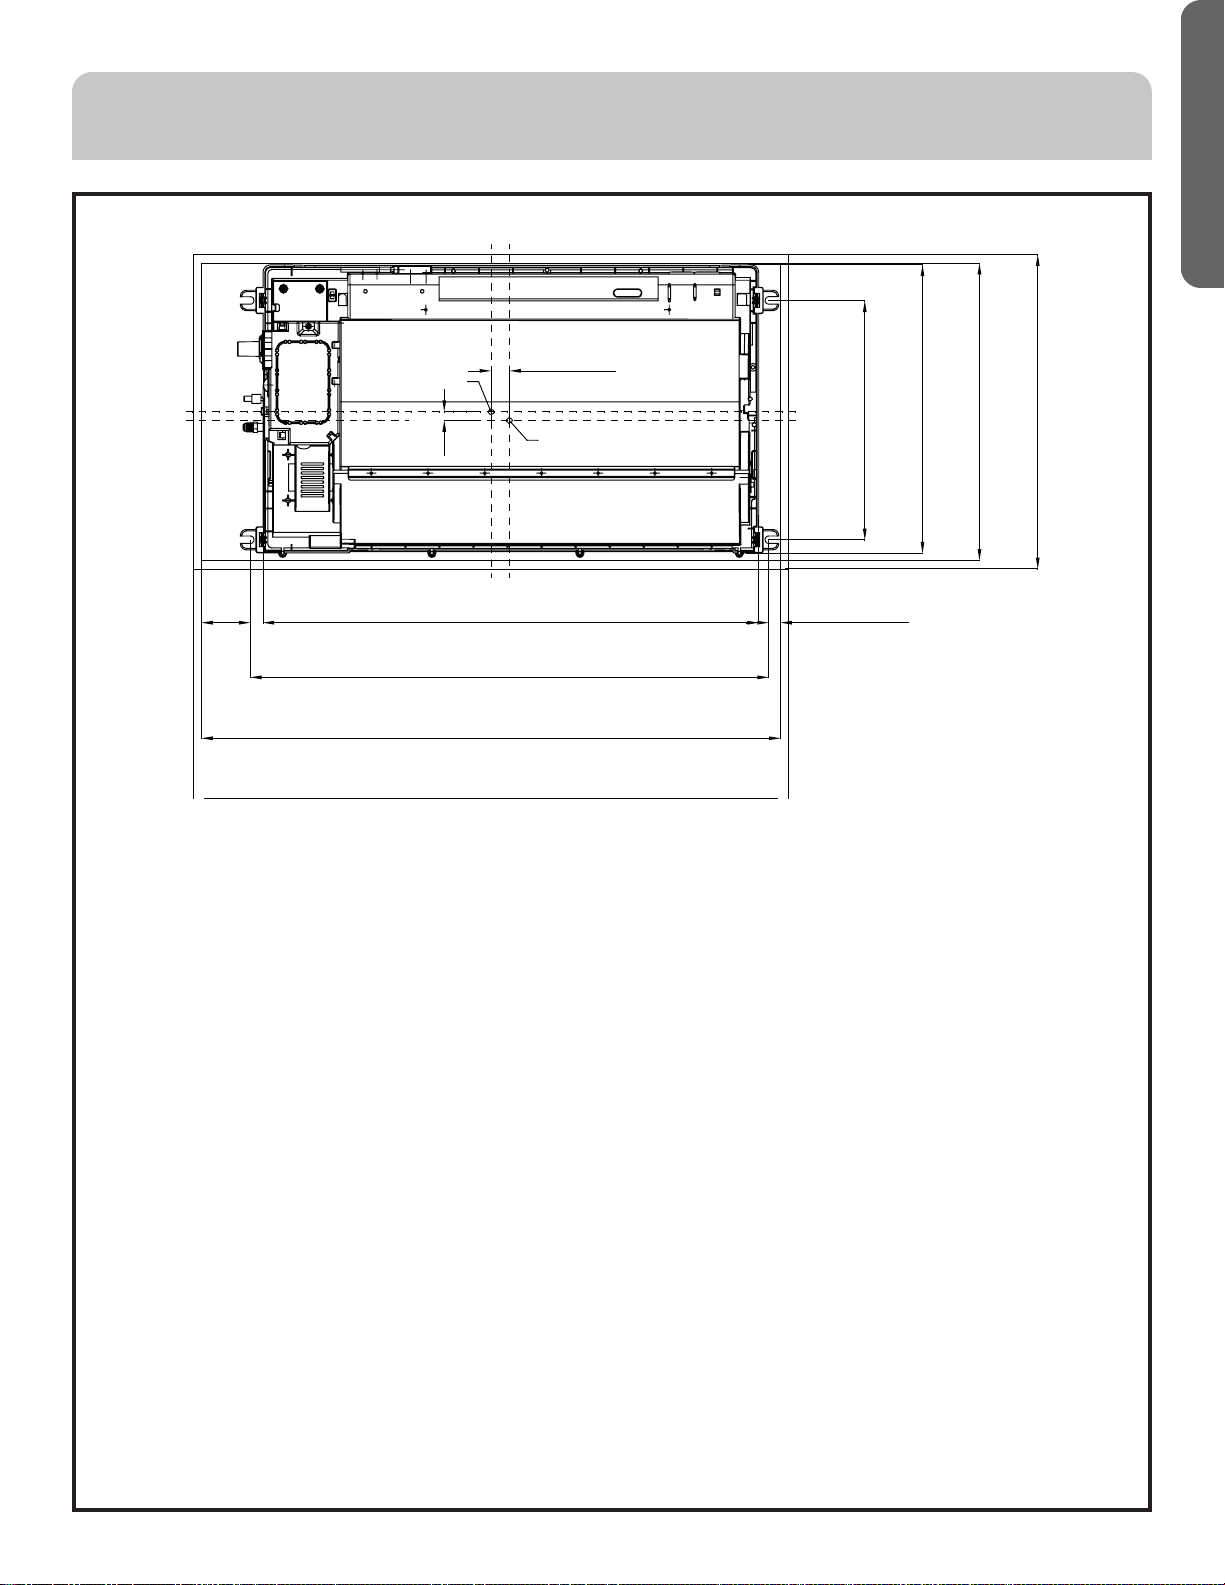
2. Location Relationship among Ceiling Hole, Unit and Hoisting Studs
Note: Before suspending the indoor unit, select the installation location according to the piping and wiring in the ceiling,
and determine the lead direction of the piping. Prepare all pipes (refrigerator and drainage) and wiring (connection line for
remote control and connection line of indoor units and outdoor units) connected to indoor units before suspending the
indoor unit so as to make the connections right after the installation.
• In the situation with the ceiling, before suspending the unit, set refrigerant pipe, drainpipe, connection line in the room,
lead wire of line control to the locations of piping and wiring.
• Confirm the size of the indoor unit and fix it according to the requirements in the manual.
Installation Space:
• Ensure there is adequate space for installation and maintenance (refer to the following drawings).
• The installation height should be kept within 9ft (2.7m). Warm air is more difficult to blow down to the floor so avoid
installing more than 9 feet high.
3. Ceiling Hole & Reinforcement
(1) Cut and withdraw the foundation of ceiling according to the size of indoor unit.
(2) After cutting an appropriate hole, reinforce the cutting area on the foundation of indoor unit, and append the rim to
the ceiling to secure its foundation. In order to prevent the ceiling from vibrating, it is vital to reinforce the ceiling
foundation and ensure the original levelness of the ceiling.
4. Hoisting Stud Installation
• To support the weight of the unit, use barb bolts in the situation with the ceiling. In the situation with the new ceiling, use
inlaid bolts, embedded bolts or other parts provided on site. Before proceeding the installation, adjust the gap between
the bolts and the ceiling.
• Use four 3/8"(M10) hoisting studs (provided on site) (when the height of the hoisting stud exceeds 3ft (0.9m), 3/8"(M10)
studs should be used.). The gaps should be kept according to the overall drawing of the air conditioner. Make the
installation according to regulations for various building structures as to ensure the safety. Use the level meter to
perform the parallel installation.
41.3in (1050mm) (trim panel)
40.4in (1025mm) (ceiling opening)
35.9in (913mm) (spacing of hanging screw)
34.4in (875mm) (indoor unit)
0.83in (21mm)
3.4 in
(86mm)
16.5in (419mm)
(spacing of hanging screw)
19.7in (500mm) (indoor unit)
20.7in (525mm) (ceiling opening)
22in (560mm) (panel)
1.3in (33mm)
Four hanging screw center
0.6 in
(15mm)
Ceiling
opening center
Loading ...
Loading ...
Loading ...