
Loading ...
Loading ...
Loading ...
29
Install Cameras
≥ 2”
Doorway camera position
Rear camera
position
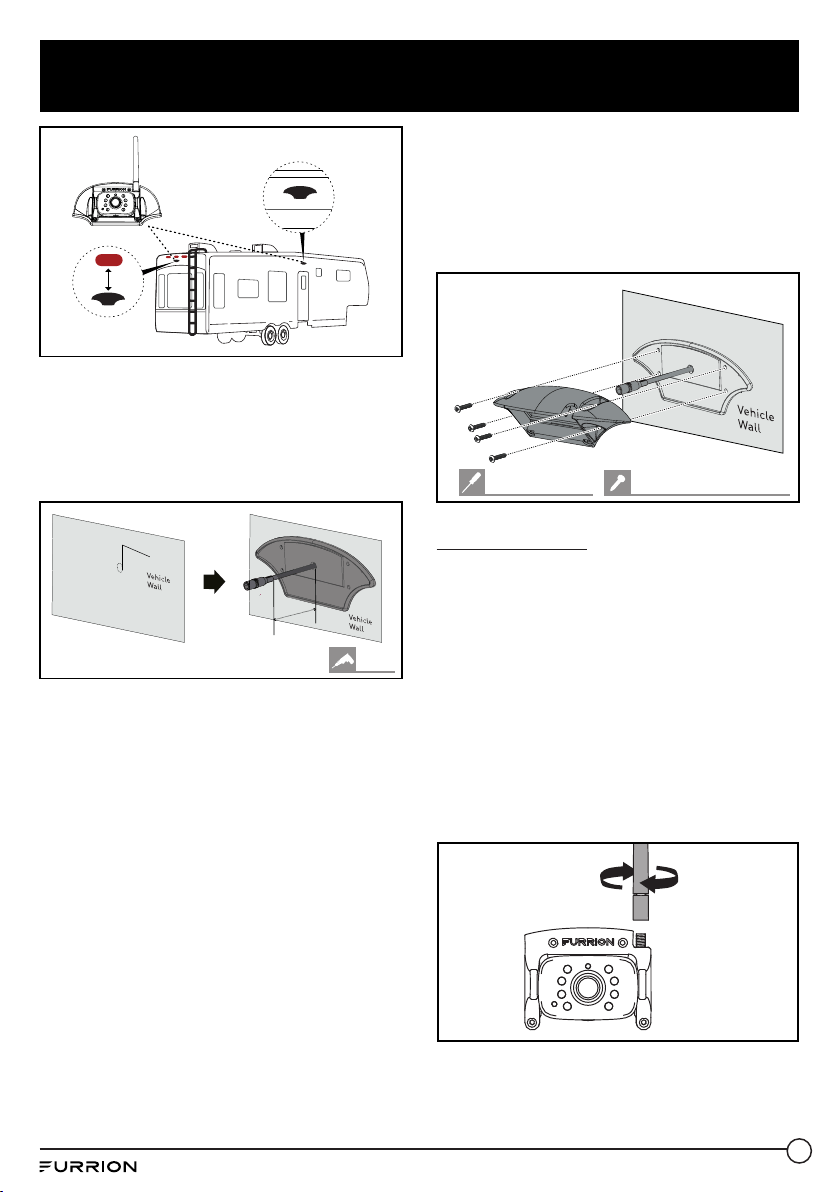
2. Use the gasket as a template to mark a
basic outline on the chosen location with
a pencil. Drill a 5/8” center hole. Then
route the female connector of the camera
power cable through the hole and leave
2inches of slack.
5
/
8
”
2 ”
5/8”
3. Connect the bare ends of the camera
power cable to the nearest 12V / 24V
power supply.
− For rear camera position:
You are suggested to share the same
power line from the nearest marker light
(such as the red marker light at the top
center on the rear if available).
− For doorway camera position:
You are suggested to share the power
line from your RV porch light (or the
nearest light source from the RV/trailer
battery).
Note: Ensure that the fuse on the connected
power line provides additional 1A fusing
current for the camera. Ensure proper cable
isolation for all bare ends (e.g., by using
insulation tape).
4. Fix the gasket and bracket with four
#6x3/4“ flat self-tapping screws. If the
mounting surface is uneven, apply sealant
between the gasket and RV surface,
and around the 5/8” holes at the screw
locations for better sealing.
#2 Phillips head #6x
3
/
4
" flat self-tapping
Mount camera
If this camera comes in a bundle with a
Furrion Vision S monitor, it is paired with the
monitor by default. You can connect it to the
female connector on the Y type power cable
of the monitor and resume power temporarily
to check the pairing status before installation.
If you cannot find the video of the camera on
the monitor screen or you have an unbundled
camera, see the monitor installation and
usage section for the pairing procedures.
1. Mount the antenna onto the camera
securely and keep the antenna straight.
Torque: ≤8 In-lbs
Loading ...
Loading ...
Loading ...