Loading ...
Loading ...
Loading ...
5
Questions? We’re here to help!
Visit: shopelitegourmet.com for support on this product.
BEFORE FIRST USE
1. Always read all instructions and safeguards before operation.
2. Remove all packaging materials and make sure that all parts are present and in
good condition before discarding packaging materials.
3. Wash the lid, canister, and other plastic accessories in warm soapy water.
4. Rinse and dry thoroughly.
5. Use a damp cloth to wipe clean the electric motor, hand crank and wooden
bucket.
6. For brand new machines, please ll the wood bucket 2/3 full of water. Allow
to sit for 1-2 hours. This allows the wood to expand and swell up so that the
seams in between will close together keeping any ice or salt from leaking
during the operation process.
WARNING: DO NOT USE ABRASIVE CLEANERS OR SCOURING PADS.
DO NOT IMMERSE ANY ELECTRICAL COMPONENT OR POWER CORD IN
WATER OR ANY OTHER LIQUIDS AT ANY TIME.
HOW TO USE
PREP – Chill the ice cream canister in the freezer for 2-3 hours prior to use. Do not
leave the canister inside the freezer for more than 6-hours.
1. Using your favorite recipe, prepare the necessary ingredients per the recipe
instructions.
2. Pour the prepared and chilled ice cream mixture into the chilled ice cream
canister. Do not ll more than 2/3 full.
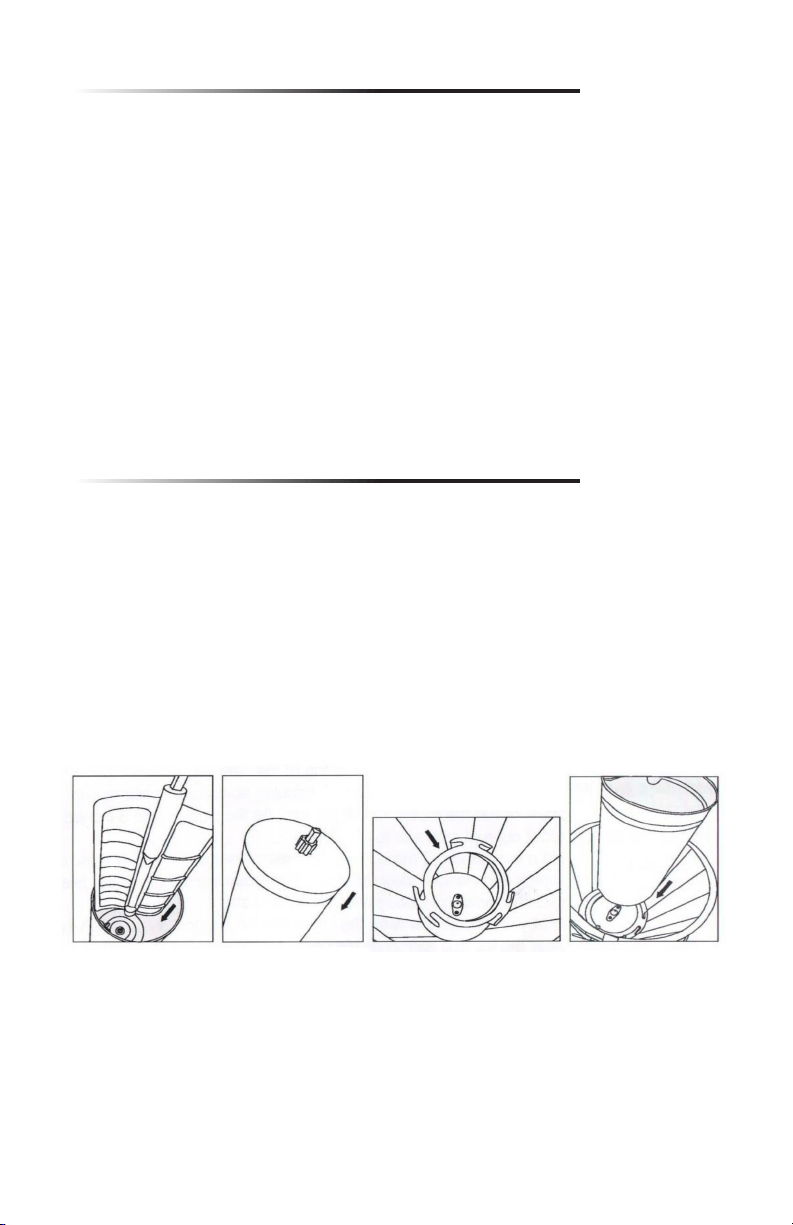
3. Insert the Blending Spatula and make sure the bottom of the spatula is xed in
the center of the bottom of the canister. (Fig 1)
4. Place the lid on the canister. (Fig 2)
5. Place the plastic stabilizing ring into the wooden bucket. (Fig 3)
6. Place the canister into the wooden bucket and make sure it engages the cone
in the center of the bucket. (Fig 4)
7. Slide the rectangular end of the hand crank or electric motor into the
rectangular hole on the rim of the wooden bucket (Fig 5a). The opposite end
of the crank will drop into the open end where the locking latch is (Fig 5b).
Carefully lift the latch so that the wire goes over the rounded end of the hand
crank or motor (you may need to rotate the canister by hand so that the lid ts
into the motor/hand crank) (Fig 5c).
5
Figure 1 Figure 2 Figure 3 Figure 4
Loading ...
Loading ...
Loading ...