Loading ...
Loading ...
Loading ...
operating
_69
02 OPERATING
• If you have a
long vacation
or business trip
and won’t use
the water or ice
dispensers, close
the water valve.
- Otherwise, water
leakage may occur.
• When you have not
used the Ice maker for a while, or you have
opened the Freezer door frequently, the Ice may
stick together. If this has occurred, empty the ice
bucket or break up the ice with a wood kitchen
tool. Do not use sharp items such as knives or
forks.
• When the bucket is removed, there may still be
some residual ice in the ice maker that will be
produced.
• In case ice doesn’t
come out, pull out
the icemaker cover
and press test button
located on the ice
maker.
• Do not press the test
button continuously when the tray is filled with ice
or water as illustration below. Water may overflow
or ice jamming may occur.
CLEANING THE REFRIGERATOR
Do not use Benzene, Thinner or Clorox™ for
cleaning.
They may damage the surface of the
appliance and can create a risk of fire.
Do not spray the refrigerator with water while
it is plugged in, as it may cause an electric
shock. Do not clean the refrigerator with
benzene, thinner or car detergent as there is a
risk of fire.
REMOVING THE FREEZER/FRIDGE
ACCESSORIES
cleaning and rearranging the interior of the freezer is a
snap.
1. Shelves (Freezer/Fridge)
Pull the shelf out as far as
it goes.
Then lift up and remove it.
2. DOOR BIN
Remove the Door Bin by
holding it with both hands and
then gently lift it up.
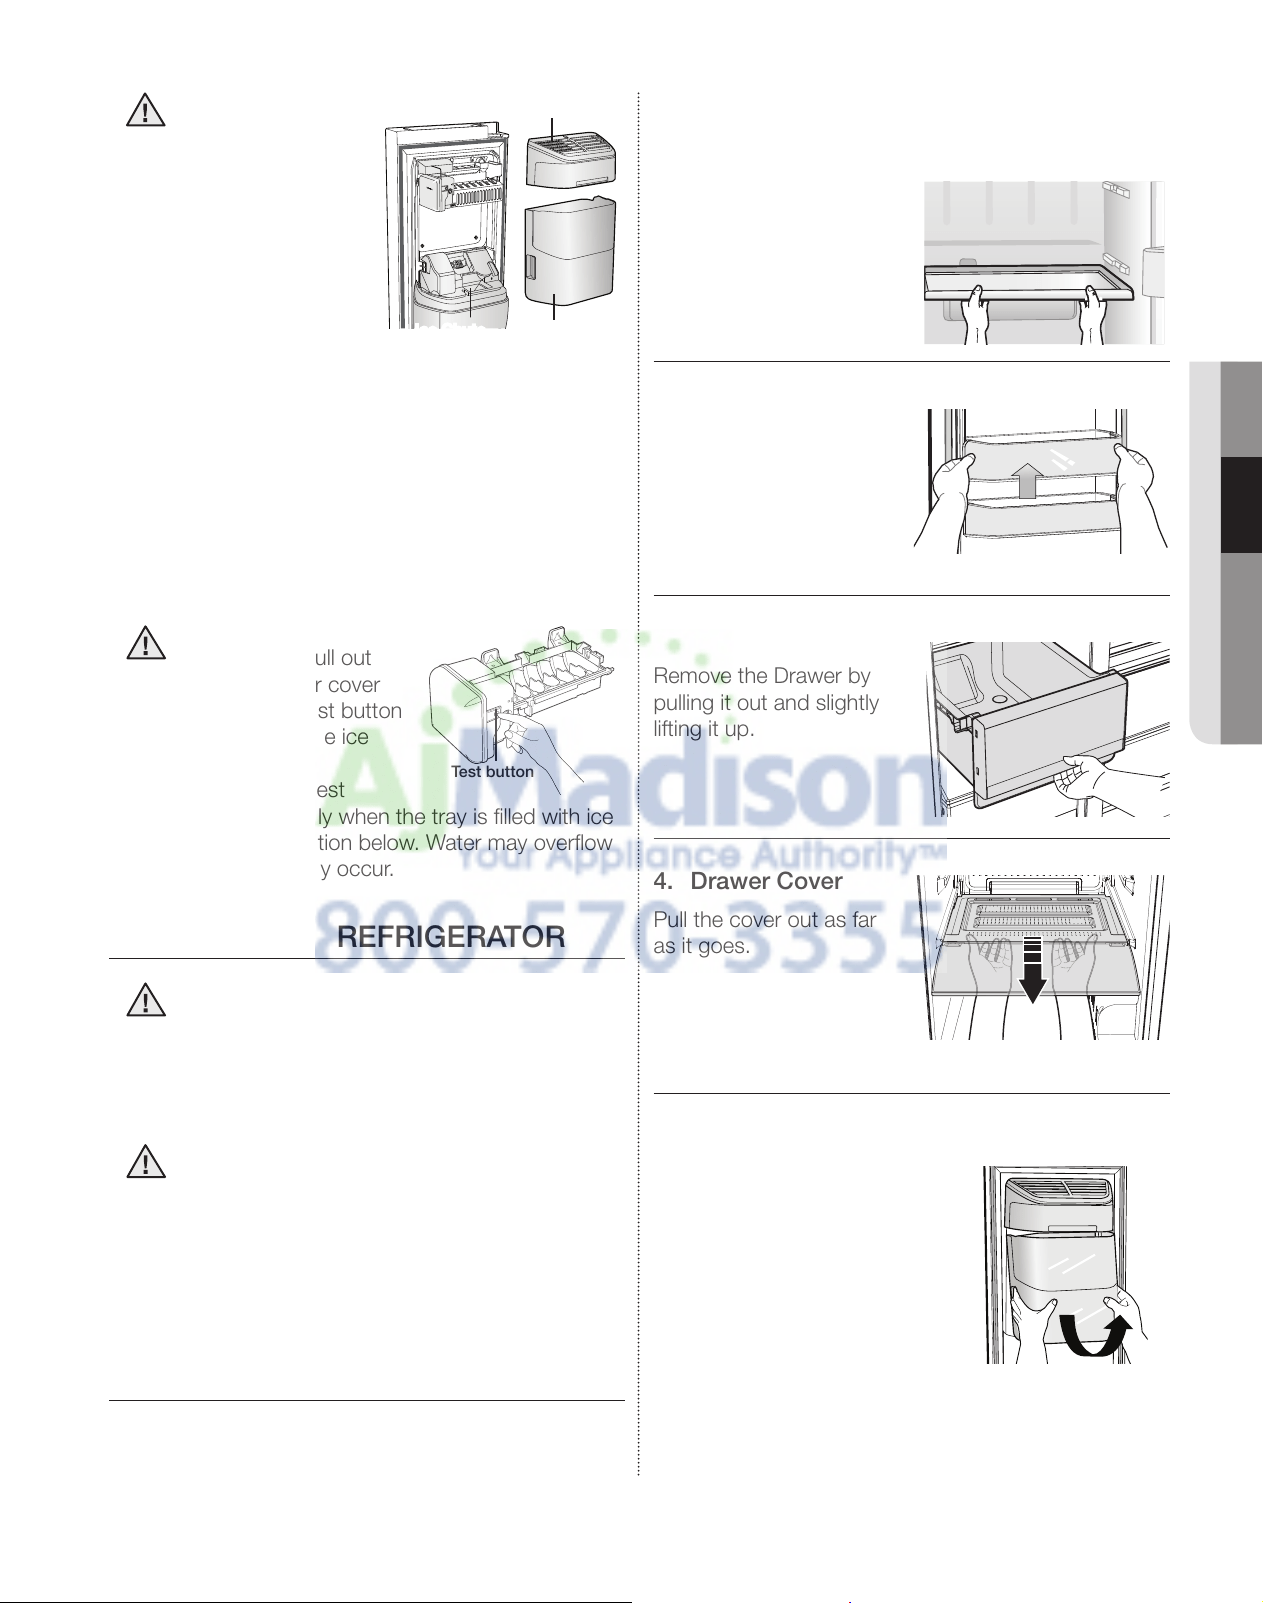
3. DRAWER
Remove the Drawer by
pulling it out and slightly
lifting it up.
4. Drawer Cover
Pull the cover out as far
as it goes.
Then lift up and remove it.
5. Ice Bucket (Freezer)
Remove the Icemaker Bucket
by lifting up and pulling it out
slowly.
• Grip the handle as shown
in the figure
• Lift the low part slightly
• Take the ice bucket out
slowly
Ice Chute
Ice Bucket
Ice-Maker Cover
Test button
CAUTION
CAUTION
WARNING
CAUTION
DA68-02500B.indb 69 2011.3.25 11:2:48 AM
Loading ...
Loading ...
Loading ...