Loading ...
Loading ...
Loading ...
ULTRAVIOLET SYSTEM
9 69-1859EFS—01
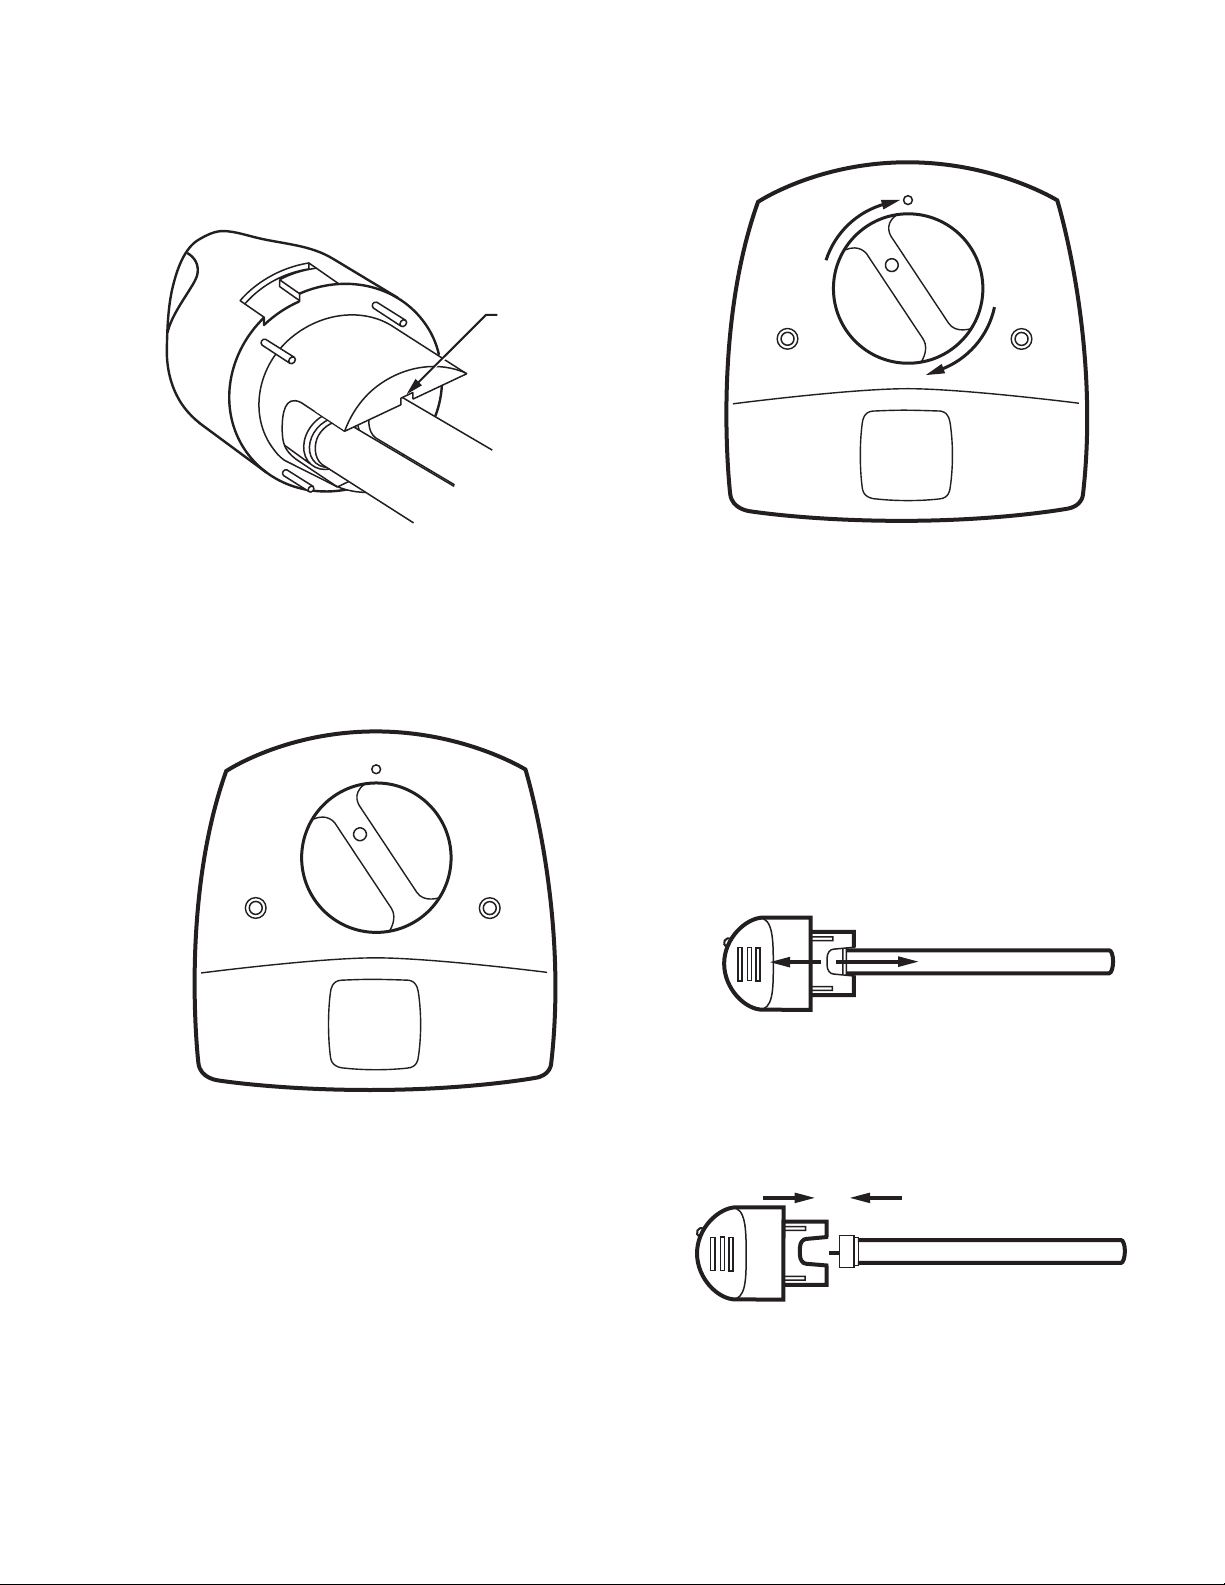
5. Also wipe away any dust that may have collected
between the lamp light indicator on the base and the
black bulb base. See Fig. 15.
Fig. 15. Wipe lamp light indicator base.
6. Dry bulb with a clean, dry cloth.
7. Insert the bulb into the base with the lamp light indicator
at the eleven o’clock position. Continue pushing and
gently rotating counterclockwise until the lamp handle
inserts fully into the base. See Fig. 16.
Fig. 16. Position bulb for insertion back into
the lamp base.
8. Rotate the lamp handle clockwise until it snaps into
place with the lamp light indicator aligned with the
raised button on the unit cover. See Fig. 17.
9. Reconnect power to your UV System.
10. Verify that your ultraviolet bulbs are operating by view-
ing only through the lamp light indicator on the lamp
handle. Never look directly at your bulb while it is illumi-
nated.
11. Reconnect power to your heating and cooling system.
Fig. 17. Snap bulb into place.
Bulb Replacement
Annual replacement of the bulb in your ultraviolet lamp is
required to maintain effectiveness.
1. Obtain the replacement bulb (Part No. RUVBULB1) for
your unit from your retailer.
2. Disconnect the power to your heating and cooling sys-
tem.
3. Unplug or turn off power to your UV System and allow
lamps to cool for at least 15 minutes.
4. Rotate the lamp handle counterclockwise and gently
pull the lamp handle to remove the bulb. See Fig. 13.
5. Grasp the lamp handle in one hand and the lamp glass
in the other and pull straight apart. See Fig. 18.
Fig. 18. Disconnect lamp glass from lamp handle.
6. Insert the new lamp glass into the lamp handle by align-
ing the key and pushing straight together.
See Fig. 19.
Fig. 19. Replace lamp glass in lamp handle.
7. If you touch the lamp glass with your hands, use a cloth
to wipe fingerprints from the glass. See Fig. 7
LAMP LIGHT
INDICATOR
BASE
M22846
M13603
M13605
M22852
M22854A
Loading ...
Loading ...
Loading ...